User Management
The user management page allows for the creation and management of users, user grouping, organizational structure management, and the maintenance and management of user attributes. Below is a detailed introduction to the user management-related functions.
User Management
The user management subpage displays information about all users in the current system, allowing you to add new users, view and edit existing users, enable/disable users, and perform batch operations on users. 
Add User
During system initialization, after creating the administrator, the administrator can manually add new users in the system or use other authentication methods to access users within the organization.
Manually add users, click the "Add User" button in the upper right corner, fill in the user information in the pop-up window, including username, display name, email, phone number, and role. After clicking confirm, the user is added successfully and can log in using the username and the initial password configured by the system. 
Instructions for Required Information When Adding Users:
- Username: The unique identifier for user login, non-repeatable, non-modifiable, cannot contain special characters or start with numbers.
- Email: The unique identifier for the user, must fill in a valid email address, non-repeatable, non-modifiable.
- User Roles: Different roles use different functional modules within the system.
Tip
When creating a user, the system treats uppercase and lowercase letters as the same character. For example, if a user named Alice has already been created, attempting to create a user named alice or AliCE will result in a failure message, indicating that a user with the same name already exists.
User Roles
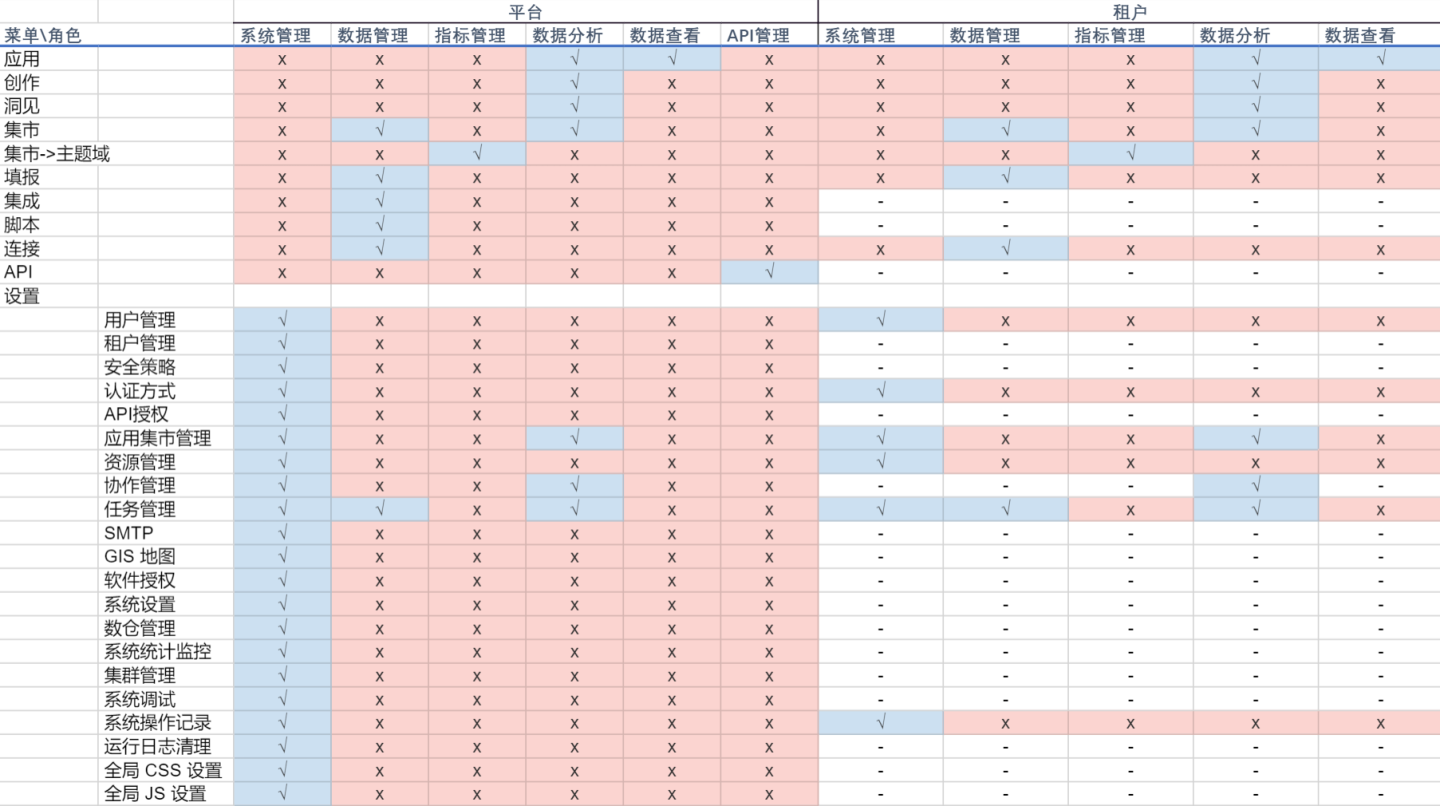
The system includes five user roles: System Management, Data Management, Data Analysis, Data Viewing, and API Management. Each role corresponds to different functional modules within the system, and users can have one or multiple roles. Below is a detailed introduction to the role and its related functional modules.
| User Role | Role Function and Related Modules |
|---|---|
| System Admin | This role can view and modify all configuration items in the system settings module, corresponding to the Settings module. |
| Data Management | This role can create, manage, and maintain system data-related information, corresponding to the Connections, Data Mart, Integration modules. |
| Metrics Management | This role is responsible for managing the Data->Metrics Management space, primarily managing business themes and indicators under the themes. |
| Data Analysis | This role conducts data exploration, creates, and manages applications, including Datasets, Charts, Dashboards, etc., corresponding to the Data Mart, Metrics Analysis, Creation, Applications modules. |
| Data Viewer | This role views applications published by data analysts within the Applications module, and can browse charts, export applications, share applications, etc., within the application. Corresponds to the Applications module. |
In the tenant scenario, the same role has slightly different functions in the platform-side and tenant-side modules, as some features are not available to tenants. Below is a comparison list of user roles' functions on the platform side and tenant side in the tenant scenario.
View and Edit Users
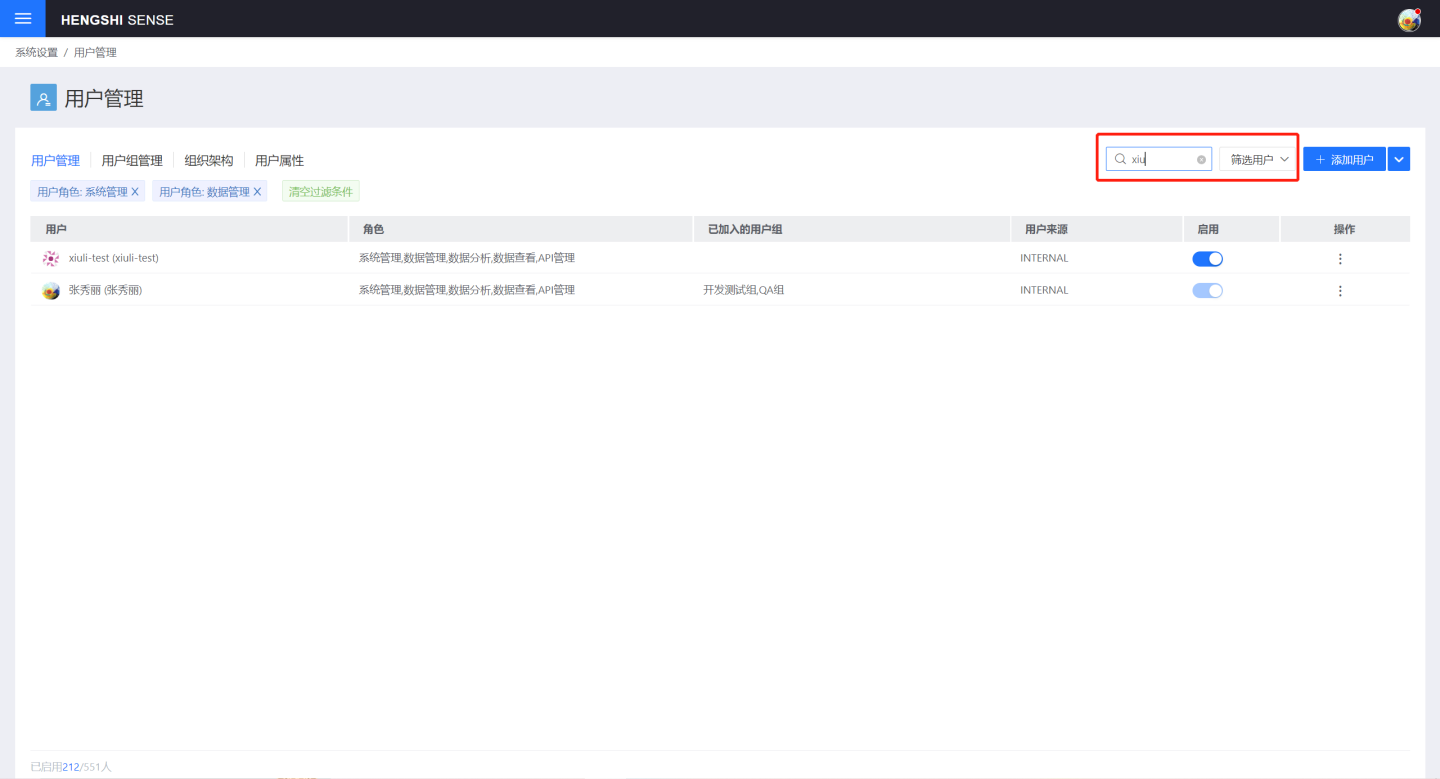
After adding a user, you can view them on the user management page. If you cannot find the user, you can use the search function or filter by conditions to locate the user.
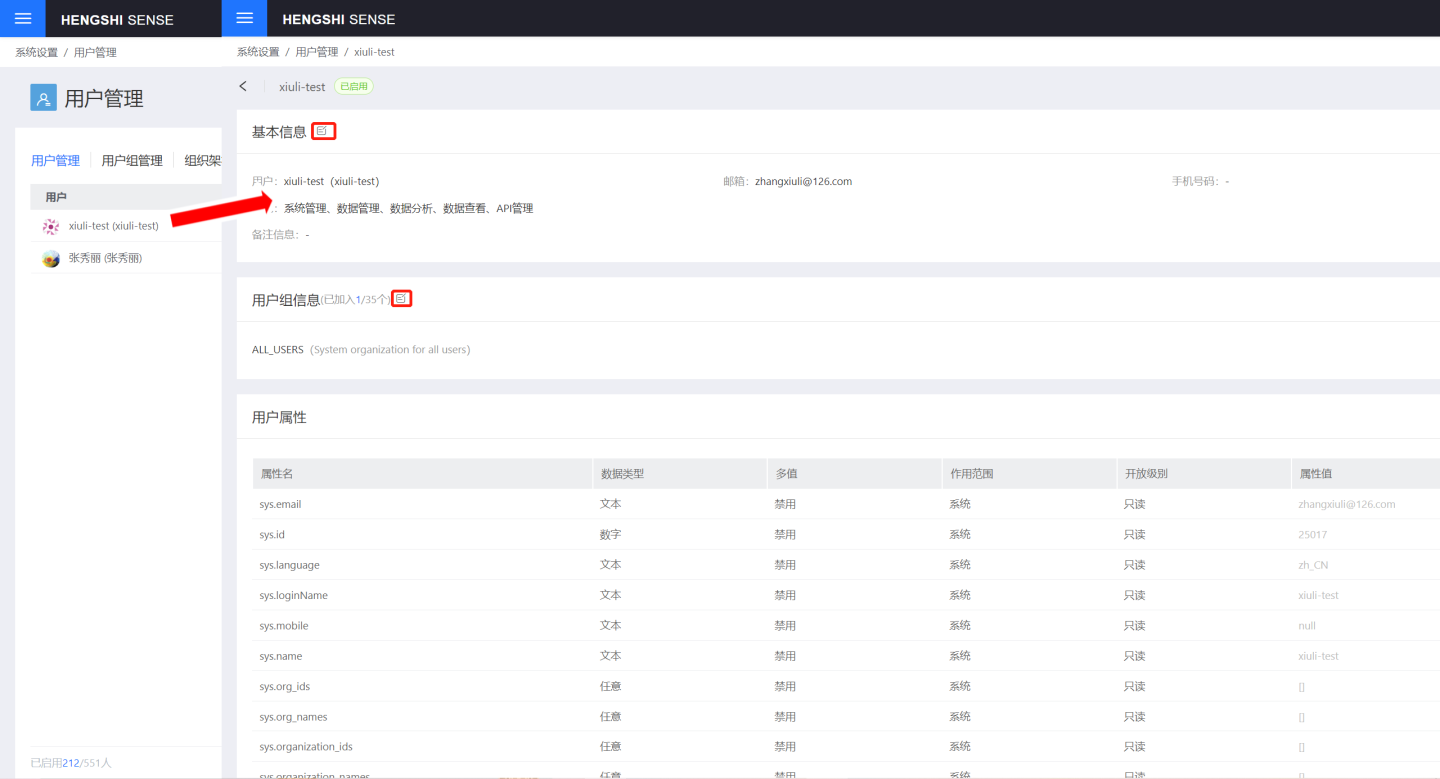
Click on the user to view detailed information about the user, including basic information, user group information, User Attributes, etc. On the detailed information display page, you can edit and modify the user information.
Delete User
When an employee leaves, the system administrator needs to delete the user. Generally, before deleting a user, it is necessary to transfer the resources under their name to another user. Find the user to be deleted on the user management page, and after ensuring that the user has no available resources, click "Delete User" to delete the user. 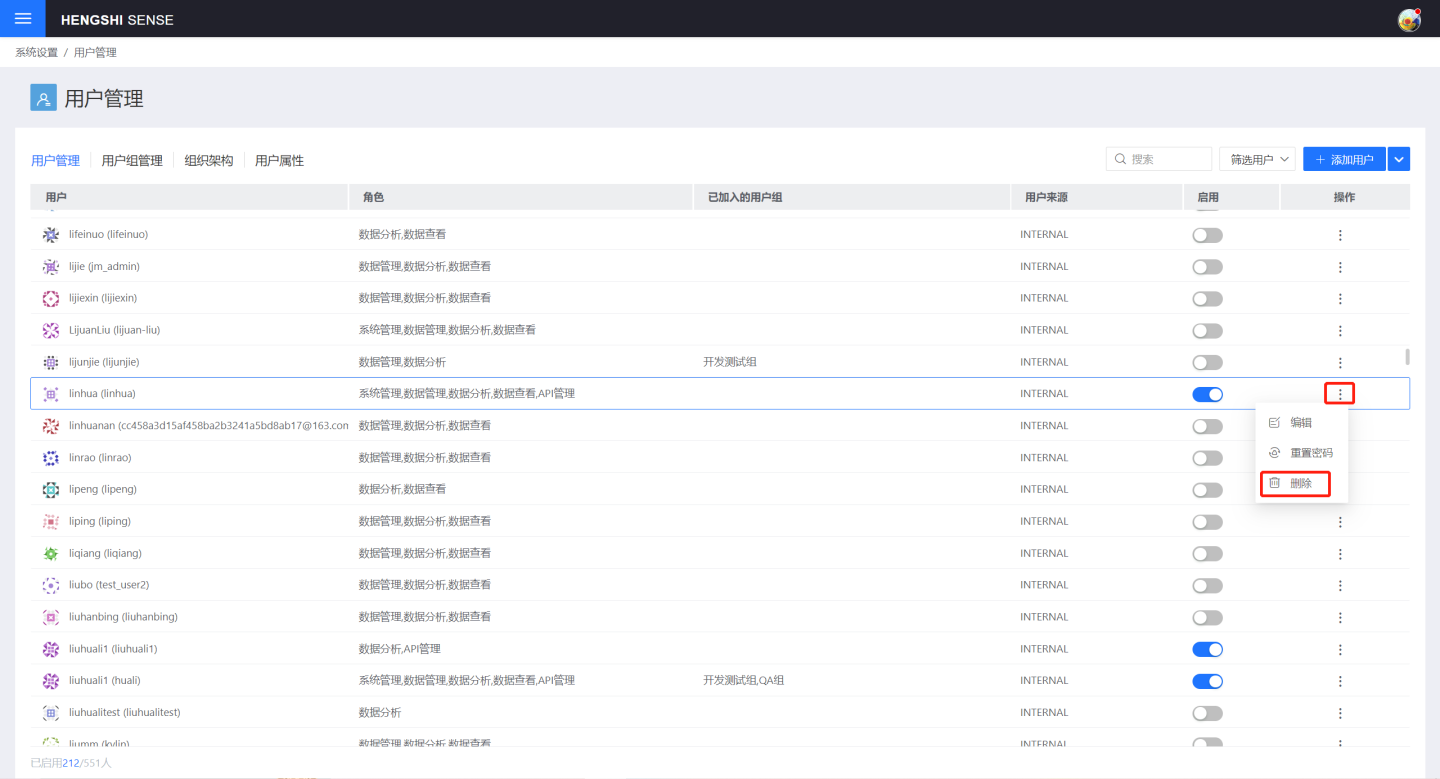
Batch Operations
User management supports batch operations on users, improving user management efficiency. Batch operations support batch import, batch export, enable all, and disable all.
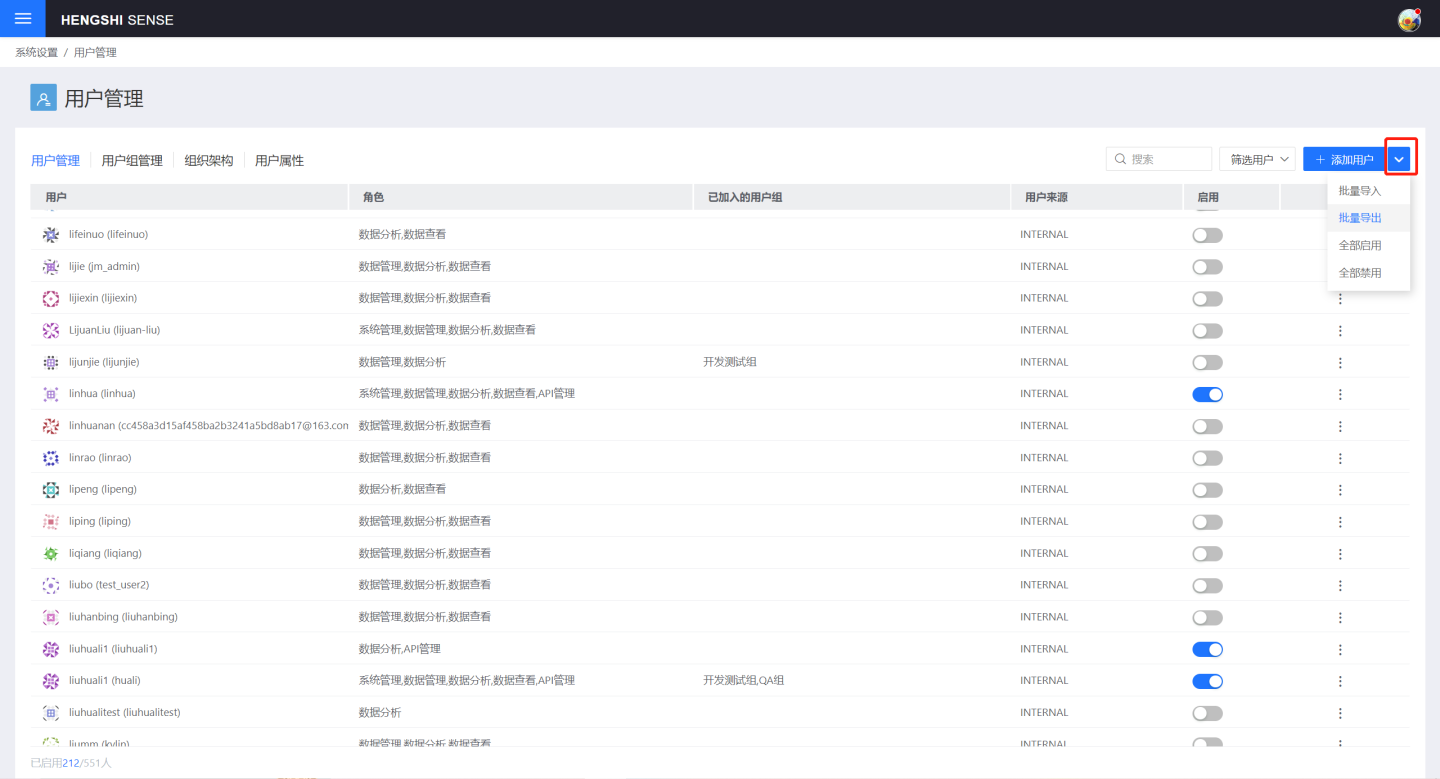
Batch Import
Click the Batch Import button in the batch operations to add, disable, or modify users by uploading a local CSV file.
When importing users in bulk, you can set user attributes for them and add custom attributes.
Import the user's local files:
- If it is a new user,
loginNameandemailare required, the password defaults to "hs2019", and the role defaults to Data Viewer. - If it is an existing user, the required information must include: either
loginNameorid, one of which can uniquely identify a user to update the user's information. If bothloginNameandidare provided but do not match theloginNameoridin the system, an error will be reported. - When a user needs to add multiple
rolesvalues, separate them with:. - When a user needs to join multiple
organizations, separate theorganization IDswith:.
Batch Export
When no filtering conditions are added, clicking the Batch Export button in the batch operations can export all users within the system. After adding filtering conditions, clicking the Batch Export button in the batch operations can export all users within the filtering conditions.
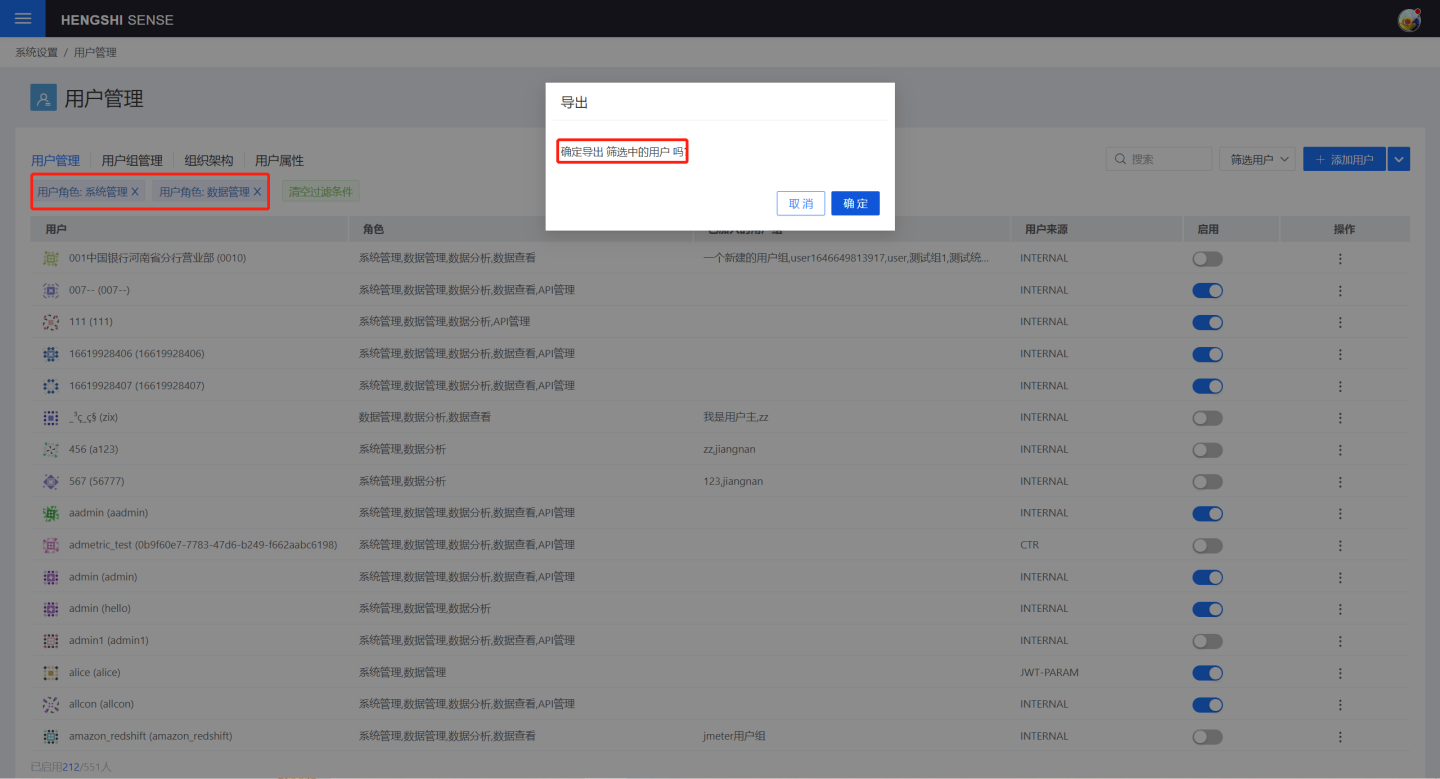
Open the export file, export all information except user passwords in full:

Batch export and import are suitable for user migration between systems.
Enable All
When no filtering conditions are added, clicking the Enable All button in the batch operations can enable all users within the system. After adding filtering conditions, clicking the Enable button in the batch operations can enable all users currently filtered out.
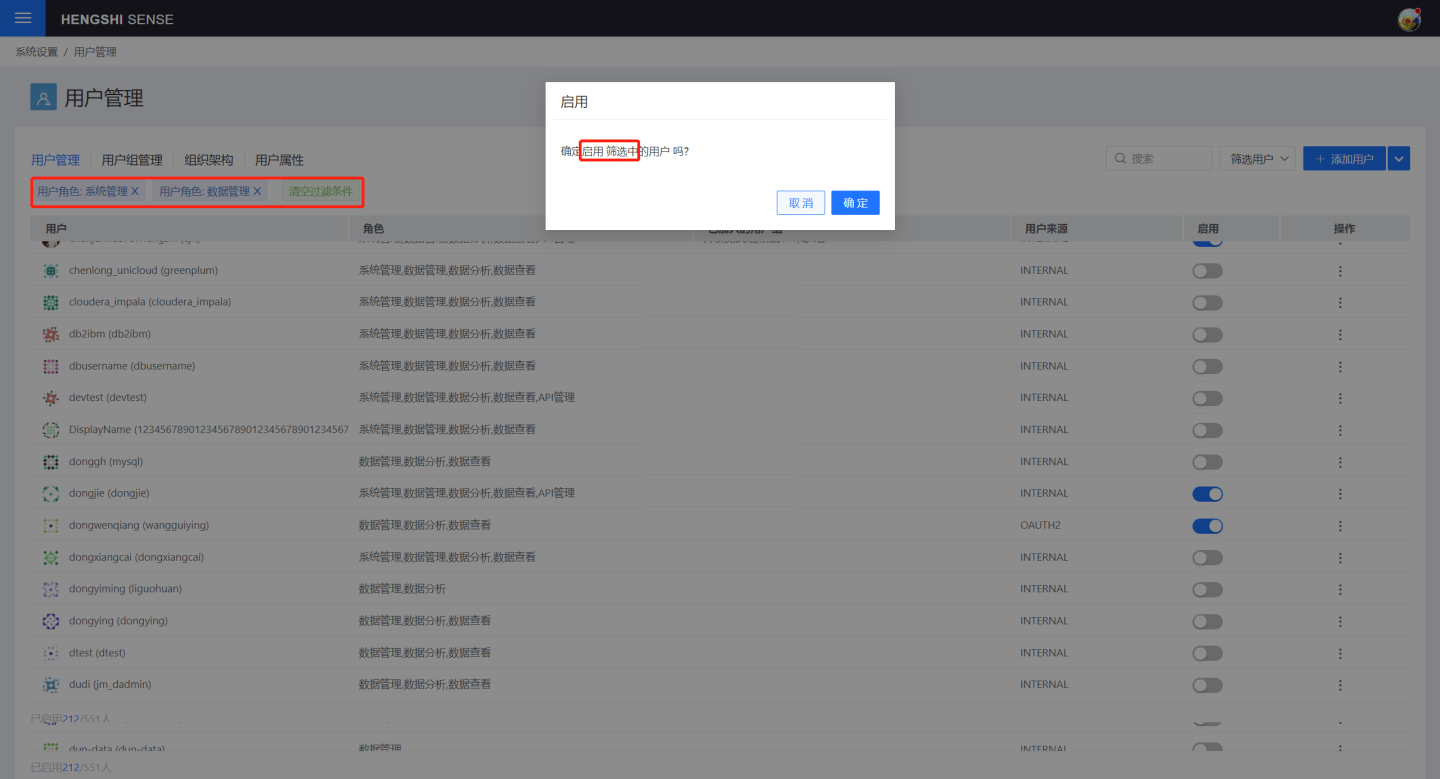
Disable All
When no filter conditions are added, clicking the Disable All button in the batch operations can disable all users within the system. After adding filter conditions, clicking the Disable All button in the batch operations can disable all users currently filtered out.
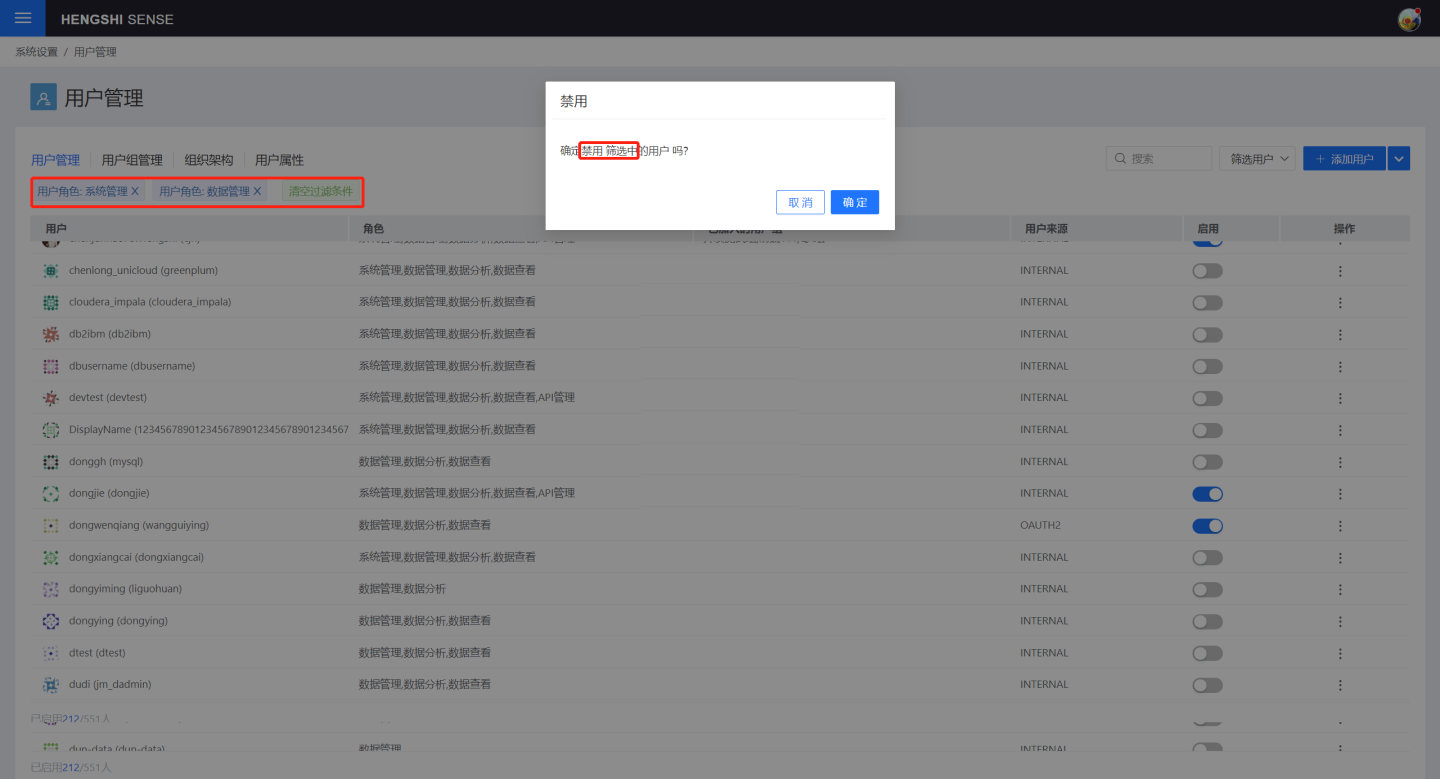
User Account Management
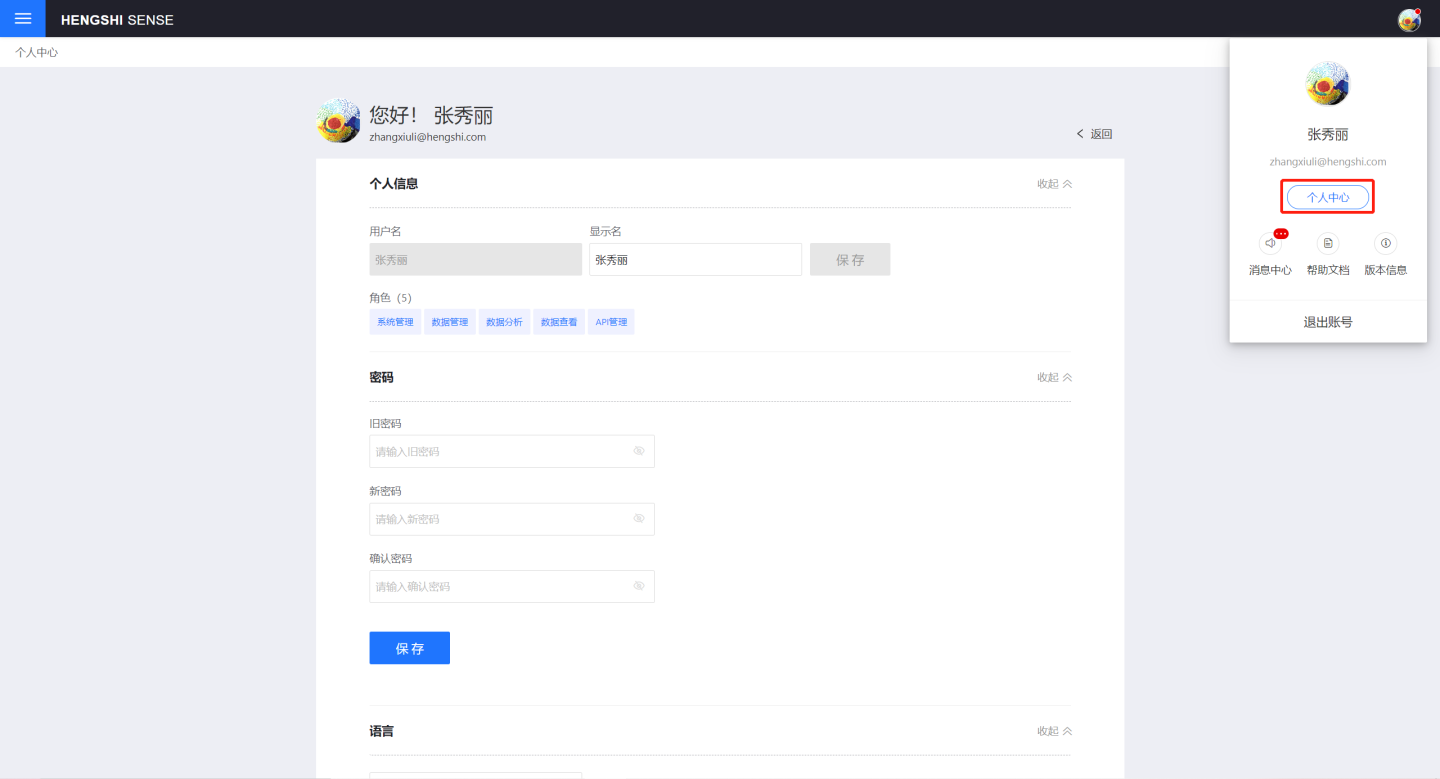
All users can view or modify their personal information by clicking Avatar -> Personal Center in the upper right corner. The items that can be modified include
- User Avatar
- Display Name
- User Password
- System Language
- Message Center System messages such as app collaboration, dataset replication, and user deactivation due to prolonged inactivity will be generated. Users can view these messages by clicking on the
Avatar -> Message Centerin the top-right corner.
Retrieve Password
There are two ways to recover your password:
- When the system does not have an SMTP account configured, the system administrator can change the passwords of all other users in the system on the user management page.
- After configuring the SMTP account, HENGSHI users can reset their passwords through the
Forgot Passwordoption on the login page, and the password will be sent to the user's login email. At the same time, the administrator's ability to change other users' passwords is disabled.
Tip
Non-HENGSHI users, i.e., users who log in through authentication methods other than HENGSHI Authorization, cannot reset their passwords in the HENGSHI system.
User Group Management
User groups are equivalent to folders. By adding users to a user group, you can perform authorization and other operations on multiple users at once as a group. For example, when selecting authorized users in connection permissions, you can directly choose a user group to grant permissions to all users within the group. By adding or removing users within a user group, you can quickly adjust user permissions.
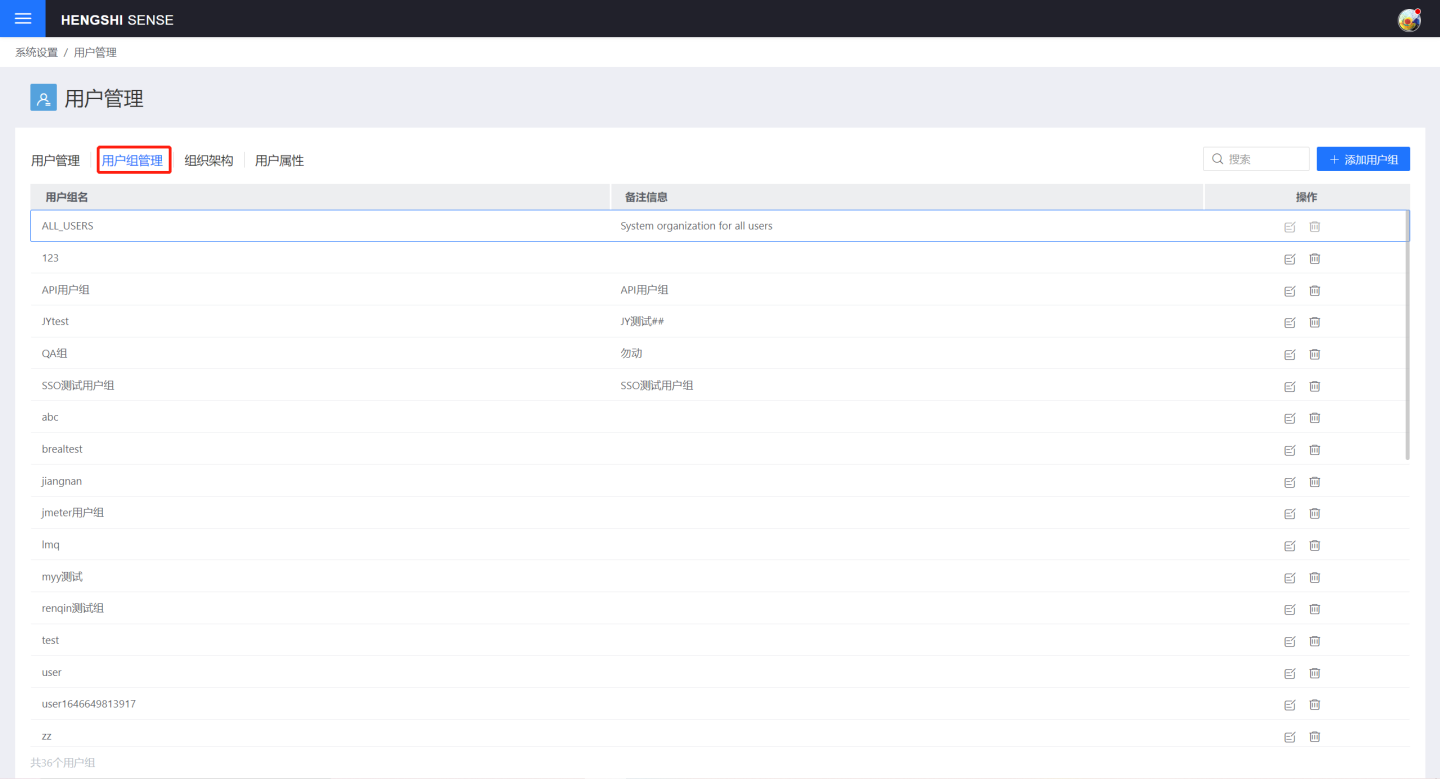
Add User Group
When adding a user group, enter the User Group Name, and click OK to generate a new user group. Click the + on the right side of the user to add the user to the user group.
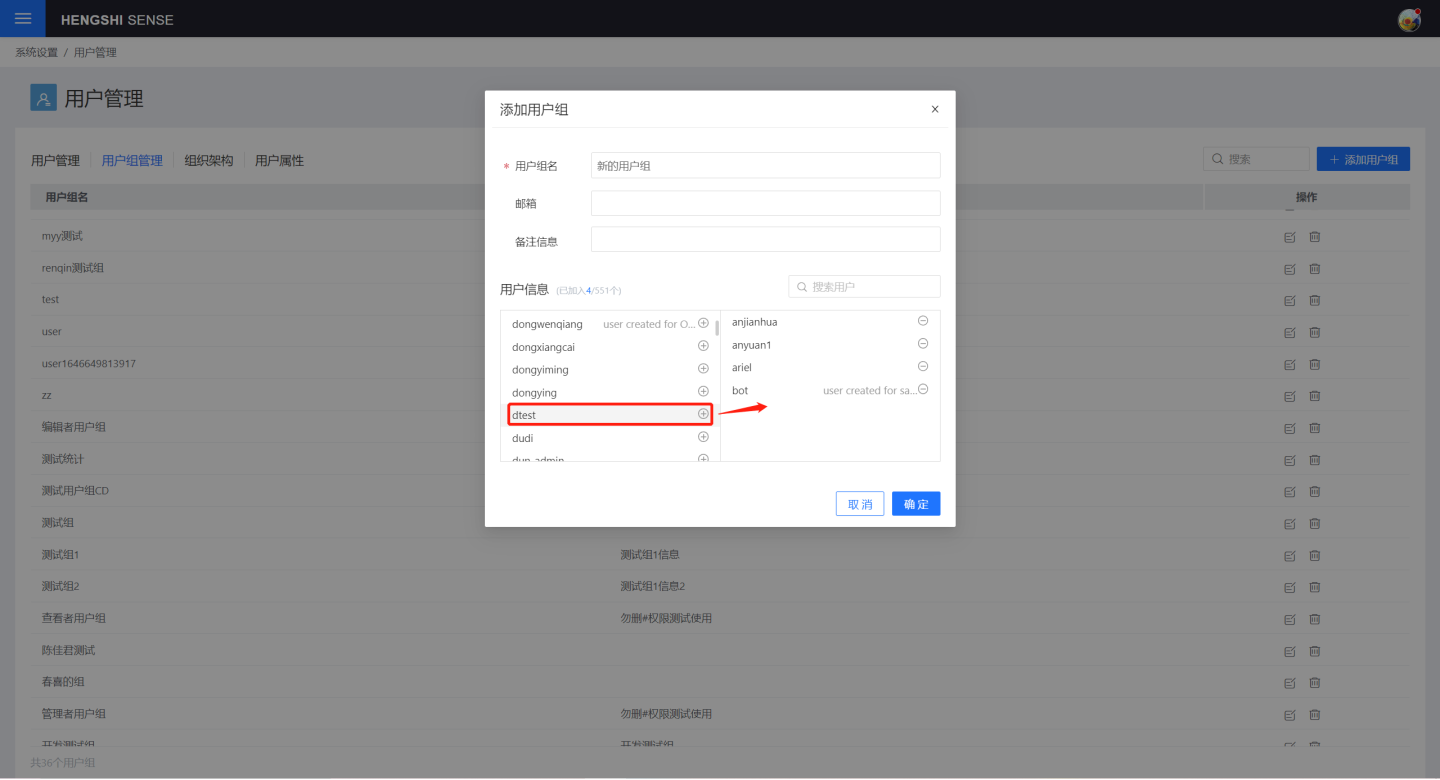
View User Groups
Click on an existing user group to view the group's information and included users.
Edit User Group
Click the edit button on the right side of the user group to edit the user group. Modify the user group name, email, and remarks, and you can also move users in or out of the user group.
Delete User Group
Click the delete button on the right side of the user group to delete the user group. Deleting the user group will revoke all resources authorized to this user group.
Organizational Structure
The organizational structure is the organizational information of the department, and by enabling the organizational structure, department information can be synchronized to the HENGSHI SENSE system.
Enable Organization Structure
Open System Settings -> Authentication Method, select DINKTALK, and click Configure.
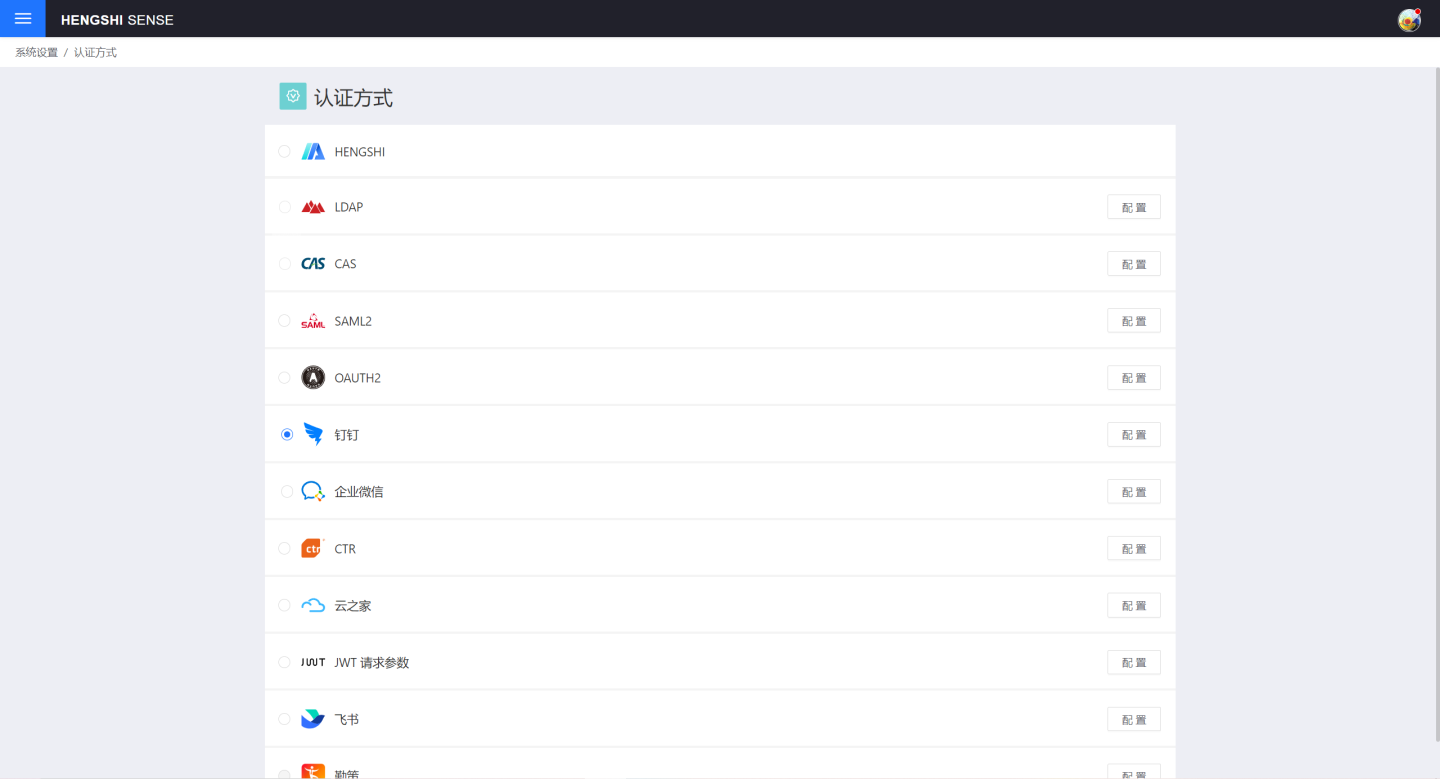
Enter the synchronization frequency in the synchronization frequency field, click Sync Now, click Save, and the organizational structure information has been synchronized and displayed in the system.
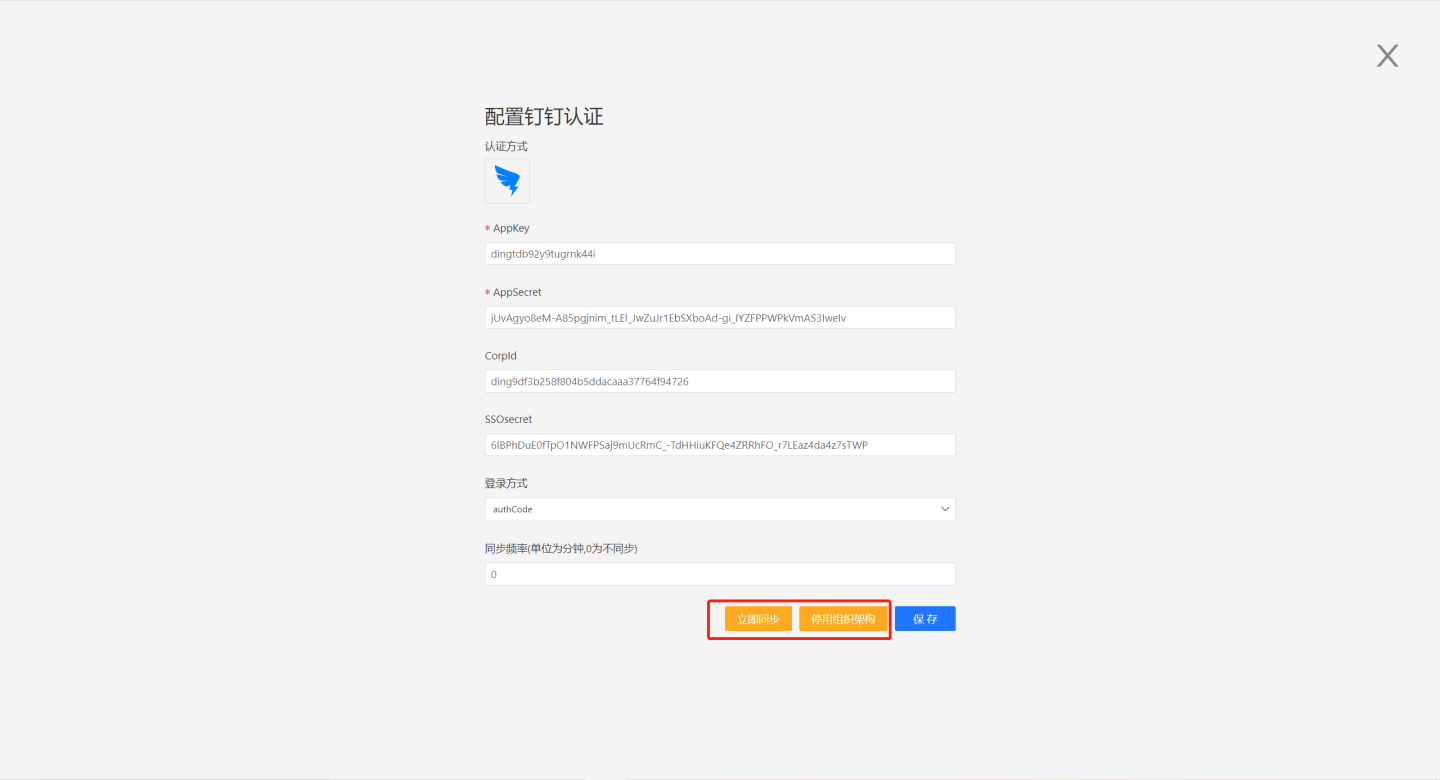
When you click Deactivate Organization Structure and save, the organization structure information will be removed from the system.
View Organizational Structure
After enabling the organizational structure, relevant information can be viewed on the organizational structure page, where you can view and edit information for each user.

User Attributes
User attributes are characteristics that each user possesses, and the attribute values may differ among users. On the user attributes page, you can see a list of all attributes included in the user.

First, introduce the basic concepts related to user attributes, including user attribute categories, data types, scope of action, and openness level.
User Attribute Categories
User attributes include system attributes and custom attributes.
System Properties
System properties are prefixed with sys. and are properties provided by the system. These properties cannot be added, edited, or deleted.
Custom Properties
Custom properties are properties added by the user and can be subjected to CRUD operations, i.e., they can be added, viewed, edited, and deleted.
User Attribute Types
The data types for user attributes are as follows:
- Text: Replace user attribute operations with text strings.
- Number: Replace user attribute operations with numeric strings.
- Date: Replace user attribute operations with date strings.
- Any Type: Can be converted to any type, for example, you can input [1,2,3] as an array in the user attribute value.
User Attribute Scope
In a multi-tenant scenario, there are times when the platform needs to manage tenant attributes uniformly. This can be achieved by setting the scope of user attributes. The scope options are as follows:
- Internal: The scope of action is internal user attributes, which can only be used within the tenant or by the platform itself internally, and cannot be used across tenants, which are also isolated from each other.
- Global: The scope of action is global user attributes, which can be used within the platform. Most importantly, the platform can set values for different tenants, and then the tenant can read them internally.
After the platform administrator creates an attribute with a global scope, they can set the attribute value for an individual tenant on the tenant's editing page. After this operation, all users under this tenant will have this attribute value.
User Attribute Open Level
In a multi-tenant or multi-organization scenario, data may be stored in different database instances, different databases, different schemas, or different tables. In such cases, user attributes are typically used to dynamically connect to these different databases.
However, for some information such as passwords, we do not want ordinary users to see them by viewing attribute values. At this point, the openness level of attributes can be used for control.
- Read-only: User attributes with a read-only access level are open to each user, allowing them to view their own attribute values and use them in most analytical scenarios.
- Hidden: User attributes with a hidden access level are not open to ordinary users; ordinary users cannot see their specific values. Generally, such hidden attributes can only be used in data connections. They cannot be used in datasets/charts/dashboards.
User Attribute Related Operations
Add User Attributes
Click to add an attribute, enter the attribute name, type, scope, and open level in the pop-up window, manually input the default value of the attribute, support setting empty values and NULL values. User attributes support multi-value settings.

Tip
- In tenant management, both the platform administrator and tenant administrator can define user attributes. The definition of user attributes is not isolated, and once defined, administrators can see them.
- Once the multi-value feature is set, it cannot be modified again. If the multi-value option is enabled when adding a user attribute, it cannot be disabled later. If it is not enabled, it cannot be enabled subsequently.
View User Attributes
You can view the detailed information of custom attributes, and also support viewing the value of custom attribute settings in each user.
Edit User Attributes
User attributes support editing and modification. Click the edit page on the right side of each attribute to edit custom attributes. Custom attributes only support modifying the scope of action, open level, and default value.
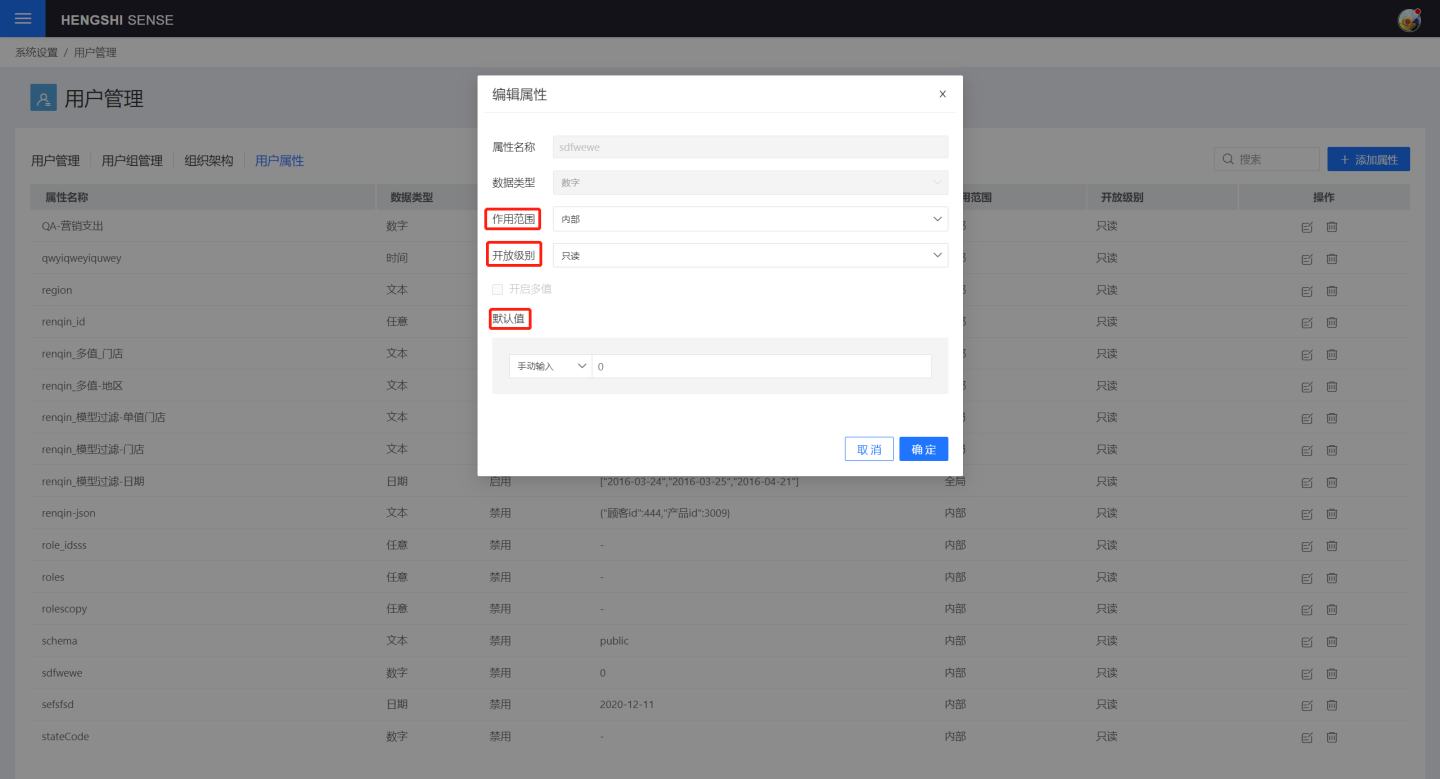
Each user's specific attribute values are also supported for modification. When viewing the user and locating the specific attribute value, simply click "Modify" to make changes.
Delete User Attribute
Click the delete button on the right side of the user-defined attribute to delete the user-defined attribute, and the user attribute in the user will also be removed.
User Attribute Usage Scenarios
Users can use user attributes in the following scenarios:
- Create Data Connection
- Create Direct Connection Dataset Select Table
- Create SQL Query Data
- Create Filter Conditions in Dataset
- Add Fields, Add Metrics in Expressions
- Filters in Charts, Dashboards
- Reference Line Settings
- Permission Control
User attribute usage scenarios are numerous, and some typical usage scenarios are shown below.
User Attribute Usage
| Purpose | HE | Expression |
|---|---|---|
| User Attribute | {“kind”: “attr”, “op”:”user attribute name”} | {{$user attribute name}} |
| User Attribute Value | {{$$user attribute name}} |
Tip
User attributes are single dollar symbols, and user attribute values are double dollar symbols. When using {{$user_attribute_name}}, the backend will convert it into an HE expression, and no quotes are needed when using it. When using {{$$user_attribute_name}}, the backend will directly query the value of the user attribute and perform text replacement, and quotes can be added as needed. In HENGSHI SENSE's advanced expressions, such as adding field/indicator expressions, chart filter expressions, and new dataset filter expressions, you must use {{$user_attribute_name}}. When creating data connections and SQL query datasets, you must use user attribute values: {{$$user_attribute_name}}.
Using User Attributes When Creating Data Connections
User attributes can be used when creating data connections, parameters cannot, because parameters belong to the app, while user attributes belong to the system.
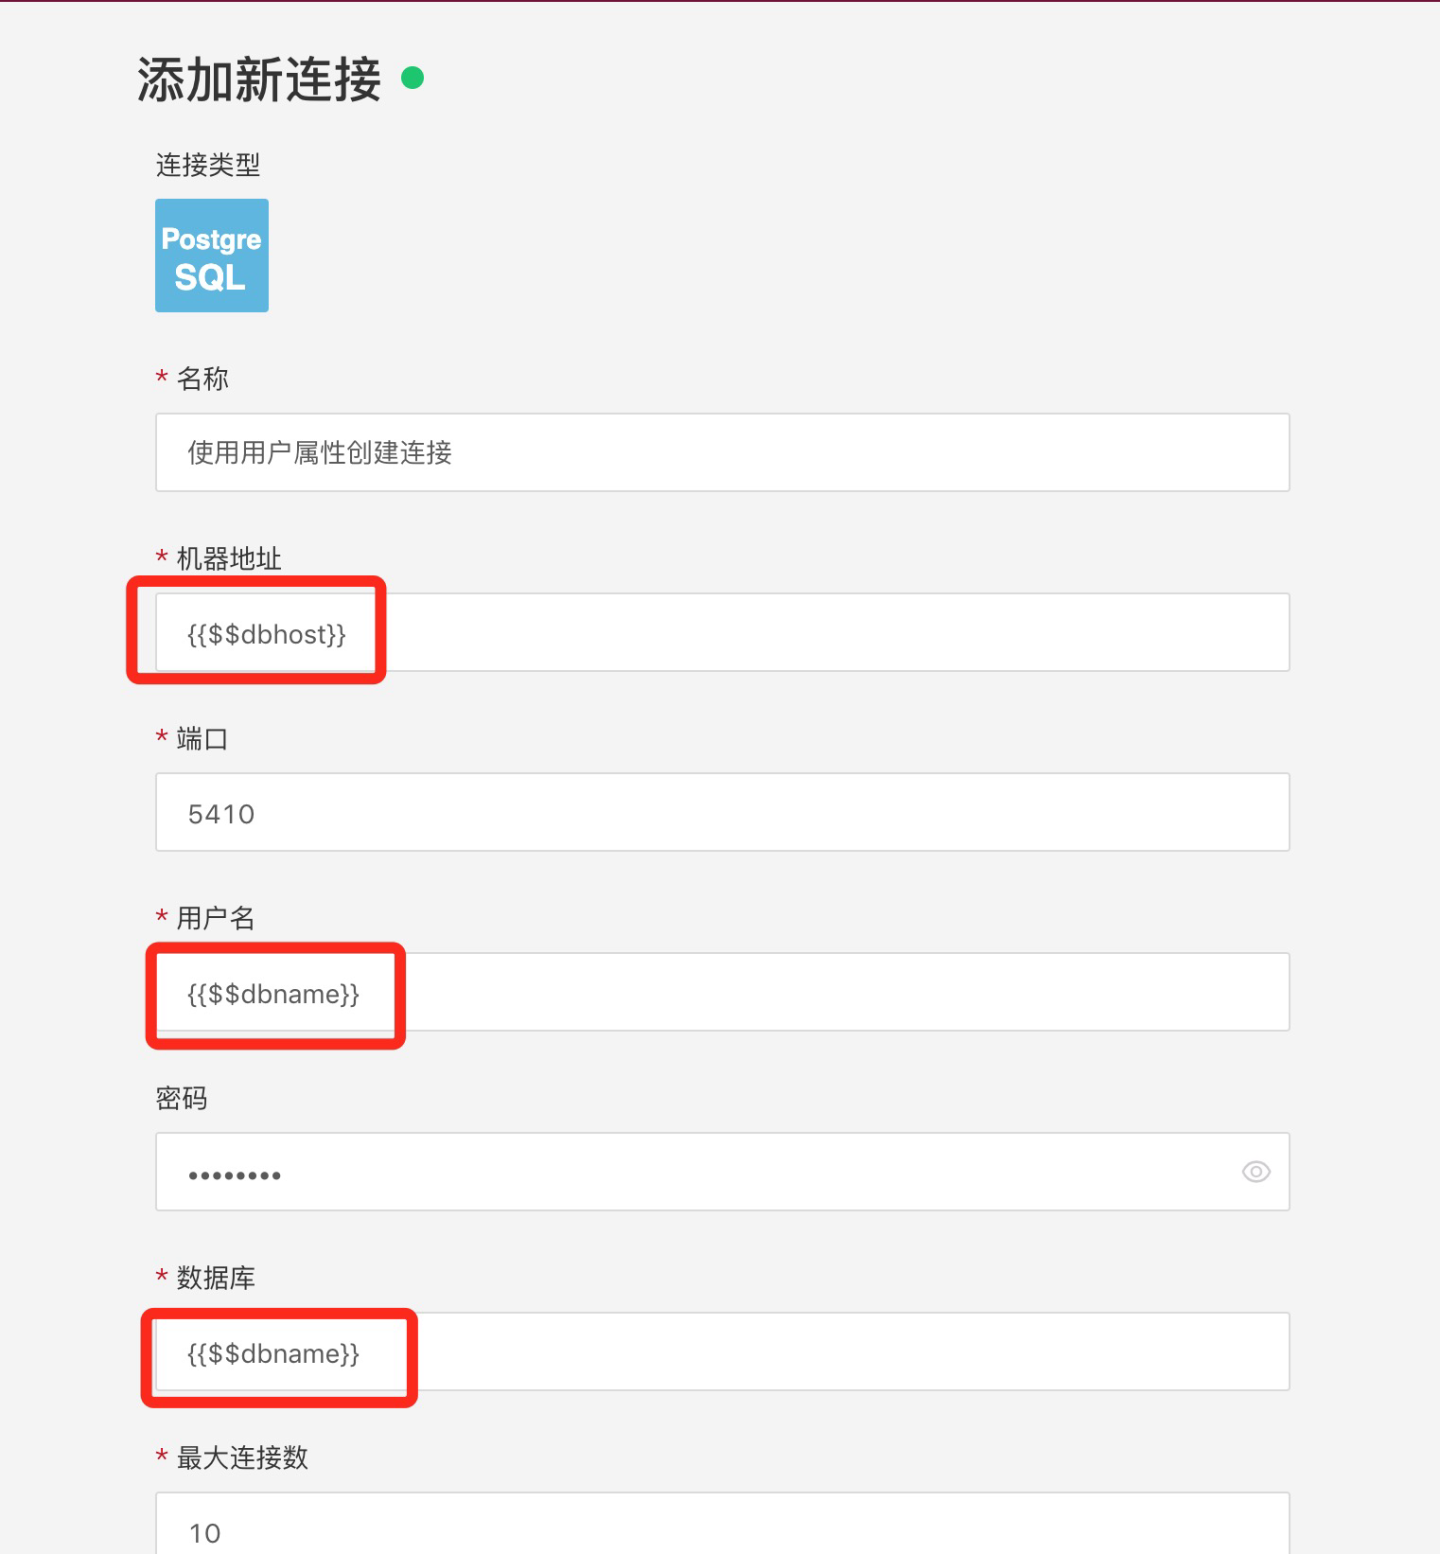
When creating a connection, you must use the user attribute value in the form of {{$$user attribute name}}.
When creating a connection, user attributes cannot be used for user passwords; they can be used elsewhere. User passwords are entered as is and are not subject to conversion or calculation.
The dbhost and dbname in the figure are both user attributes.
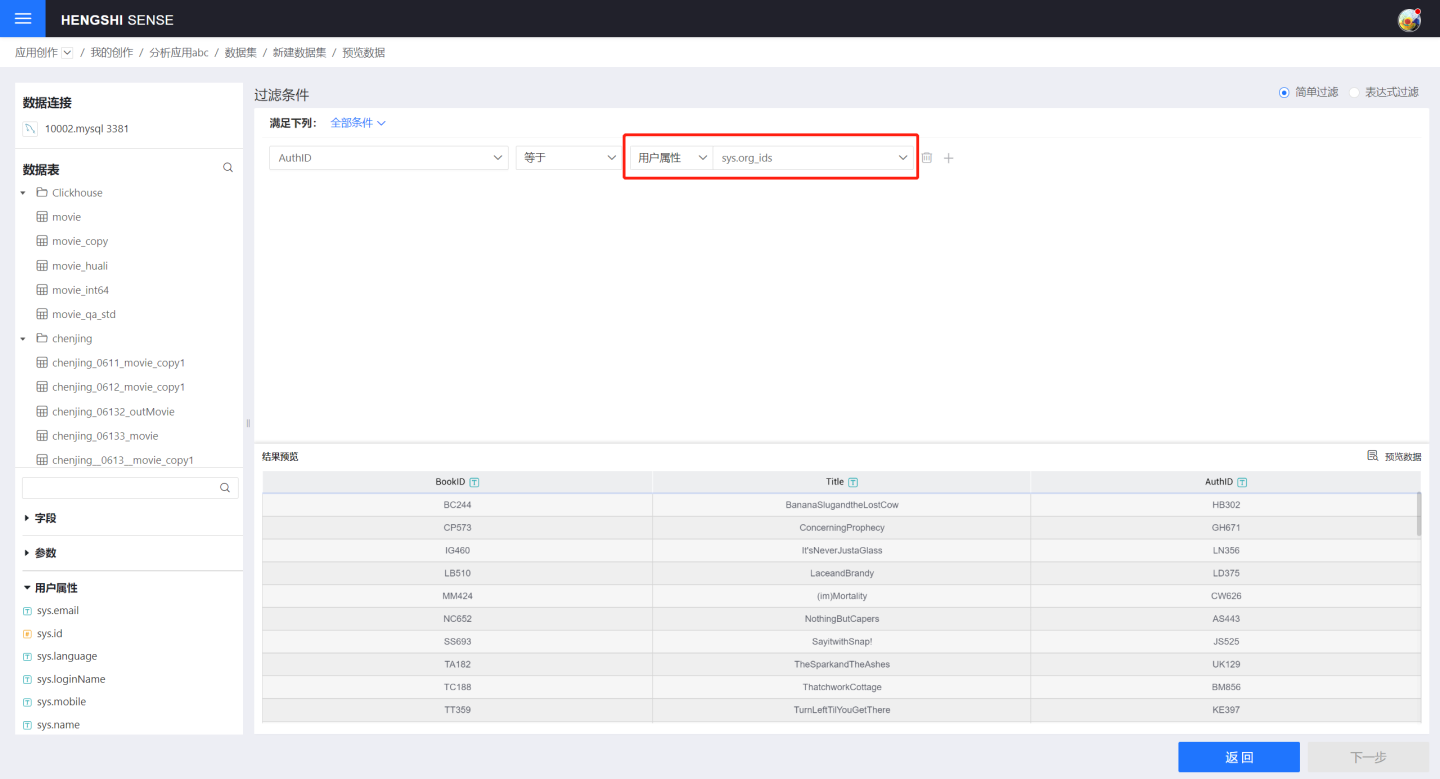
Use User Attributes in New Dataset Filter Conditions
Simple Filter Using User Attributes:
Expressions filtering using user attributes must use the {{$user attribute name}} format:

Using User Attributes When Creating SQL Query Datasets
When creating an SQL query, you must use the User Attribute Value in the form of {{$$User Attribute Name}}:
select * from movie where id > {{$$user attribute name}}

select * from {{$$user attribute name}}Use User Attributes When Creating Fields/Metrics
When creating a new field or metric, you must use the User Attribute {{$User Attribute Name}} format:
{price} + {{$user_attribute_name}}Using User Attributes in Filter Expressions
In chart filter expressions, you must use the User Attribute {{$User Attribute Name}} format:
{region} = {{$user attribute name}}