Connect to Presto
Please follow the steps below to connect to the Presto data source.
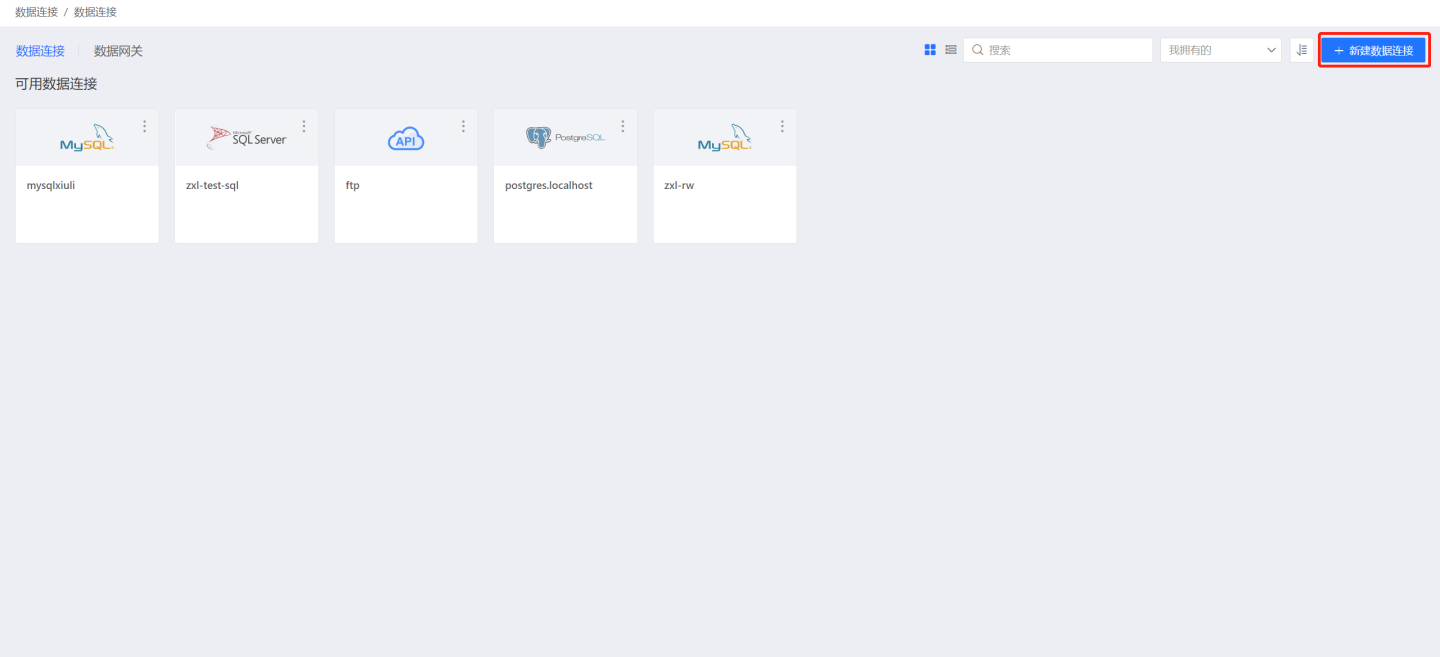
Click "New Data Connection" in the upper right corner of the Data Connection page.

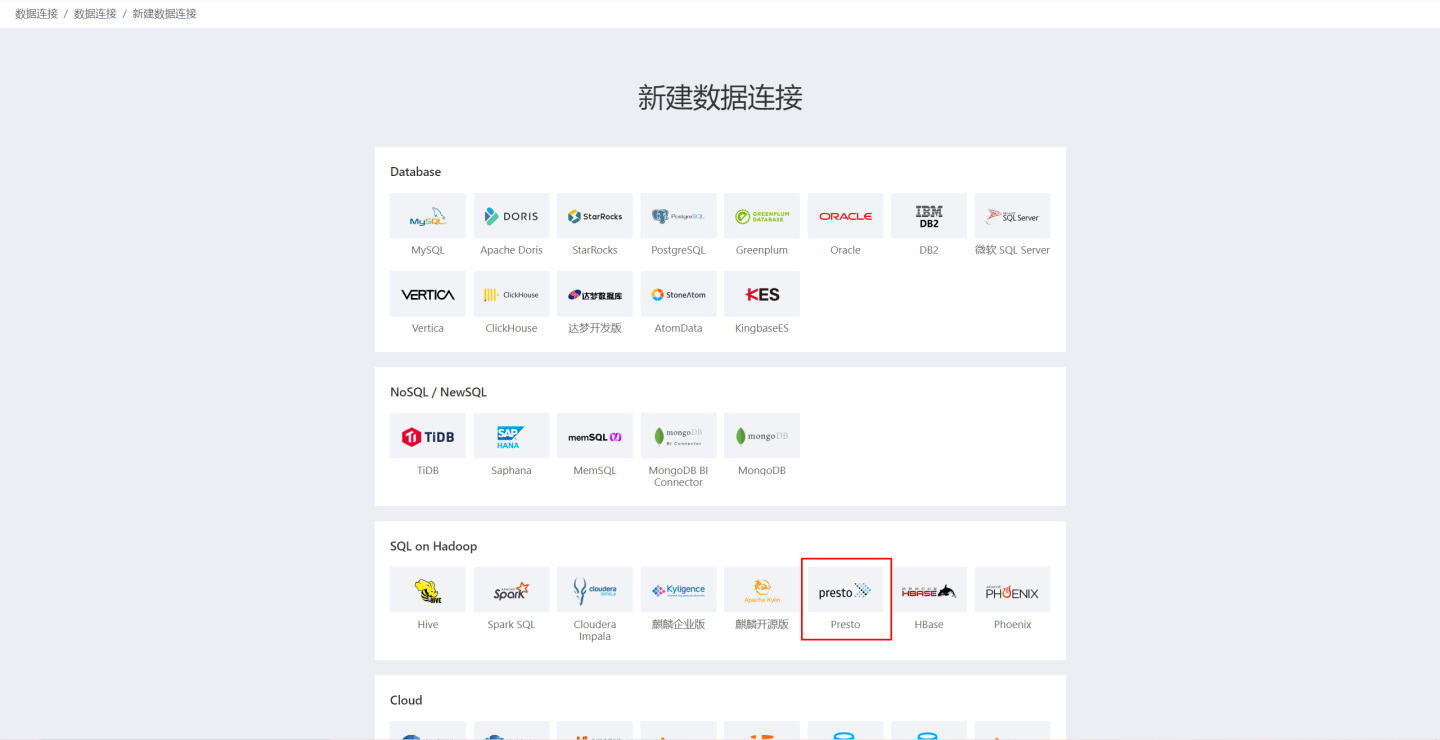
Select the Presto data source from the data source types.

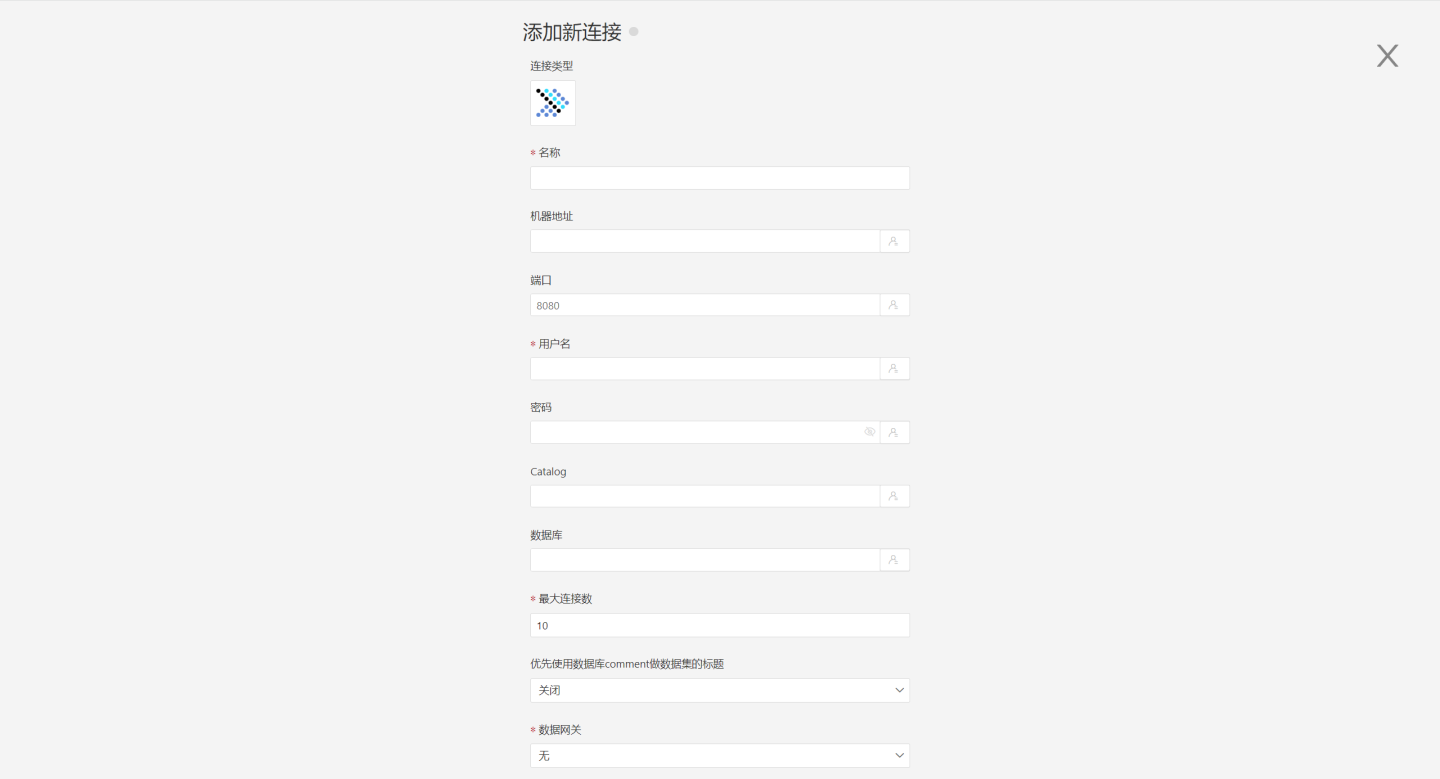
Fill in the parameters for the data source connection as required.

- Name: The name of the connection, must be unique.
- Machine Address: The address of the database. If the url field is filled, the url will be prioritized.
- Port: The port of the database. If the url field is filled, the url will be prioritized.
- Username: The username of the database.
- Password: The password of the database.
- Catalog: The catalog of presto.
- Database: The name of the database. If the url field is filled, the url will be prioritized.
- Maximum Connections: The maximum number of connections in the connection pool.
- Prefer Database Comment for Dataset Title: Whether to display the table name or the table comment preferentially. When enabled, the title is displayed; when disabled, the table comment is displayed.
- Data Gateway: Fill in the Data Gateway ID when the connection is made through a data gateway.
- URL: The jdbc url of the database.
- Additional JDBC Parameters: Additional JDBC parameters. It is recommended to write the complete url using the url. This parameter is only appended to the automatically generated jdbc url.
- Hierarchical Loading of Schemas and Tables: When closed, both schemas and tables are loaded simultaneously. When enabled, schemas and tables are loaded hierarchically, with only schemas loaded during the connection process, allowing the data source to be quickly integrated into the system.
- Support Uploading Files to Specified Path: The specific path indicates the database name where the file is uploaded. This parameter can only be configured after verification.
- Support Operations on Connected Databases: Indicates that the connection can be selected as an output connection in Data Integration, Batch Sync, and Data Filling. The user must ensure write permissions for the database. This parameter can only be configured after verification.
- Show Tables Only Under Specified Database/Schema: When this option is selected and the database field is not empty, only the tables under this db are displayed.
After filling in the parameters, click the "Verify" button to obtain the verification result (verifying the connectivity between HENGSHI SENSE and the configured data connection; adding is not allowed if the verification is not passed).
After verification is passed,
Support Data Integration OutputandSupport Uploading Files to Specified Pathwill be enabled from disabled, allowing you to choose whether to enable these two options.Click to execute the preset code, and the preset code corresponding to the data source will pop up. Click the execute button.
Click the "Add" button to add the configured Presto connection.
Please note
- Parameters marked with * are required, while others are optional.
- When connecting to a data source, the preset code must be executed. Failure to do so will result in certain functions being unavailable during data analysis. Additionally, when upgrading from versions prior to 4.4 to 4.4, the preset code needs to be executed for existing data connections in the system.