Theme
Within the app, each dashboard and query page includes a theme that applies to the visual content.
Themes consist of built-in preset themes and custom themes.
Themes help you quickly switch to the desired visual expression, and built-in themes make it easy to get started.
When you click on the blank background area of the dashboard, the dashboard settings content will appear on the left.
The content that can be set for the theme includes:
- Dashboard Title
- Theme
- Custom Settings
- Canvas Background Image Settings
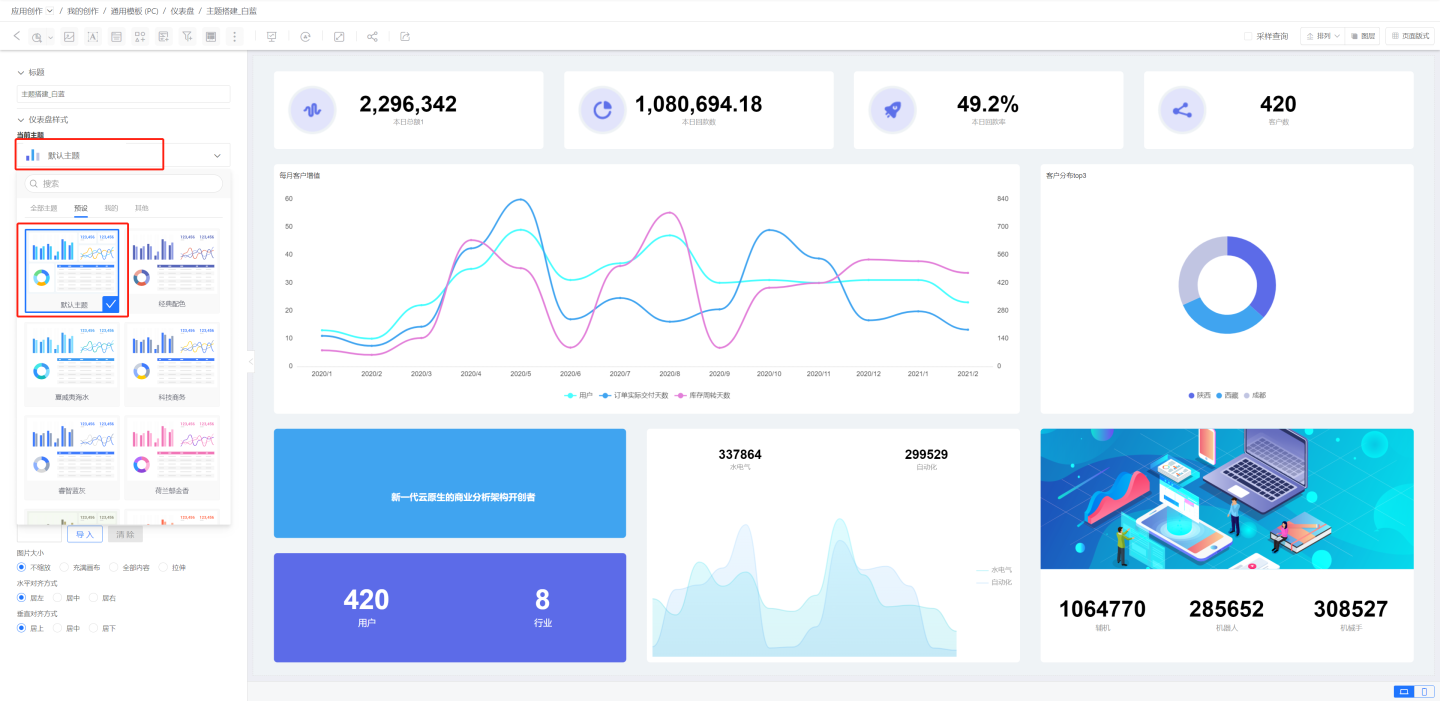
Theme Management
Themes are divided into four sections:
All Themes: Displays all themes in the application.Preset: System-built themes.Mine: Themes created by myself.Others: Themes created by other users.
Tenant-side supports tenant-customized themes, which are only visible within the tenant. They are not visible to the platform or other tenants. 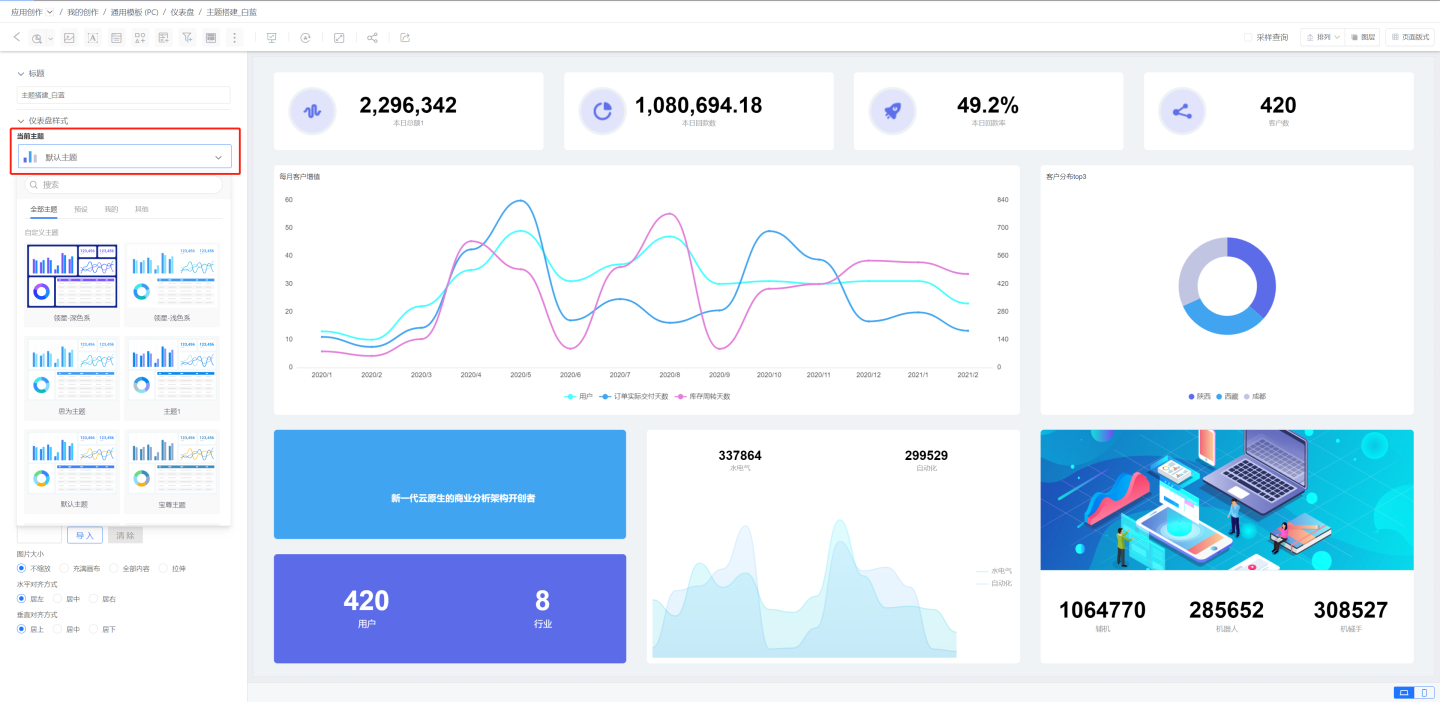
Select Theme
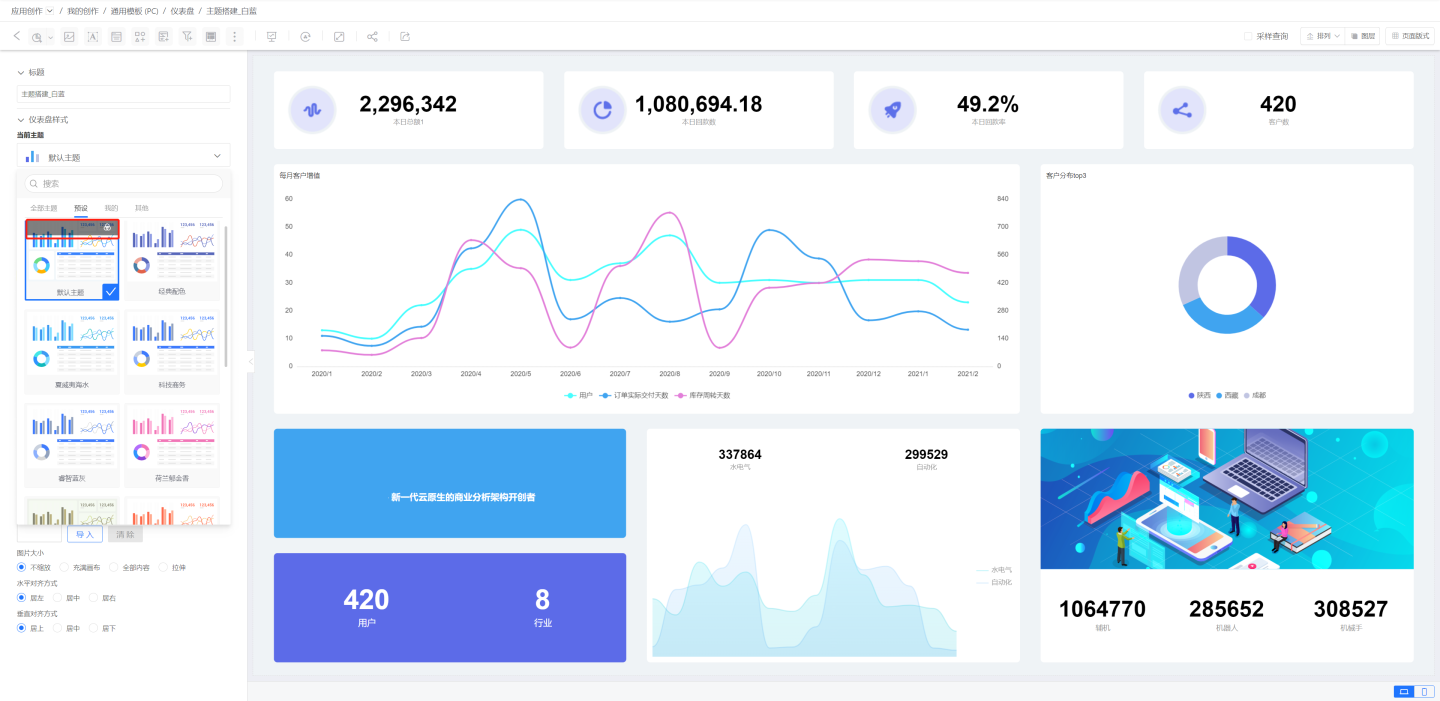
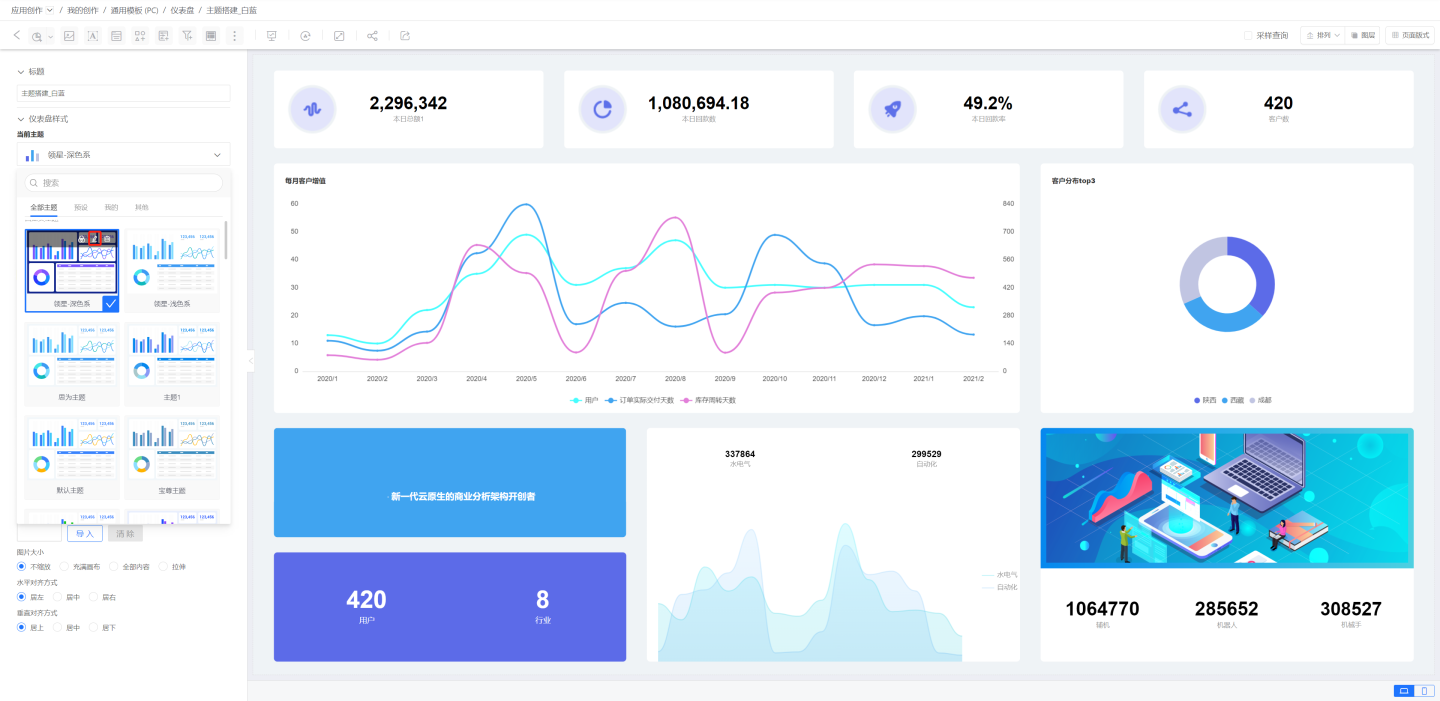
Click the "Current Theme" dropdown. You can choose the theme you need to apply to the dashboard.
Click on a theme card, and the theme card will be selected. The theme's style will be applied to the current dashboard, and the settings within the theme will be brought into the custom configuration below.
Note: Switching themes will not affect the independently configured chart styles within the current dashboard. It only applies to the appearance of controls.
Please Note
The operation takes effect immediately after switching themes.
Force Apply Theme
Click the "Current Theme" dropdown. When hovering over a theme, a "Force Apply" icon will appear on the right.
After clicking the "Force Apply" icon, the theme's styles will be applied to the current dashboard.
At the same time, the settings within the theme will be brought into the custom configuration below.
This will overwrite all independent settings of chart content, resetting everything to its default state.
Please note
The operation takes effect immediately after force applying.
Custom Theme
The theme created and saved by the user is considered a custom theme.
Users can rename or delete the custom theme.
Rename
Click the "Current Theme" dropdown. Hover the mouse over the theme, and a "Rename" icon will appear on the right.
Click the "Rename" icon to rename the theme. Once the renaming is completed, the changes will take effect immediately.
Delete
Click the "Current Theme" dropdown. Hover over the theme with the mouse, and a "Delete" icon will appear on the right.
Click the "Delete" icon to delete the theme.
After deletion, the visualizations of dashboards using this theme will remain unaffected, but the theme will be removed from the theme list.
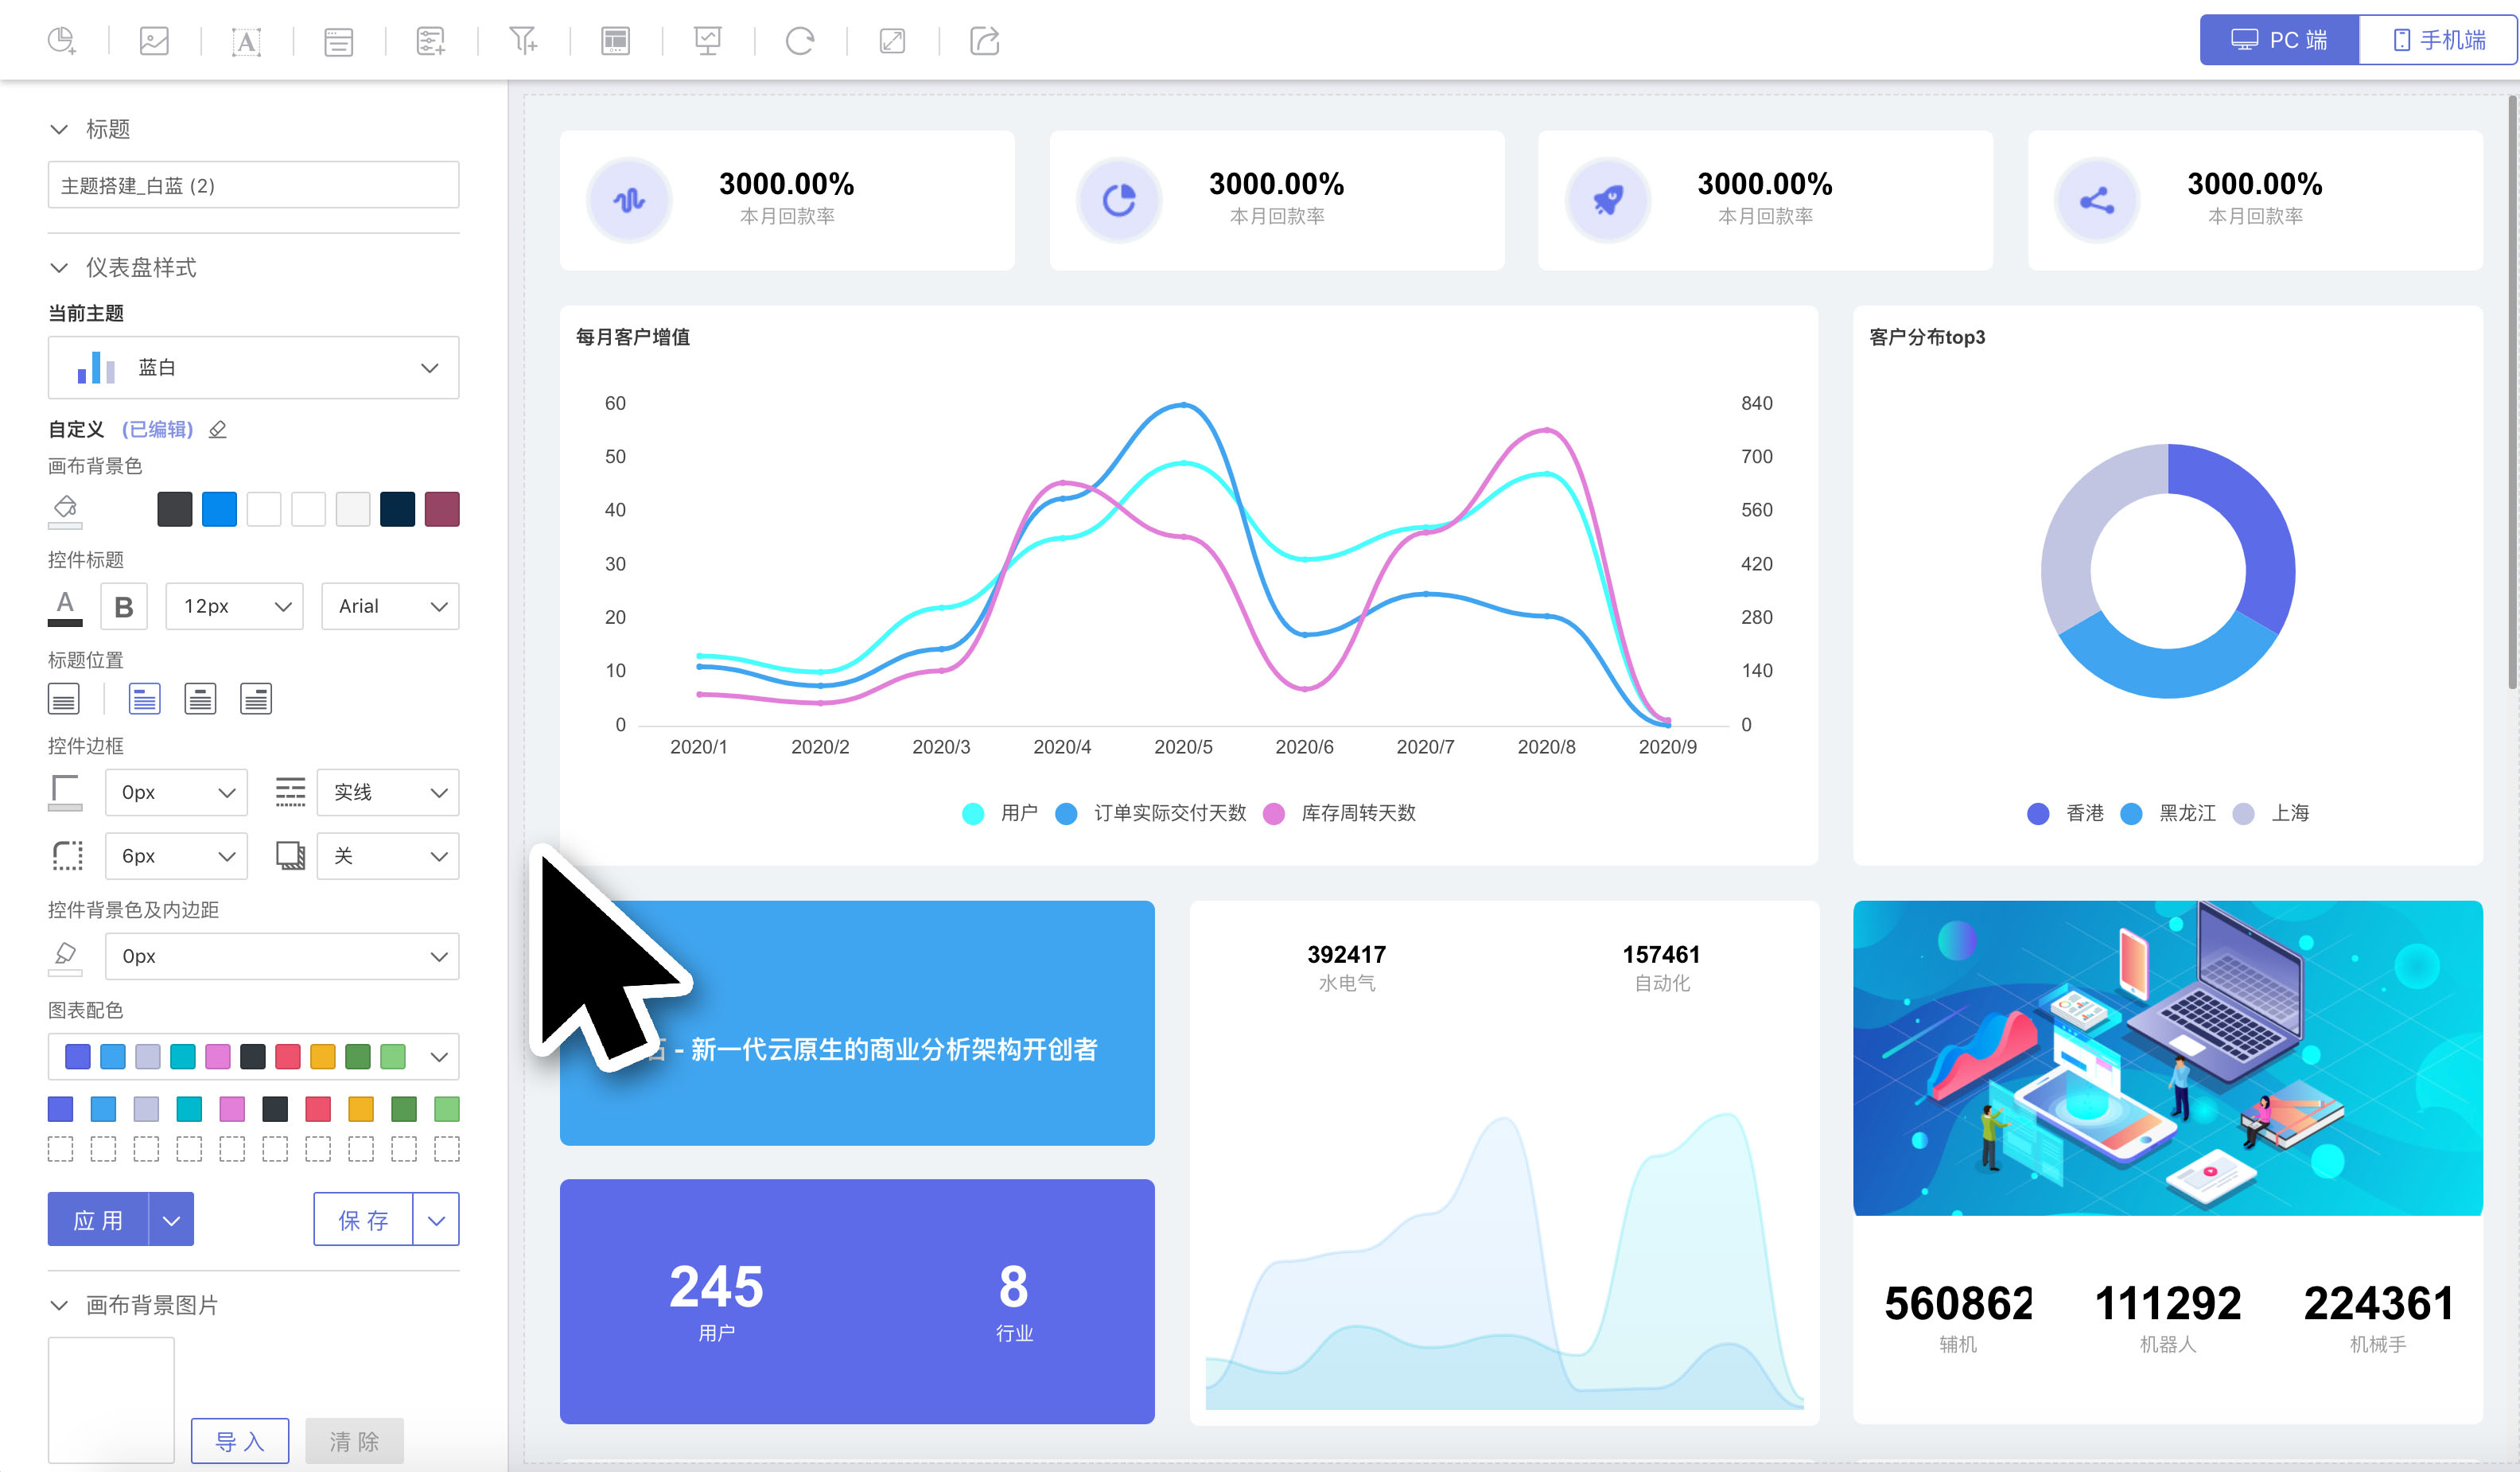
Custom Settings and Applications
Custom Settings
Based on the selected theme, users can perform custom settings to adjust the visualization effects of the current theme without altering the theme itself.
When a user selects "Theme A" and does not want to modify "Theme A" but wishes to adjust the visual presentation of "Theme A" for the current dashboard, they can use Custom Settings.
The visual effects of Custom Settings take precedence over the theme.
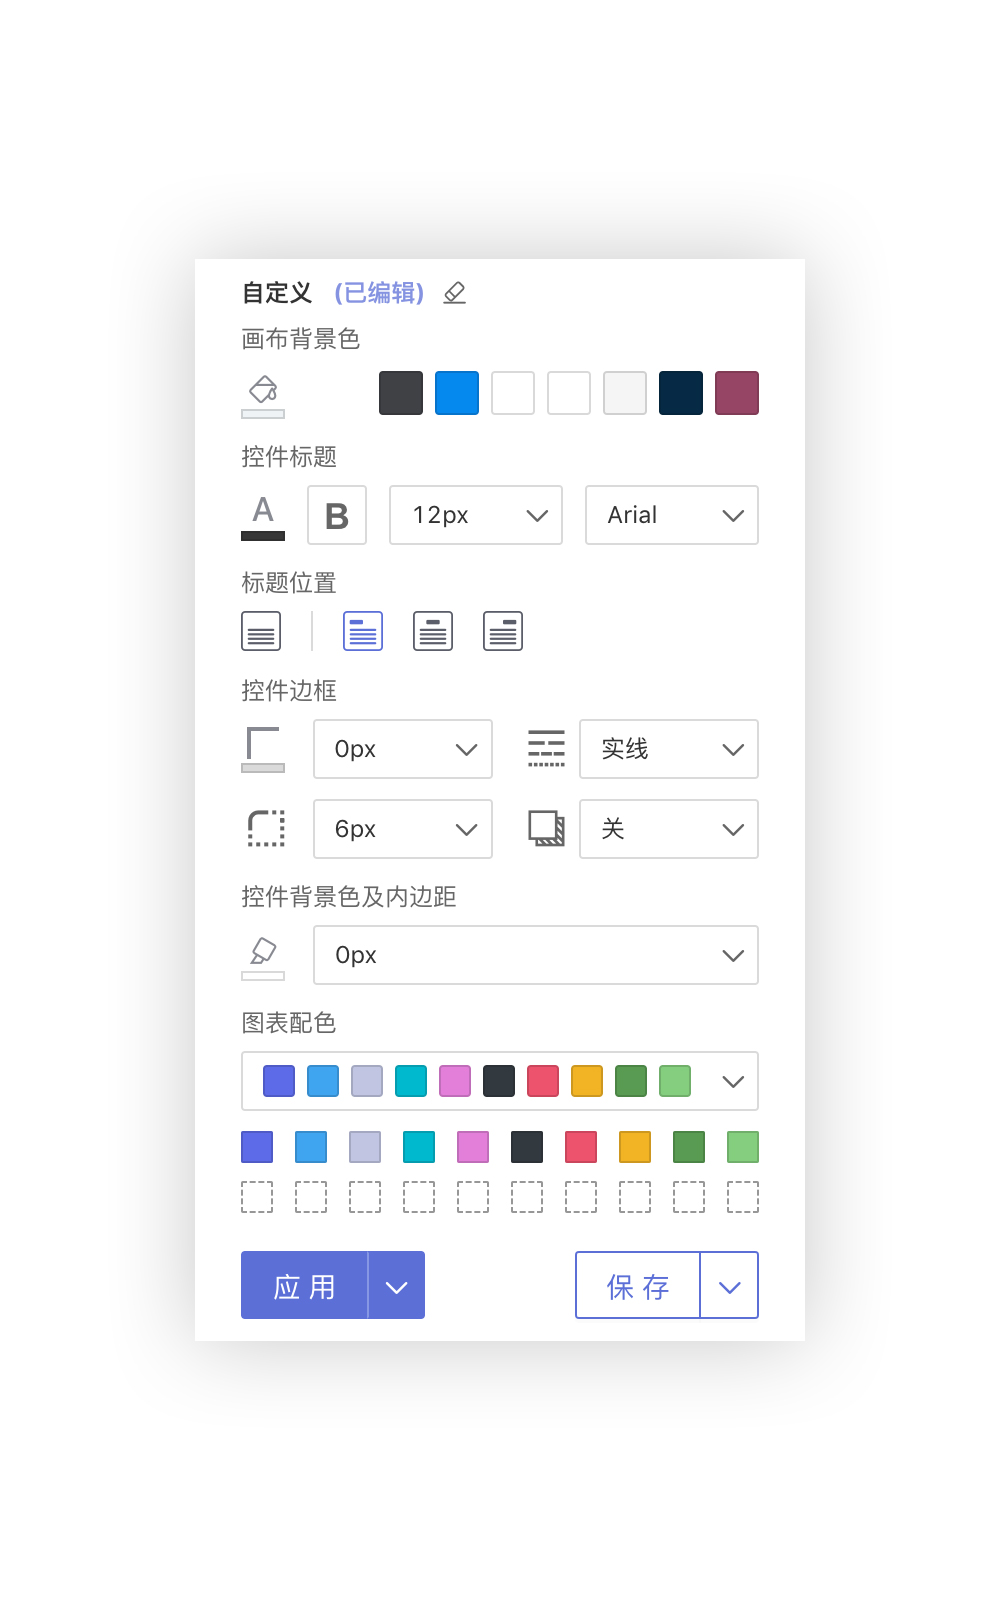
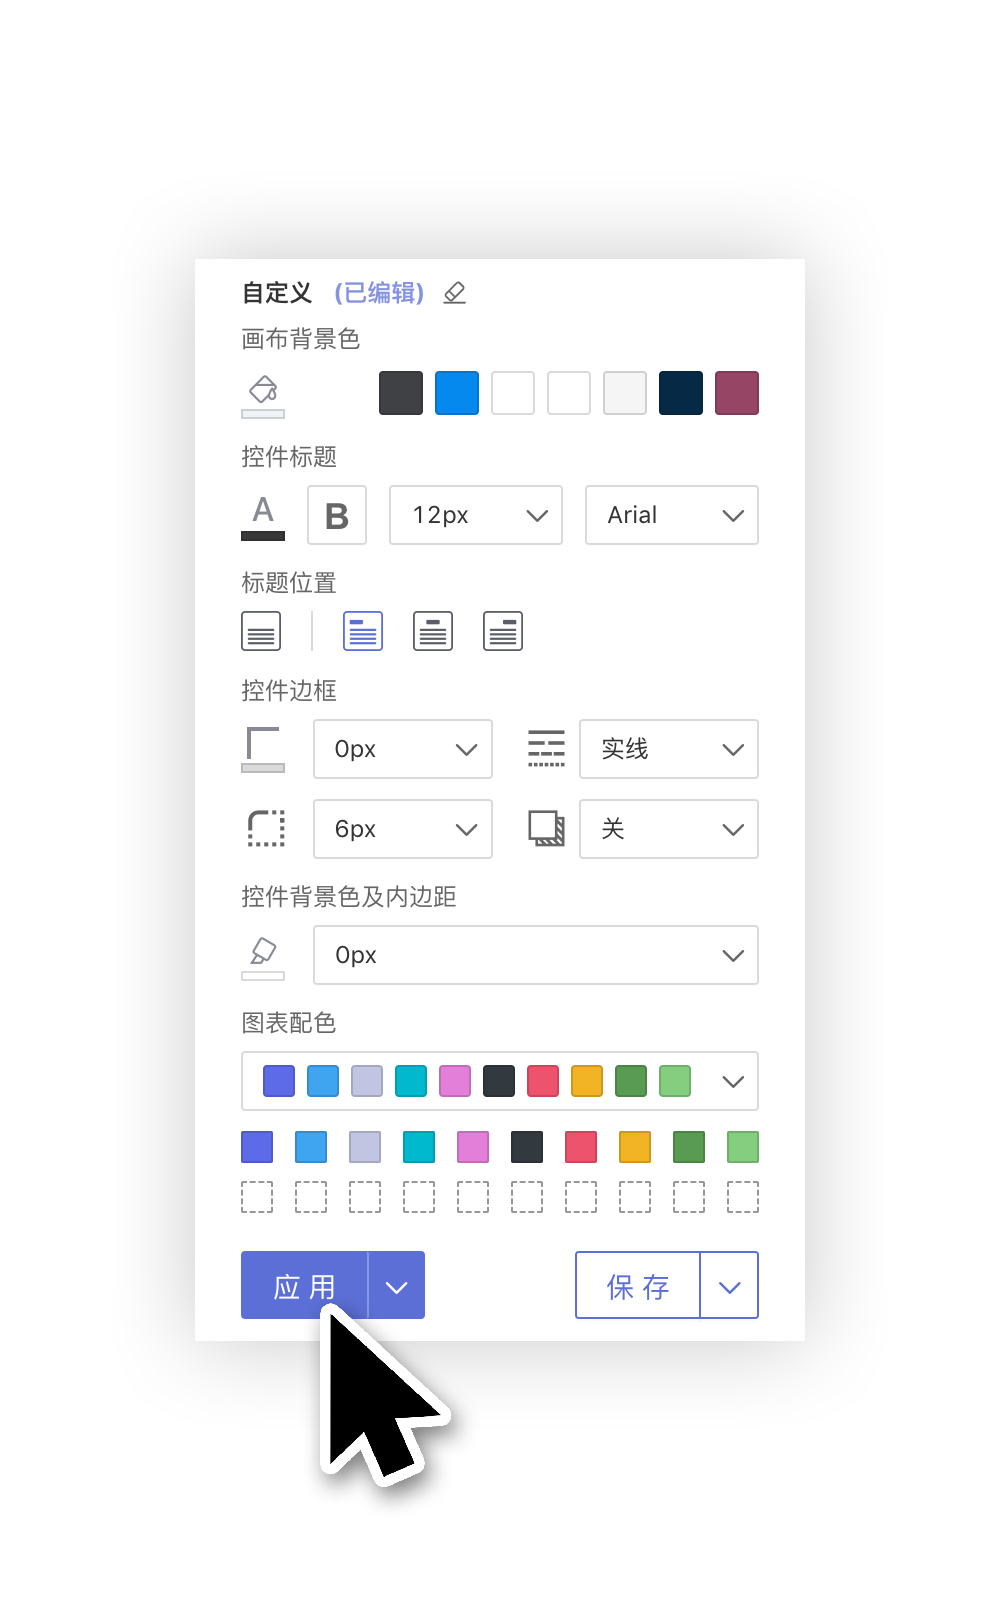
Application of Custom Settings
After completing the custom content settings, you can click the "Apply" button at the bottom left of the custom settings panel to apply the custom settings to the current dashboard.
At this point, the custom settings are independent of the selected theme.
Please note
Custom settings will only take effect after clicking "Apply."
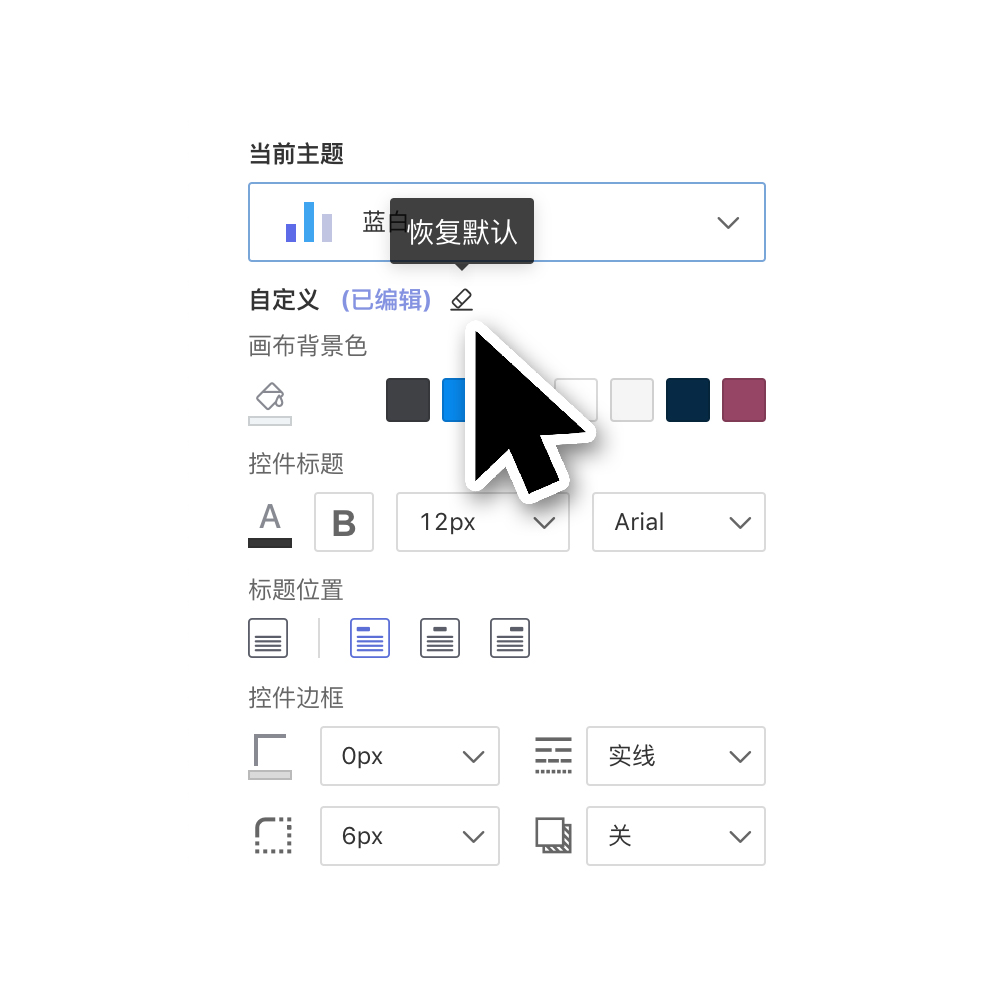
Clear Custom Settings
When the dashboard has custom settings, a prompt with the text "(Edited)" will notify the user that the current dashboard contains custom edits. Users can click the "Clear" icon on the right side of the custom title to remove the custom styles. (After clearing the custom settings, you also need to click "Apply" for the changes to take effect.)
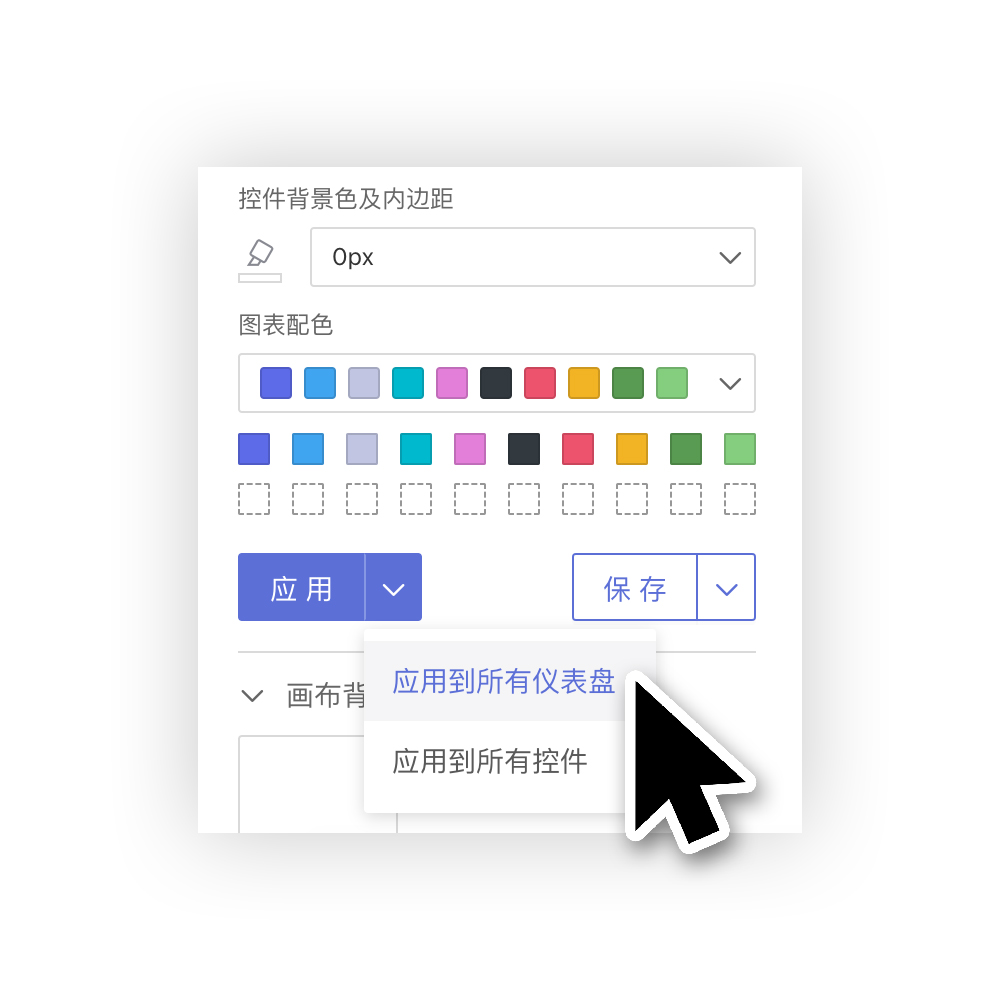
Apply to All Dashboards
Click the dropdown arrow to the right of the "Apply" button, then select "Apply to All Dashboards." You can choose to apply the combination of the current dashboard's [Theme + Custom Settings] to all existing dashboards in the current application.
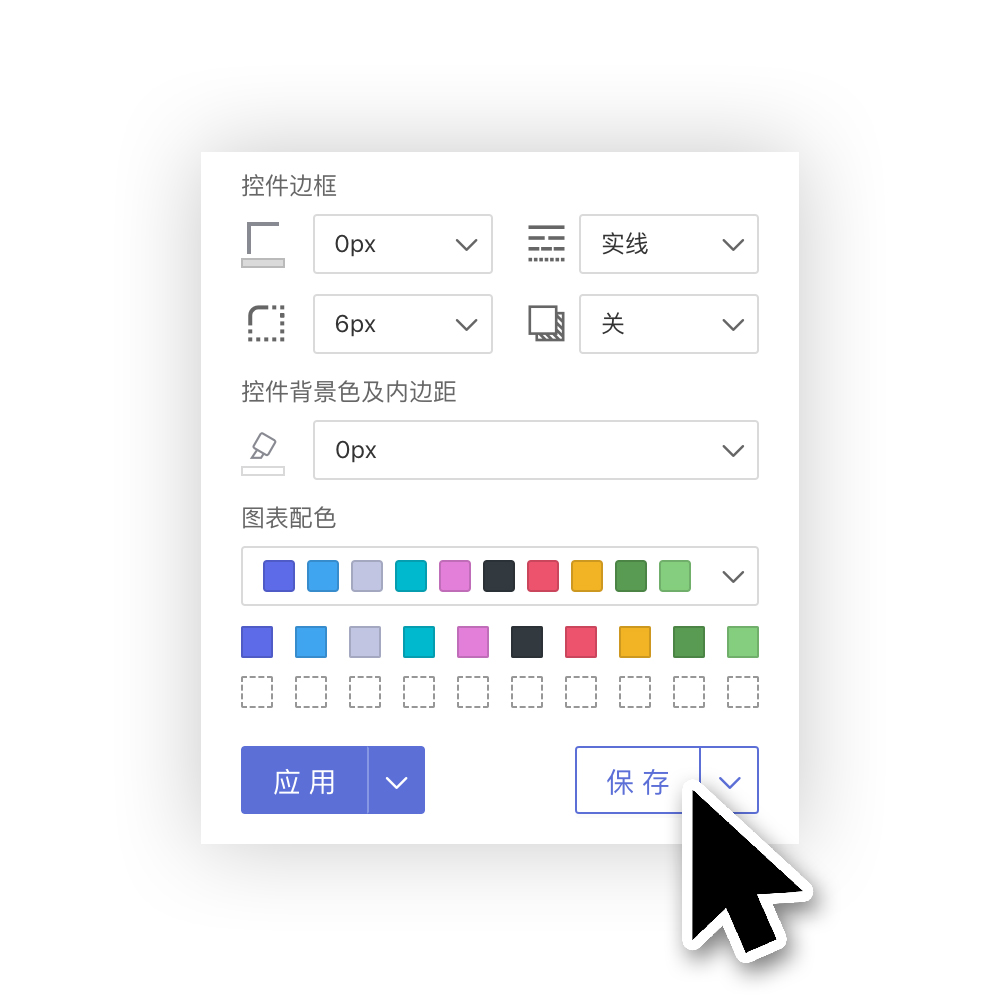
Save Customization to Theme
If we are not satisfied with the customization being applied only to the current dashboard and want to save the customized content to a theme, we can click the save button at the bottom right of the customization panel to save the customized settings to the current theme. (Saving takes effect immediately.) (Built-in system themes cannot be overwritten; they can only be saved as new themes.)
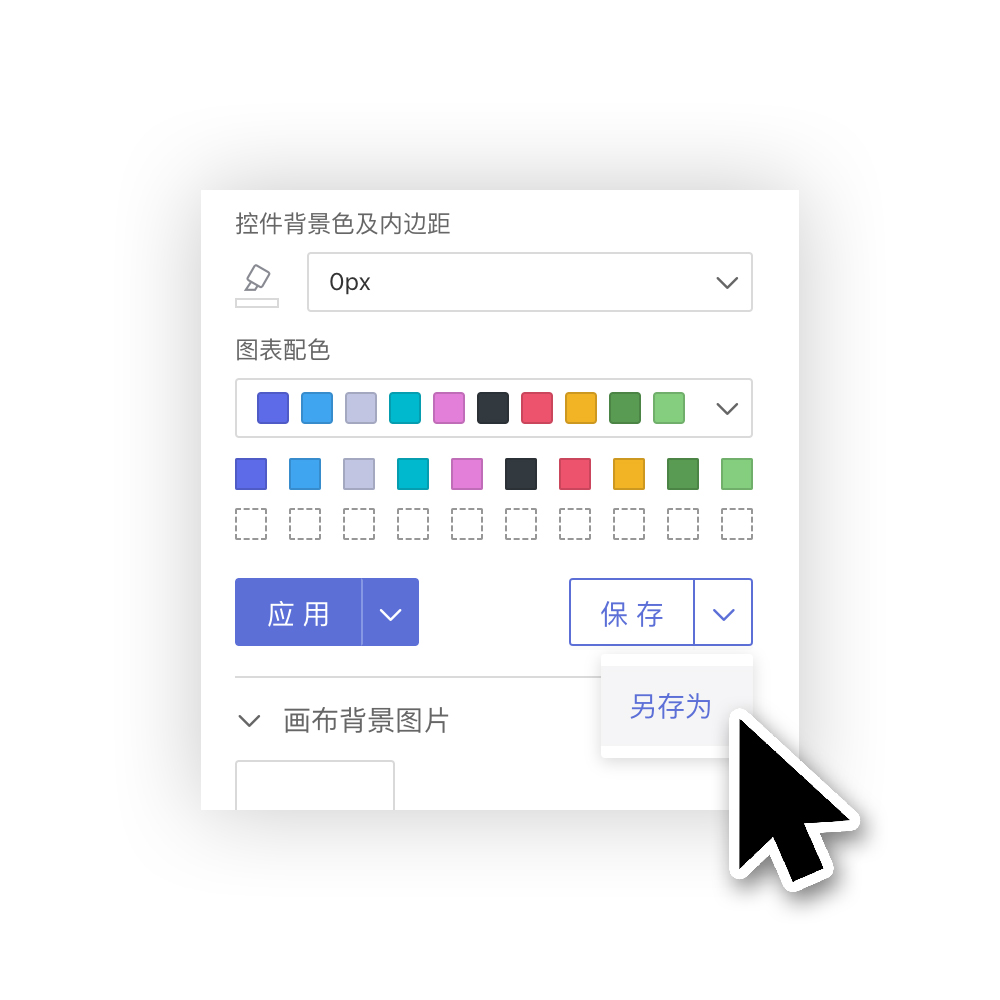
Save Current Theme + Customization as New
We can also click the dropdown arrow to the right of the "Save" button and select "Save Current Theme + Customization" to save it as a new theme.
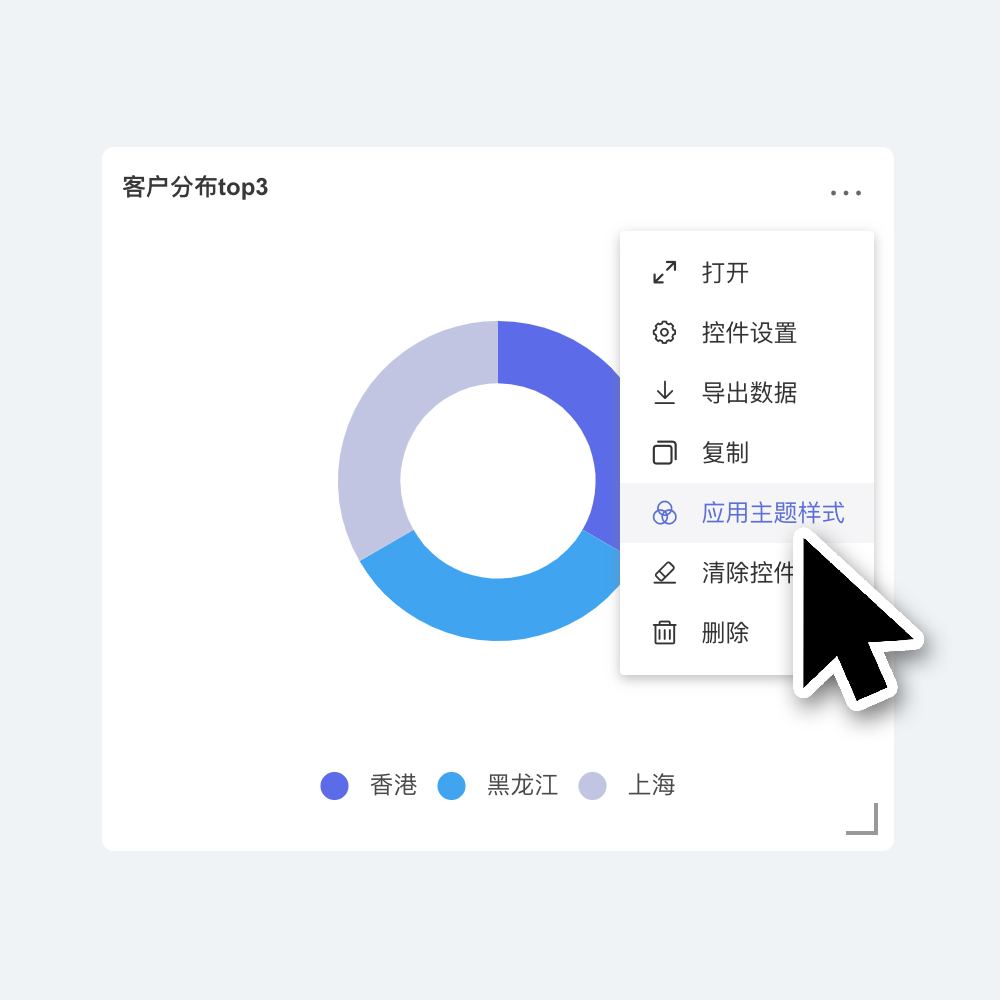
Controls - Apply Theme Style
After users individually set and visually adjust the appearance of a single control, if they want the control's appearance to follow the theme style:
Simply click the three-dot menu at the top right corner of the control, and select "Apply Theme Style" from the dropdown.
The appearance of this control will then follow "Theme + Customization."
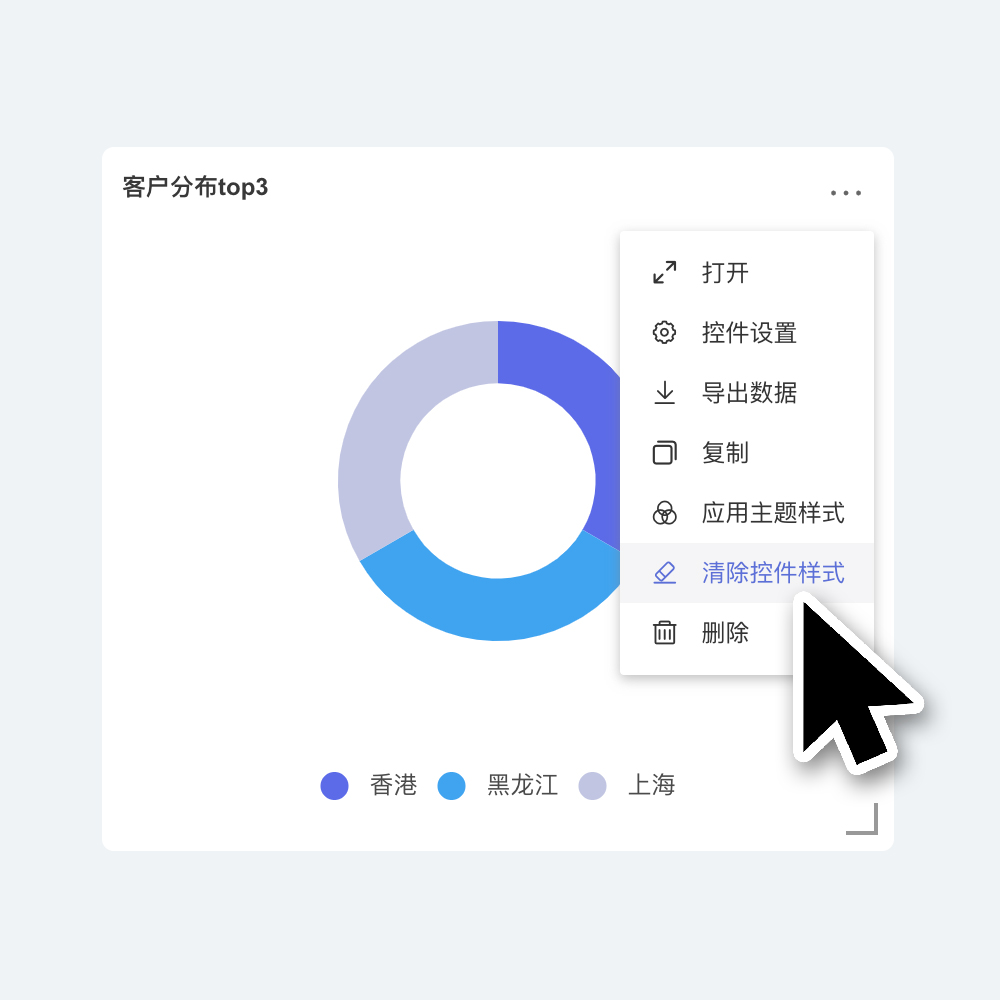
Control - Clear Control Style
Click the three-dot menu at the top right corner of the control, and select "Apply Theme Style" from the dropdown.
The appearance of this control will then follow "Theme + Customization," and any custom settings within the control will be cleared.
This includes adjustments to chart visualization, which will revert to the initial default style.