User Management
The User Management page displays information about all users in the current system. You can add new users, view and edit existing users, enable/disable users, and perform batch operations on users.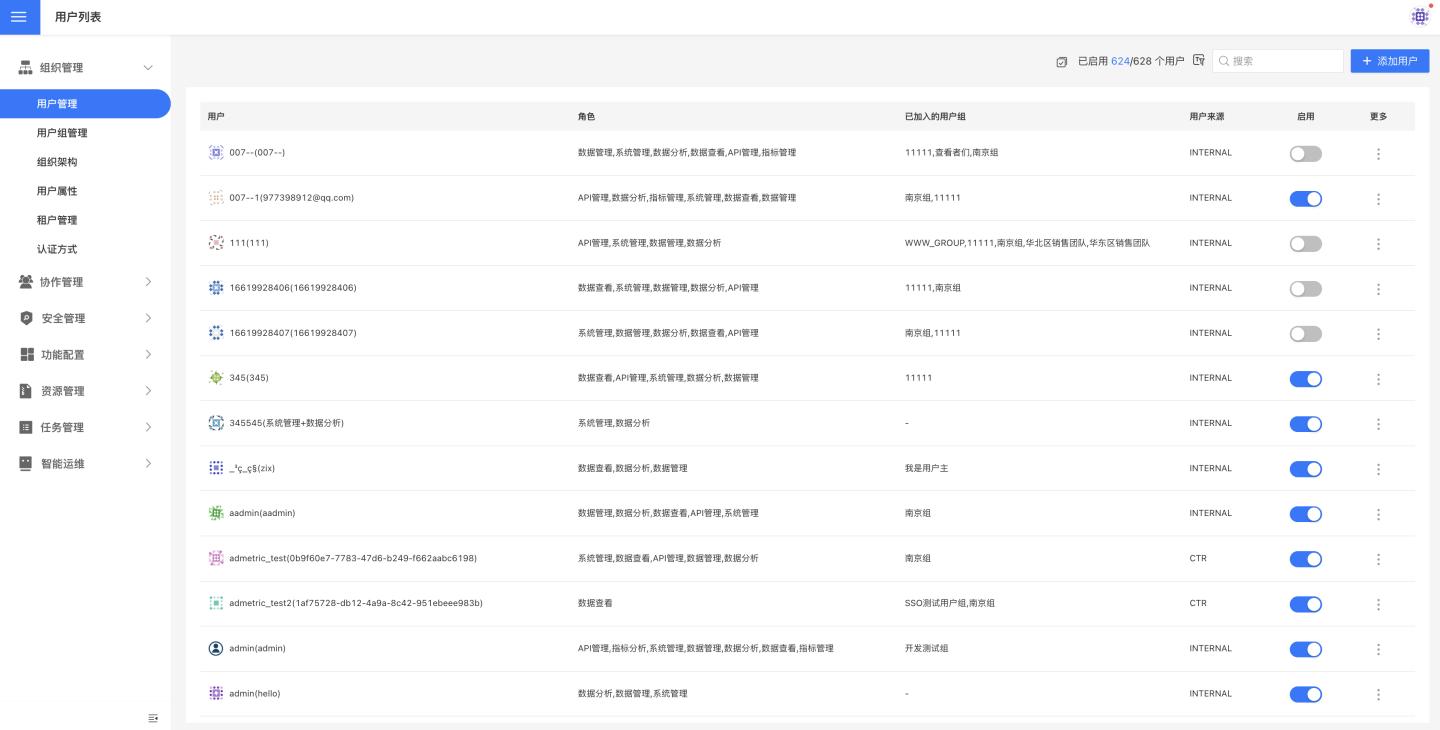
Add User
During system initialization, after creating an administrator, the administrator can manually add new users to the system or integrate users from the organization using other authentication methods.
To manually add a user, click "Add User" in the upper right corner, and fill in the user information in the pop-up window, including username, display name, email, phone number, and role. Click "Confirm" to successfully add the user, who can then log in using the username and the system-configured initial password. 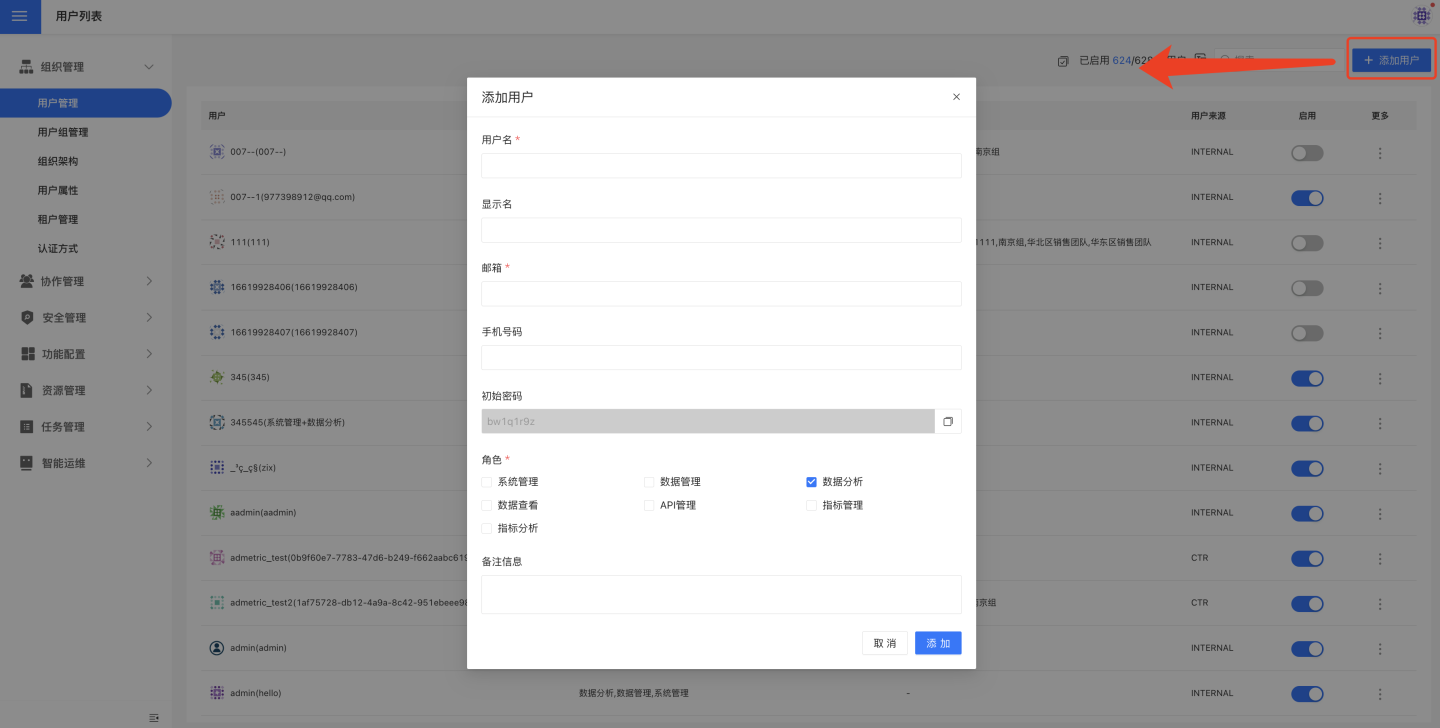
Required information when adding a user:
- Username: The unique identifier for logging into the system. It must not be duplicated, modified, contain special characters, or start with a number.
- Email: The user's unique identifier. A valid email address must be provided, and it cannot be duplicated or modified.
- User Role: Different roles have access to different functional modules within the system.
Note
When creating a user, usernames are case-insensitive. For example, if a user named Alice has already been created, attempting to create a user named alice or AliCE will result in a failure message indicating that a user with the same name already exists.
User Roles
The system includes seven user roles: System Management, Data Management, Data Analysis, Data Viewing, API Management, Metric Management, and Metric Analysis. Each role corresponds to different functional modules within the system. A user can have one or multiple roles. Below is a detailed description of each role's purpose and related functional modules.
| User Role | Role Purpose and Related Functional Modules |
|---|---|
| System Management | This role can view and modify all configuration items in the system settings module, corresponding to the Settings module. |
| Data Management | This role can create, manage, and maintain system-related data information, corresponding to the Connection, Data Mart, and Integration modules. |
| Metric Management | This role is responsible for managing the Data -> Metric Management space, primarily managing business topics and metrics under those topics within the space. |
| Data Analysis | This role performs data exploration, creates and manages applications, including Datasets, Charts, Dashboards, etc., corresponding to the Data Mart, Metric Analysis, Creation, and Applications modules. |
| Data Viewing | This role views applications published by data analysts within the Applications module and can browse charts, export applications, share applications, etc., corresponding to the Applications module. |
| API Management | This role can view and manage the list of APIs available for service (in a published state) within the API Services module. Users can quickly locate APIs using the search and type filter options in the upper-right corner of the page. |
| Metric Management | This role can create and manage business metrics, create and manage topic domains, manage metric lifecycle (online/offline), and authorize topic domains within the Metric Management and Business Metrics modules. Corresponds to the Metric Exploration and Analysis module. |
| Metric Analysis | This role can view authorized topic domains and metrics within the Metric Marketplace and explore and analyze metrics from the marketplace to create analysis dashboards in the Metric Analysis Dashboard. Corresponds to the Metric Exploration and Analysis module. |
In the tenant scenario, the functionality of the same role differs between the platform side and the tenant side, as some features are not available to tenants. Below is a comparison table of user roles' functionalities on the platform side and tenant side in the tenant scenario. 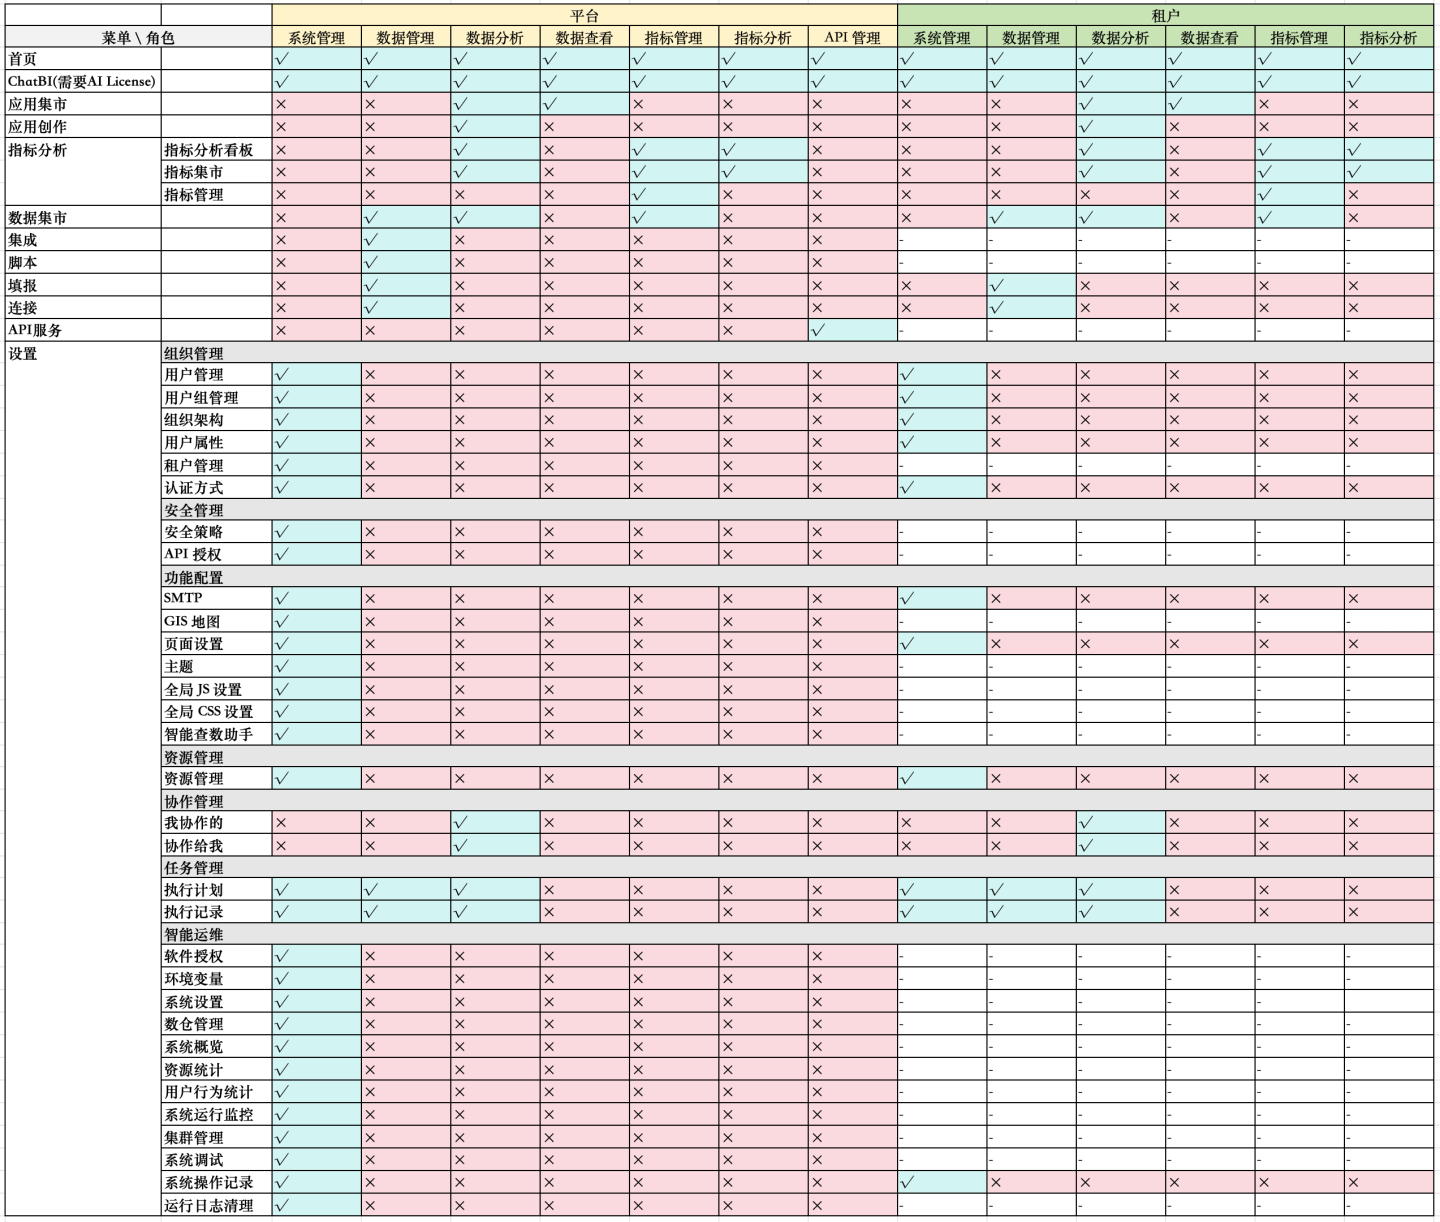
View and Edit Users
After adding users, you can view them on the user management page. If you cannot find a user, you can use the search function or filter conditions to locate the user.

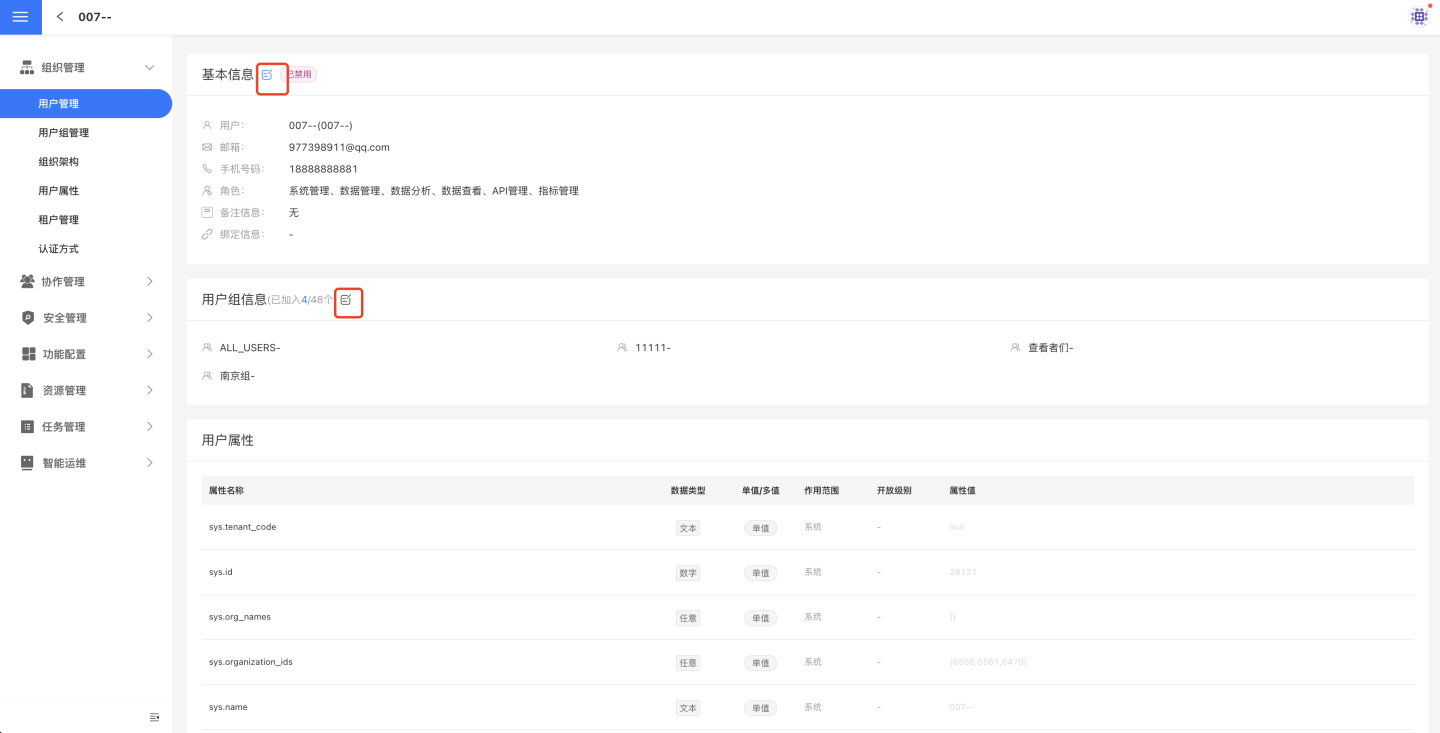
Click on a user to view detailed information, including the user's basic information, user group information, User Attributes, and more. On the detailed information display page, you can edit and modify the user's information.
Delete User
When an employee leaves the company, the system administrator needs to delete the user. Typically, before deleting a user, their resources need to be transferred to other users. On the user management page, locate the user to be deleted, ensure that the user has no available resources, and then click "Delete User" to remove the user.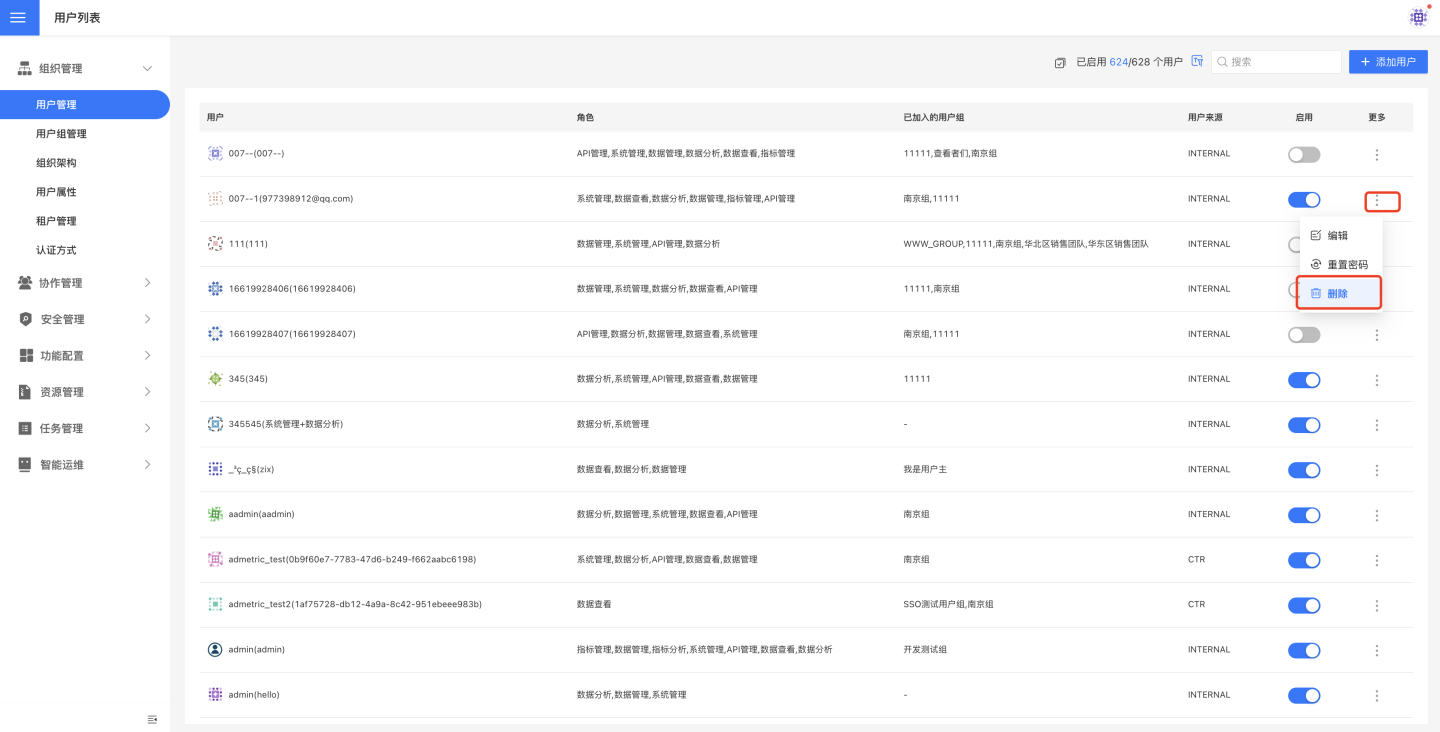
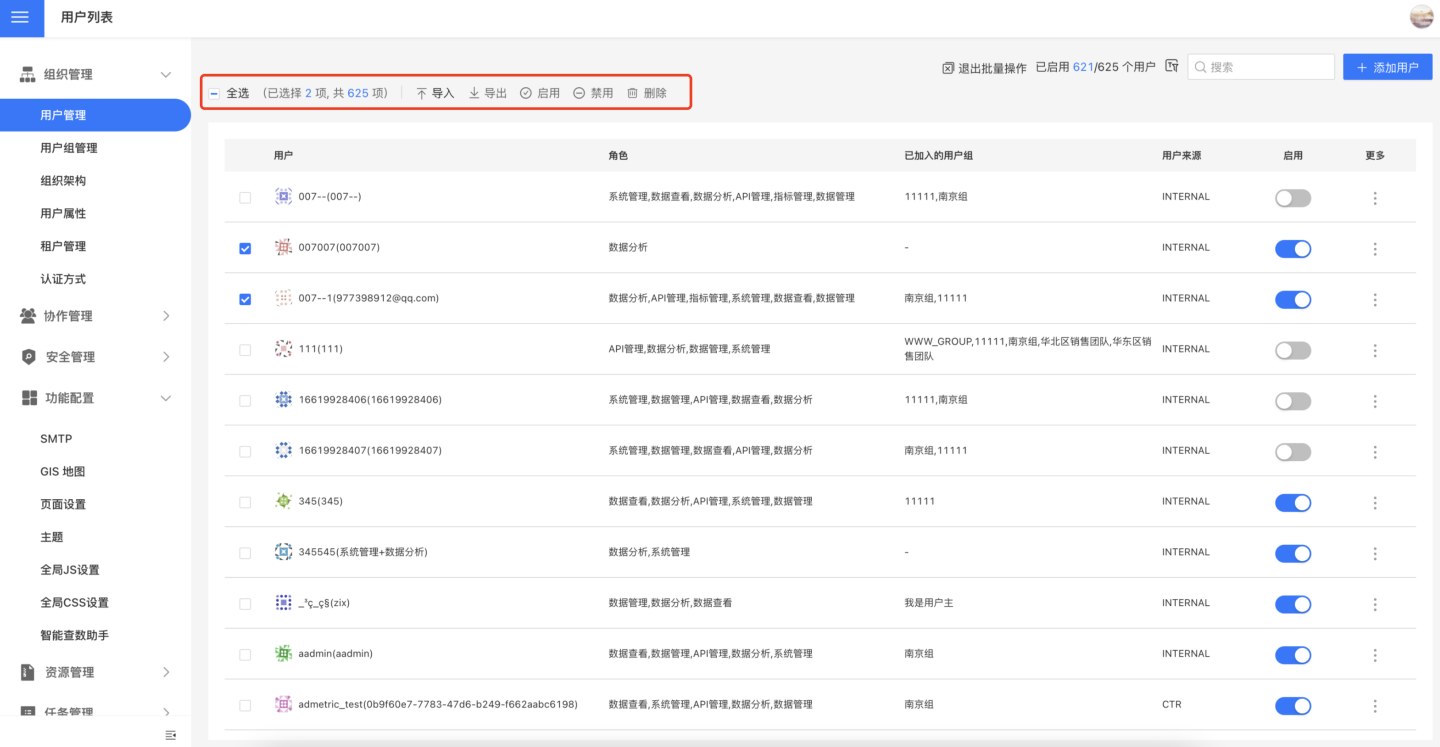
Batch Operations
User management supports batch operations to improve management efficiency. Batch operations include Batch Import, Batch Export, Enable All, Disable All, and Batch Delete.
Batch Import
Click the Batch Import button in the batch operations to add, disable, or modify users by uploading a local CSV file.
When batch importing users, you can set user attributes and add custom attributes for the users.
In the local file for importing users:
- For new users,
loginNameandemailare required. The default password is "hs2019", and the default role is Data Viewer. - For existing users, the required information includes either
loginNameorid, as either one can uniquely identify a user to update their information. If bothloginNameandidare provided but do not match the system'sloginNameorid, an error will occur. - When adding multiple
rolesvalues for a user, separate them with a colon (:). - When adding a user to multiple organizations, separate the organization IDs with a colon (
:).
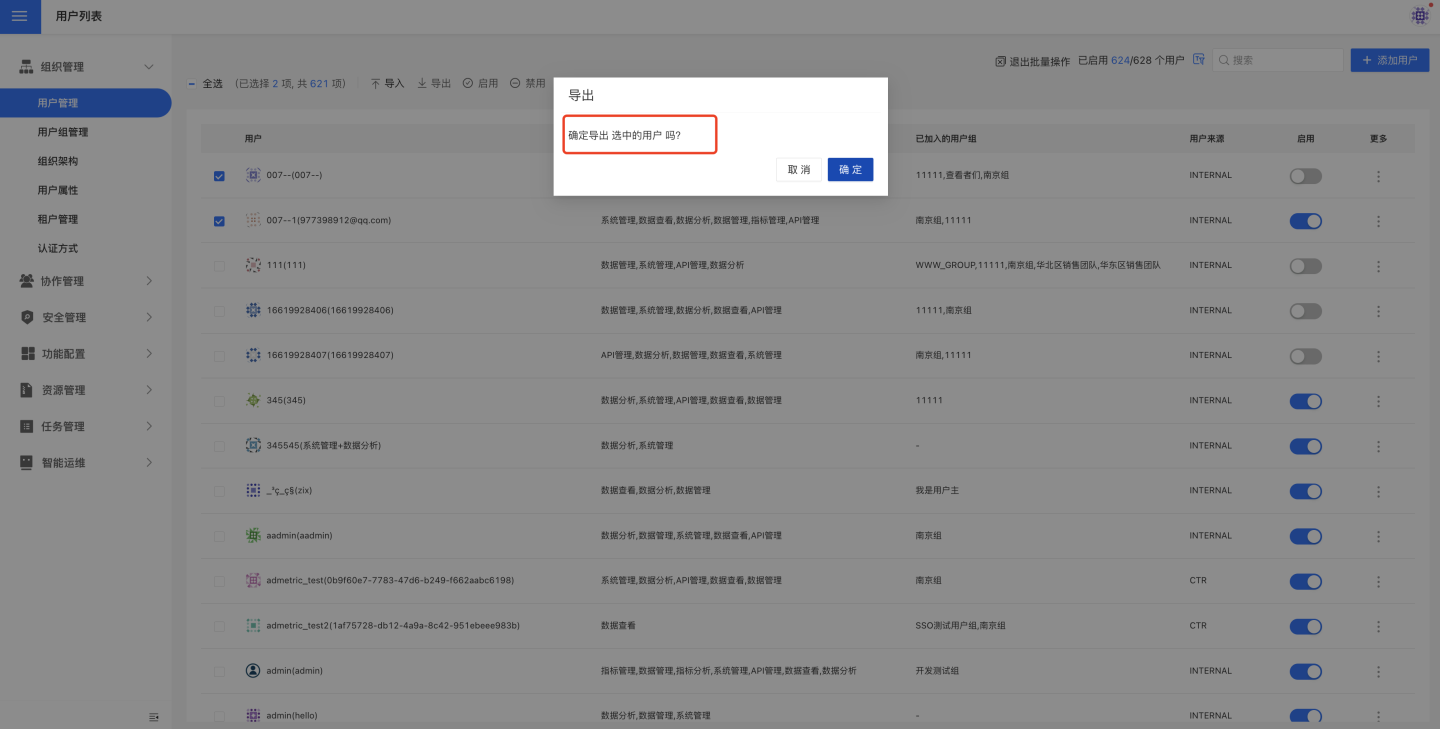
Batch Export
When no filter conditions are added, clicking the Batch Export button in batch operations allows you to export all users within the system. After adding filter conditions, clicking the Batch Export button in batch operations allows you to export all users that meet the filter criteria.
Open the exported file to view all information except for user passwords:
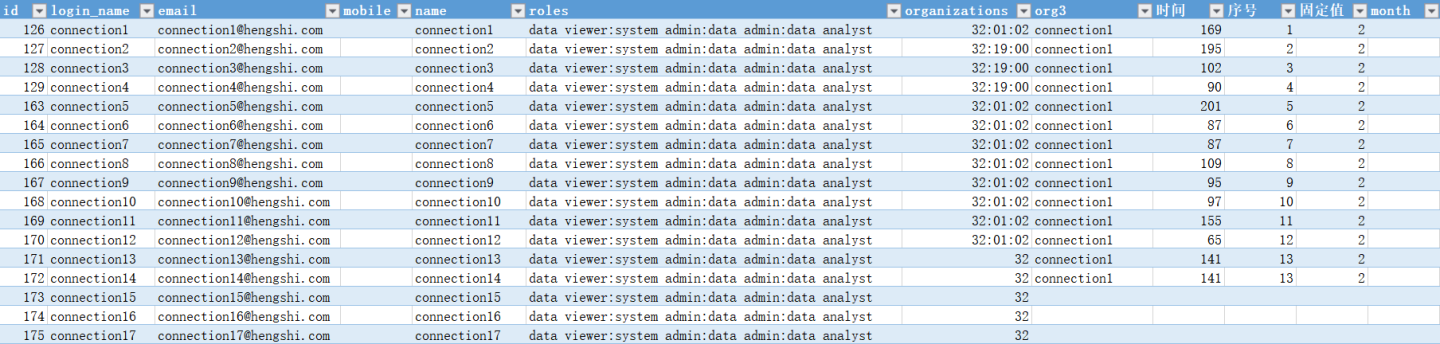
Batch export and batch import are suitable for user migration between systems.
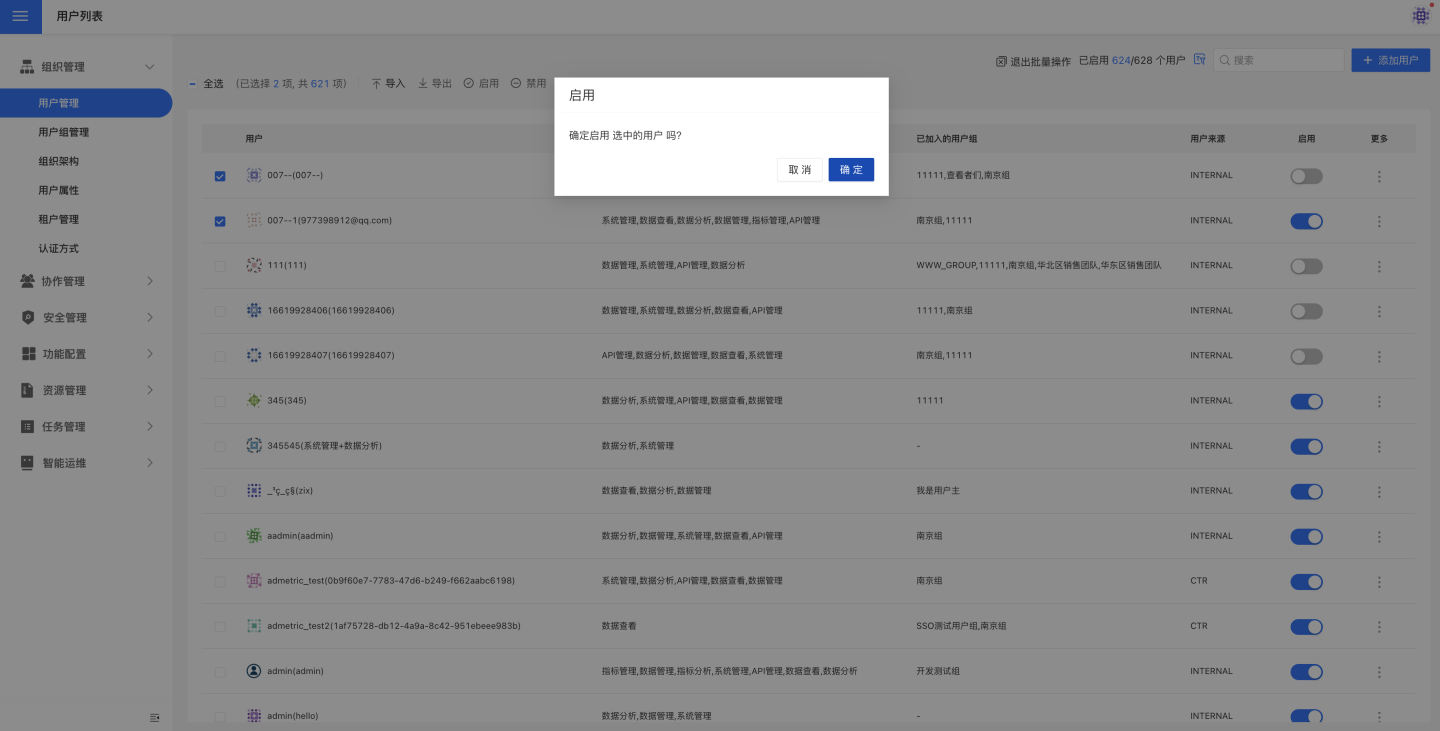
Enable All
When no filter conditions are added, clicking the Enable All button in batch operations will enable all users in the system. After adding filter conditions, clicking the Enable button in batch operations will enable all users currently filtered.
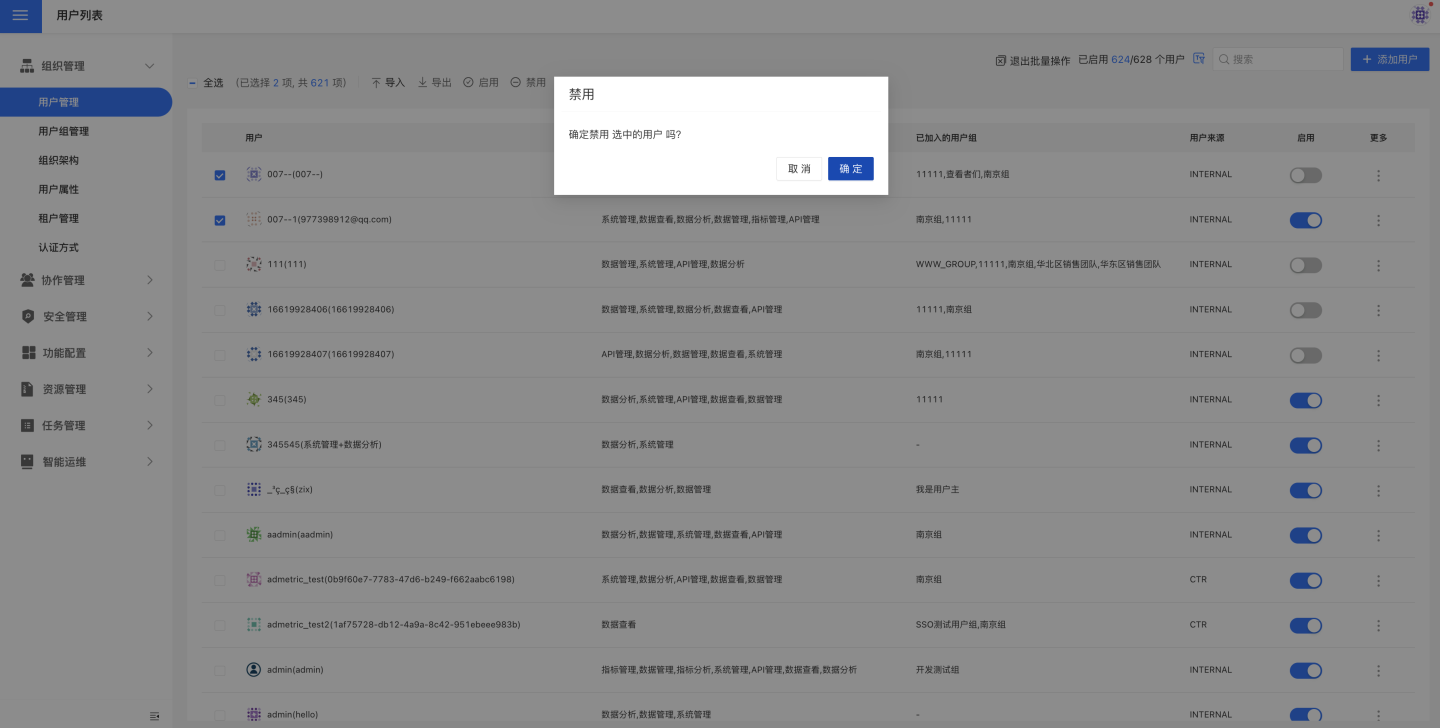
Disable All
When no filter conditions are added, clicking the Disable All button in batch operations will disable all users in the system. After adding filter conditions, clicking the Disable All button in batch operations will disable all users currently filtered.
Bulk Deletion
When some accounts under the batch-deleted users have available resources (such as app resources, dataset resources, etc.), those users will not be successfully deleted. A prompt will display the number of users successfully deleted and the number of users whose deletion failed.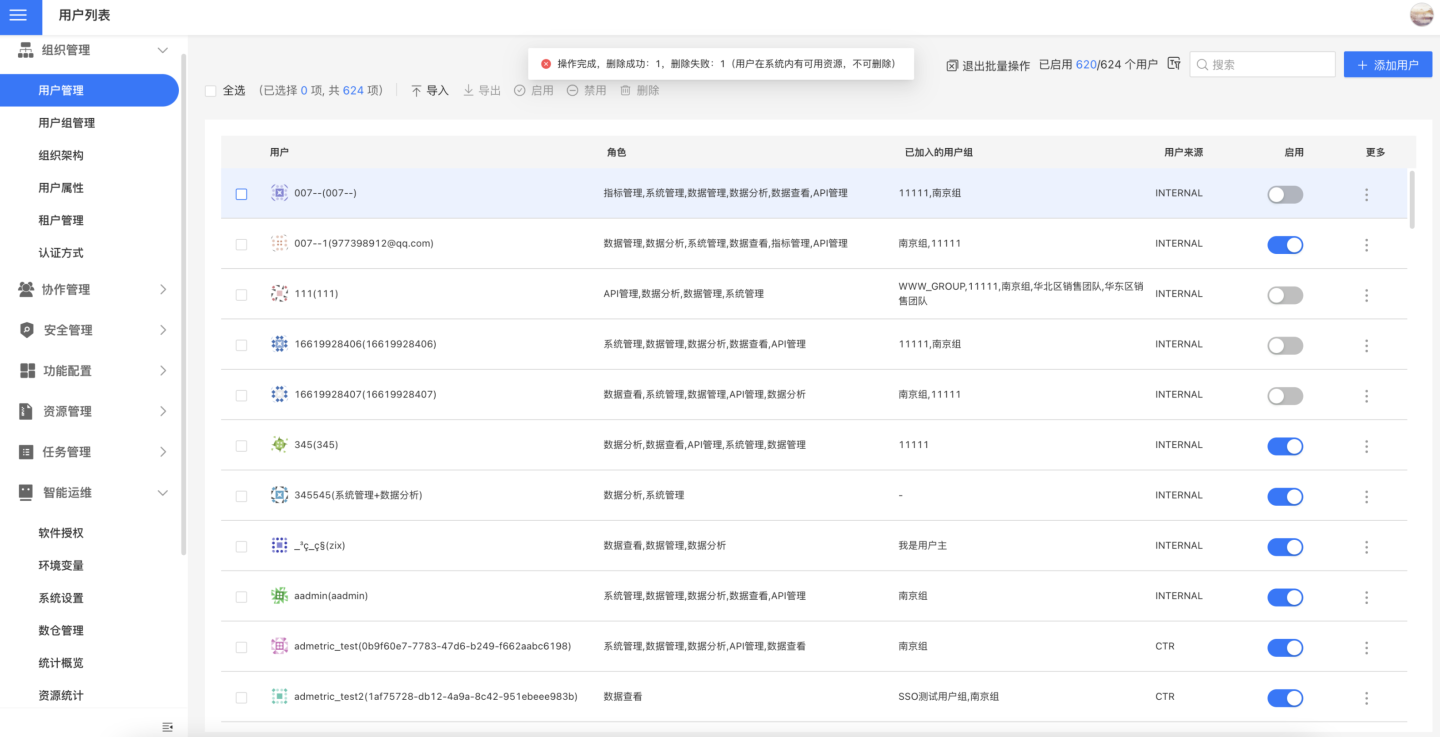
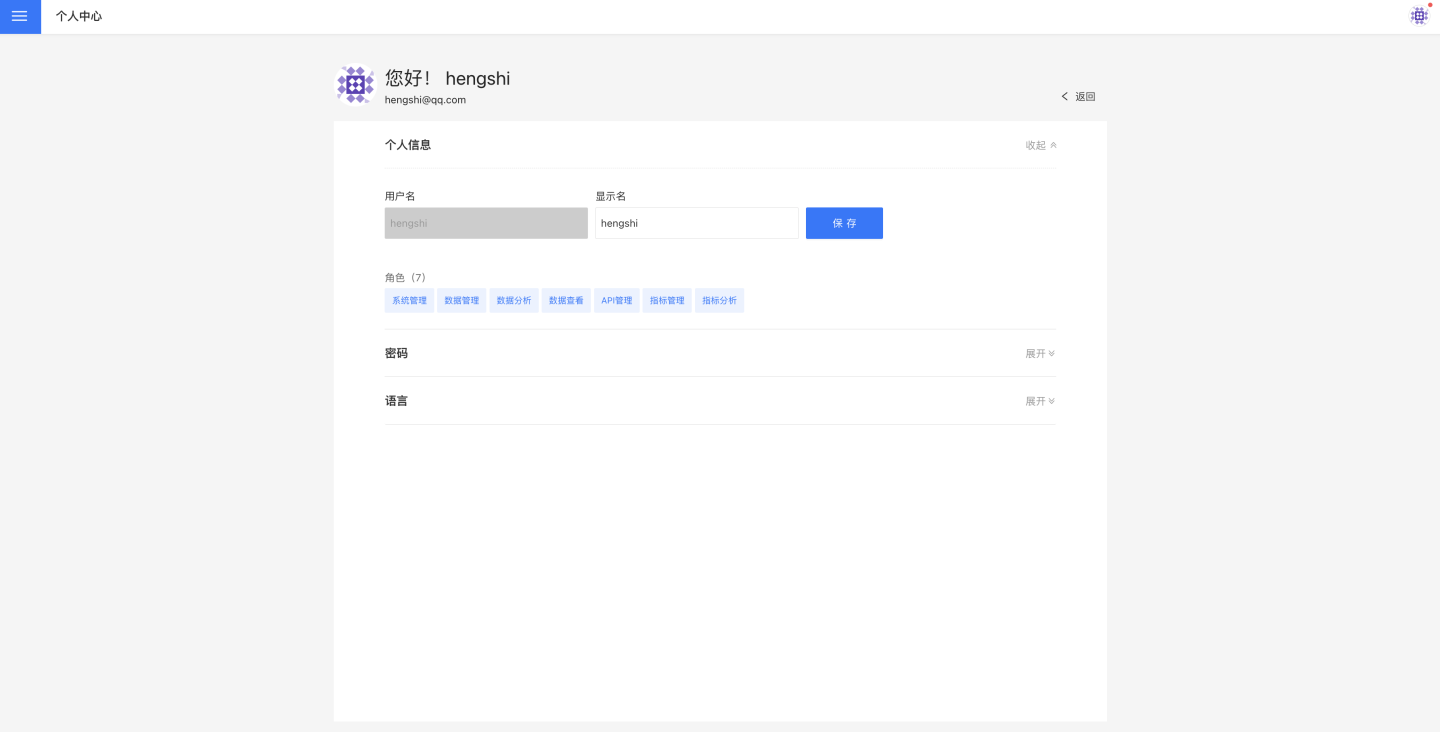
User Account Management
All users can view or modify their personal information by clicking Avatar -> Personal Center in the upper right corner. The items that can be modified include:
- User Avatar
- Display Name
- User Password
- System Language
- Message Center
Actions such as app collaboration, dataset duplication, or user deactivation due to prolonged inactivity will generate system messages. Users can view these messages by clickingAvatar -> Message Centerin the upper right corner.
Password Recovery
There are two ways to recover your password:
- When the system does not have an SMTP account configured, the system administrator can modify the passwords of all other users in the system through the user management page.
- After configuring the SMTP account, HENGSHI users can recover their passwords via the
Forgot Passwordoption on the login page. The password will be sent to the user's login email. Meanwhile, the administrator's ability to modify other users' passwords will be disabled.
Tip
Non-HENGSHI users, i.e., users who log in through authentication methods other than HENGSHI Authorization, cannot recover their passwords within the HENGSHI system.