Batch Synchronization
When users need to migrate data from one database to one or more target databases, they can achieve this by creating projects in batch synchronization.
Main features of batch synchronization:
- Synchronize one or more tables to the specified connection.
- Set data synchronization strategies during the data synchronization process.
- Support manual and scheduled data synchronization.
- Execute multiple projects to complete data synchronization tasks.
Creating a Data Synchronization Workflow
The process for batch data synchronization is as follows: 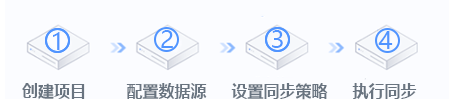
- Create a batch synchronization project.
- Configure the source data connection and the target data connection.
- Configure the synchronization strategy.
- Set the project execution schedule.
Detailed Guide to Batch Synchronization
Create a Batch Sync Project
On the Data Integration -> Batch Sync page, click "New Project" in the upper right corner to create a batch sync project. 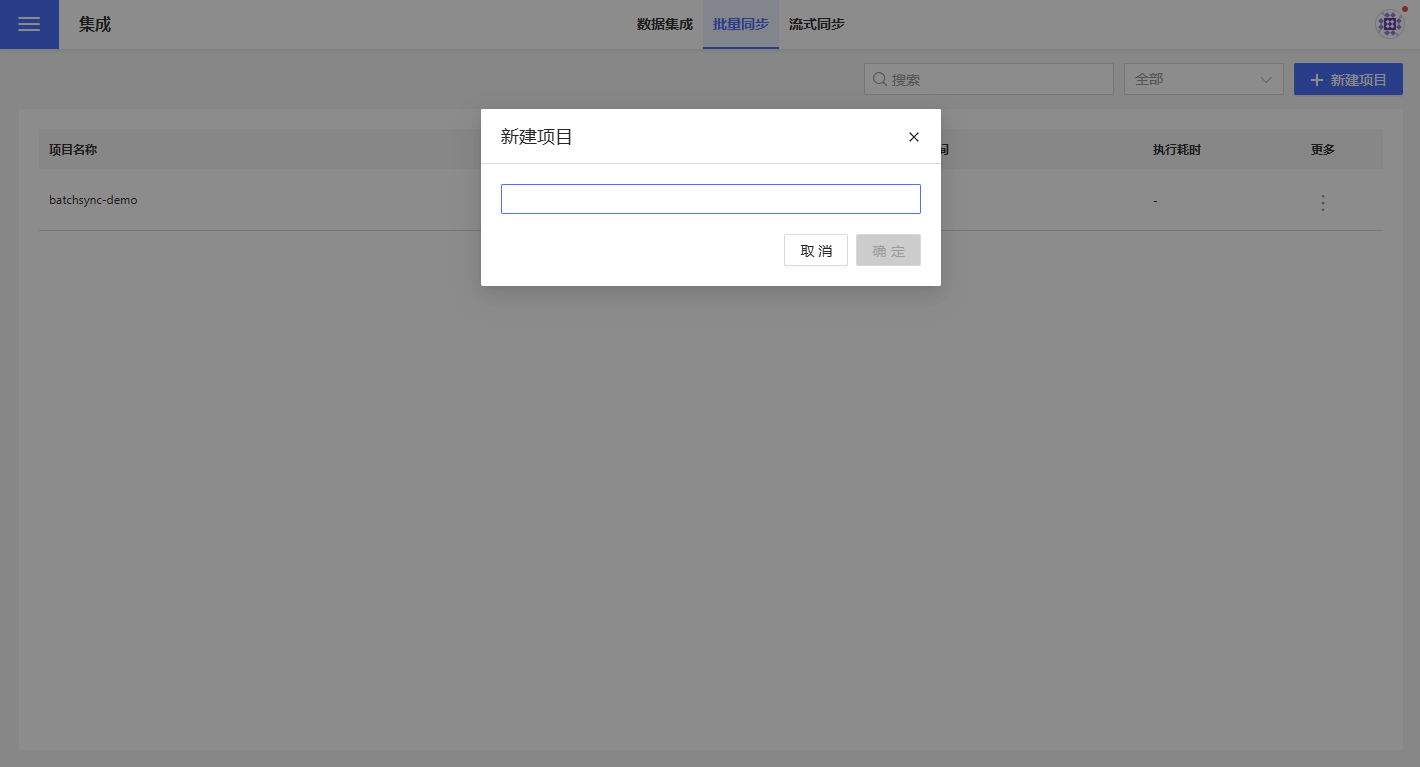
Configure Data Source
On the batch sync project page, set the source data connection (the data connection to be migrated) and the target data connection (the data connection to which the data will be migrated). When creating the target data connection, you need to check Allow Write Operations. If you are not familiar with the concept of data connections, please read Data Connection first. 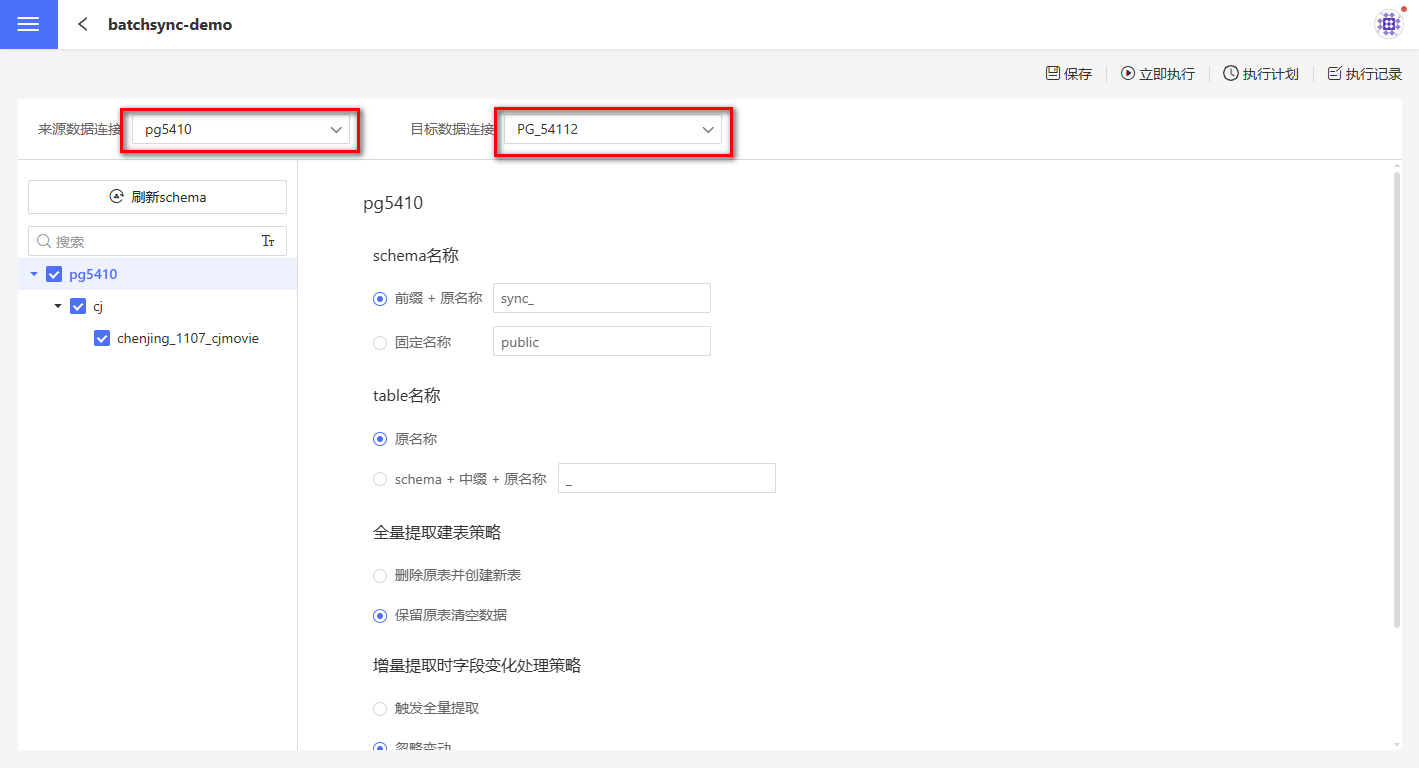
Configure Data Synchronization Strategy
Batch synchronization supports setting synchronization strategies for connections, schemas, and tables separately.
Configure Connection Synchronization Policy
The connection synchronization policy applies to all directories and tables under the connection. The connection synchronization policy includes:
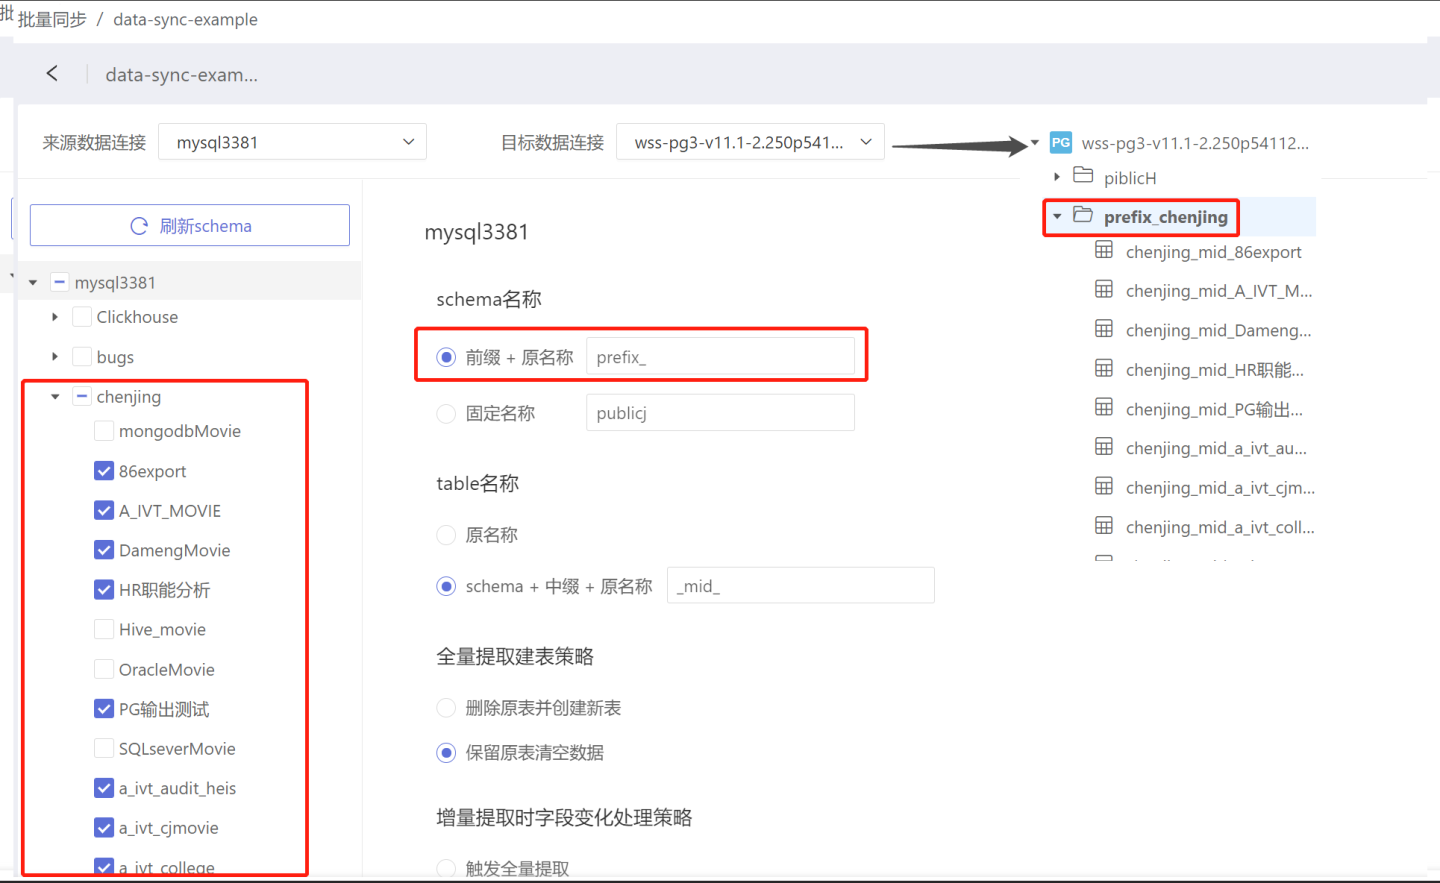
- Schema Name: The schema name setting for tables after data synchronization.
- Prefix + Original Name: After data synchronization, the directory name where the table is stored will be "prefix" + "original name". As shown in the figure, when the prefix is set to "prefix_", before synchronization, the table 86export is stored in the directory chenjing. After synchronization, the table 86export is stored in the directory named "prefix_chenjing". The prefix has no default value and needs to be filled in as required.
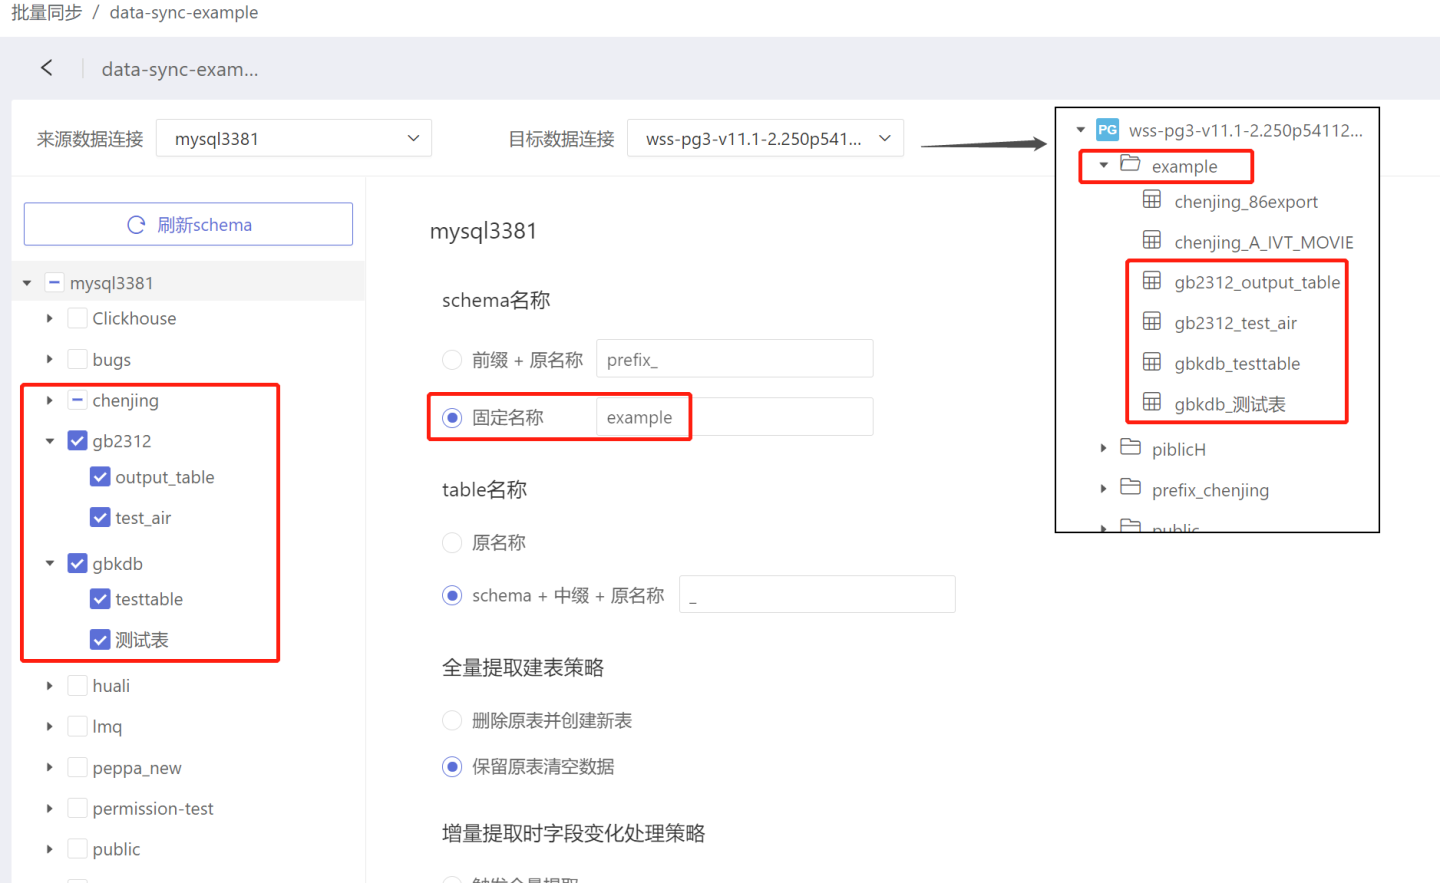
- Fixed Name: After data synchronization, all tables are stored in the same directory. As shown in the figure, tables in the directories chenjing, gb1312, and gbkdb are all stored in example. The fixed name has no default value and needs to be filled in as required.
- Prefix + Original Name: After data synchronization, the directory name where the table is stored will be "prefix" + "original name". As shown in the figure, when the prefix is set to "prefix_", before synchronization, the table 86export is stored in the directory chenjing. After synchronization, the table 86export is stored in the directory named "prefix_chenjing". The prefix has no default value and needs to be filled in as required.
- Table Name: The naming rule for tables after synchronization.
- Original Name: The table name remains unchanged after data synchronization.
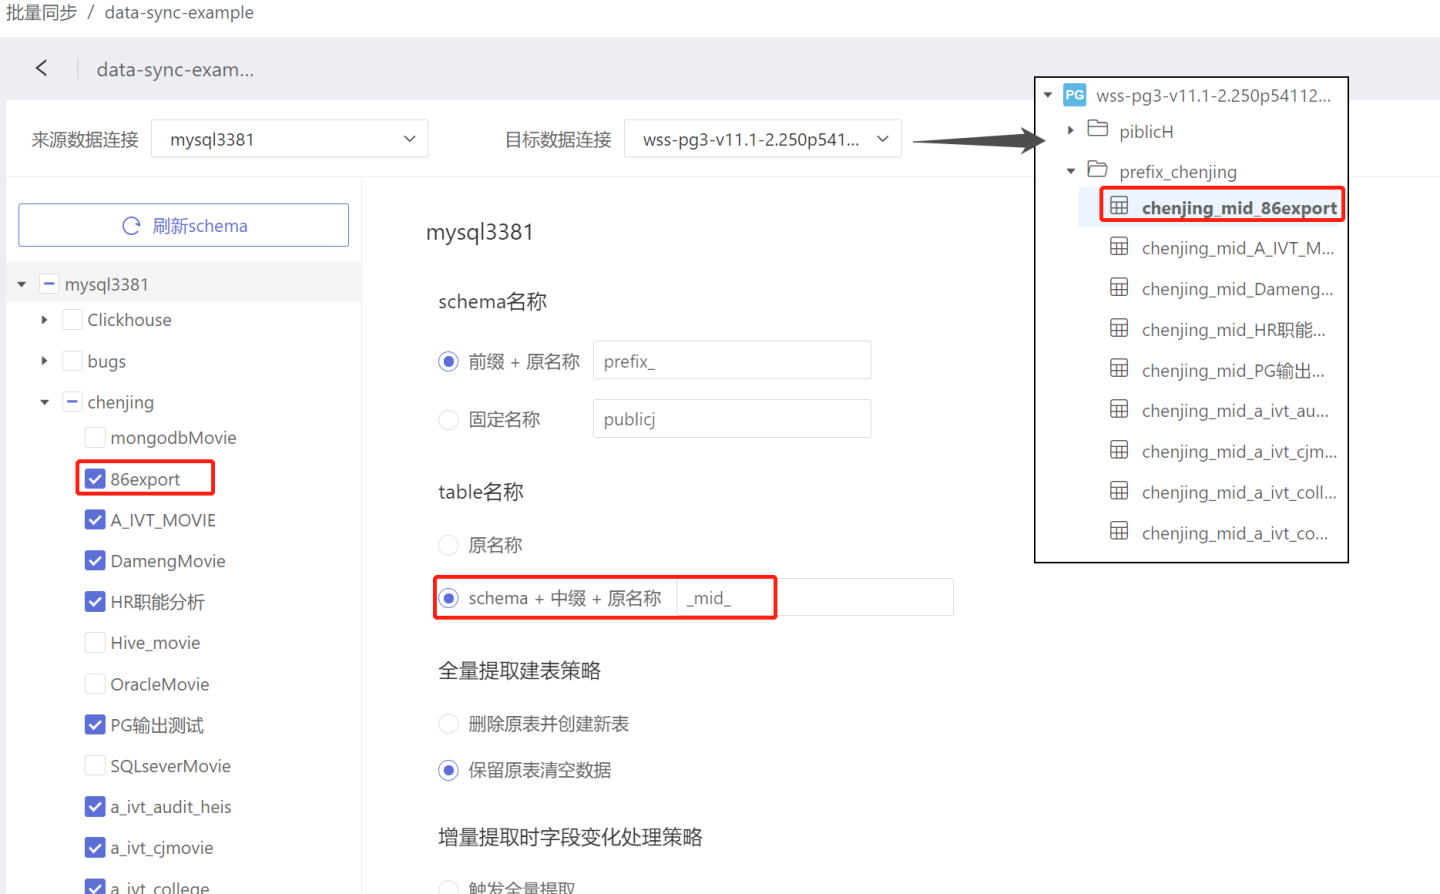
- Schema + Infix + Original Name: After data synchronization, the table name becomes "schema" + "infix" + "original name". As shown in the figure, when the infix is set to "mid", the table 86export is renamed to chenjing_mid_86export after synchronization. The infix has no default value and needs to be filled in as required.
- Full Extraction Table Creation Policy: By default, tables are fully extracted unless specifically set to incremental extraction at the table level with corresponding settings. When full extraction is selected, the following two methods are supported:
- Delete Original Table and Create New Table: The original table is deleted, a new table is created, and data is synchronized.
- Retain Original Table and Clear Data: The original table is not deleted, only the data is cleared, and then data is synchronized. If the new data has more fields, they will be added to the target table. If the new data has fewer fields, the corresponding fields in the target table will use the default value set during table creation, usually null.
- Field Change Handling Policy for Incremental Extraction: By default, tables are fully extracted unless specifically set to incremental extraction at the table level with corresponding settings. When incremental extraction is selected, if the table fields change, you can choose one of the following handling strategies:
- Trigger Full Extraction: The table will be extracted in full and the original table will be deleted.
- Ignore Changes: Ignore the changed fields and extract the table incrementally as before. New fields in the new data will be added to the target table, but old data for these fields will not be synchronized and will be null. If the new data has fewer fields, the old data in the corresponding fields of the target table will not change, and the field in newly inserted records will use the default value set during table creation, usually null.
- Ignore Newly Added Tables: When this option is checked, newly added tables in the source data connection will not be synchronized.
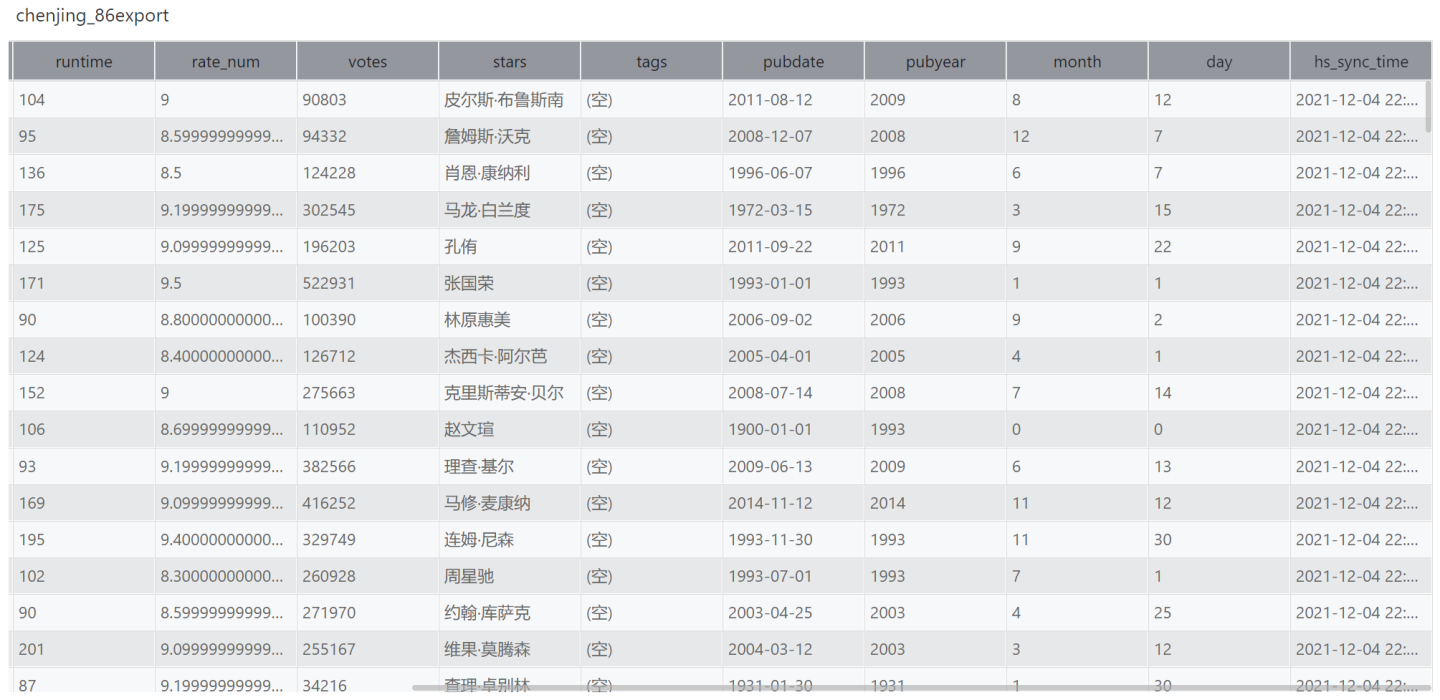
- Add an Extra Update Time Column for Each Table: When this option is selected, during data synchronization, an additional hs_sync_time column will be added besides the original data columns to record the timestamp when each row of data is synchronized.
Configure Schema Synchronization Policy
Configuring the schema synchronization policy only applies to the current schema. Currently, only the "Ignore newly added tables" option is supported. The previously set "Ignore newly added tables" applies to the entire connection, while this setting is for an individual schema and takes precedence over the global setting.
Table Synchronization Policy
The table synchronization policy only applies to the current table configuration. The table synchronization policy includes:
- Extraction Method
- Full Extraction: Each extraction retrieves all data in full.
- Incremental Extraction:
Incremental Extractionrequires selecting anIncremental Key. During extraction, only data with incremental field values greater than the current maximum value of that field in the imported data will be extracted. The incremental field must be monotonically increasing. If multiple incremental fields are selected, they are combined in the order added to form a multi-field combination, which must also be monotonically increasing. For example, a combination of year-month-day fields; using unrelated fields cannot form a valid incremental key combination. The maximum value of the incremental field is obtained from the target table. After setting the incremental field, the first execution will still be a full extraction, as there is no maximum value record in the target table initially. The incremental key is used when reading data, and it is recommended to create corresponding indexes on the source table to improve performance.
- Key Fields: Set key fields to serve as primary keys and distribution keys. Key fields are used during data writing and serve two purposes:
- Used as primary keys for deduplication during incremental updates.
- Used as primary keys and distribution keys when creating tables. If table creation properties are set, the key field settings will not take effect.
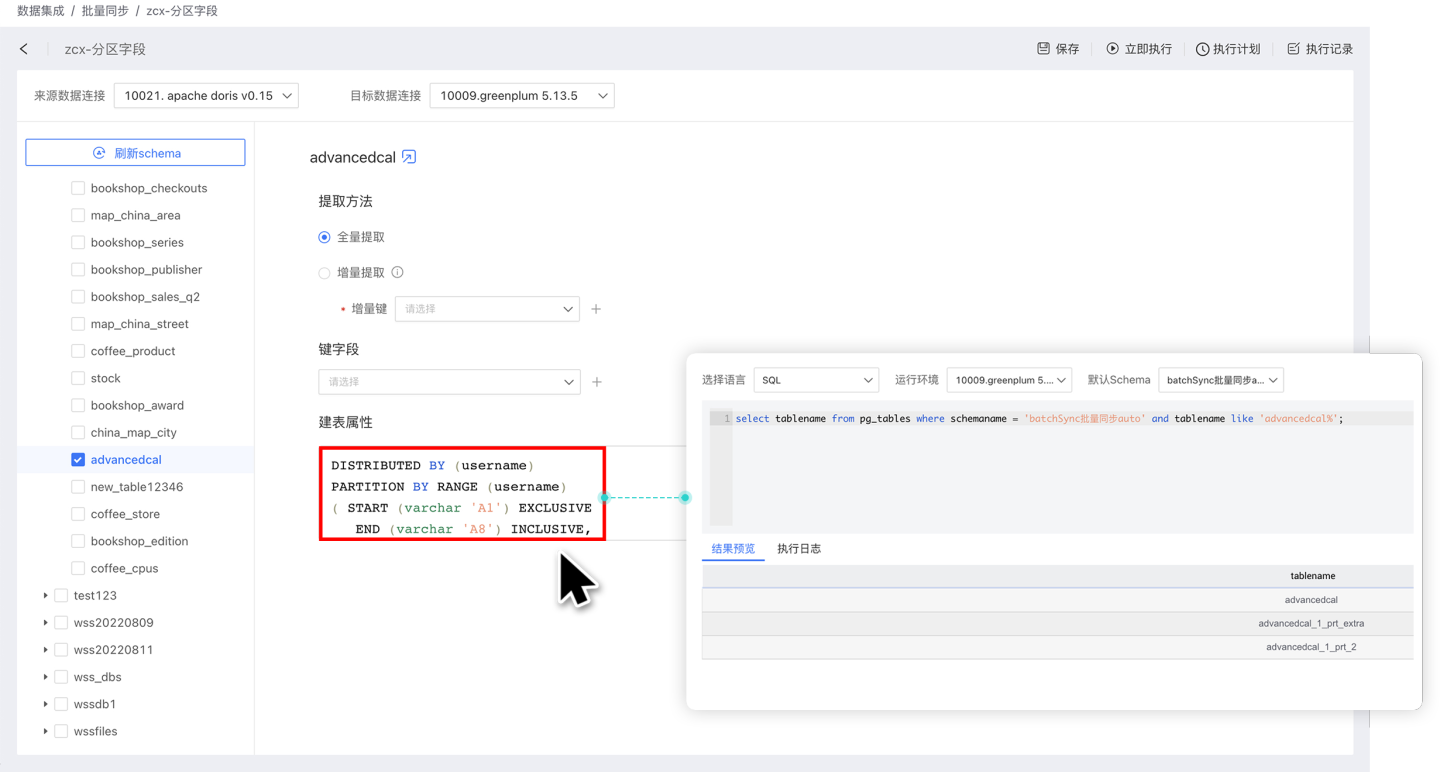
- Table Creation Properties: During the data synchronization table creation process, you can customize partition fields and index fields to distribute data storage. Table creation properties only take effect during the initial table creation. Currently, supported data sources for table creation properties include Greenplum, Apache Doris, StarRocks, and ClickHouse.
Configuration Save
After configuring the settings, you need to click the Save button to save them to the system; otherwise, the settings will be lost when you leave the page. If you click Execute before saving, the execution will be based on the current configuration, but the configuration itself will not be saved and must be saved manually. 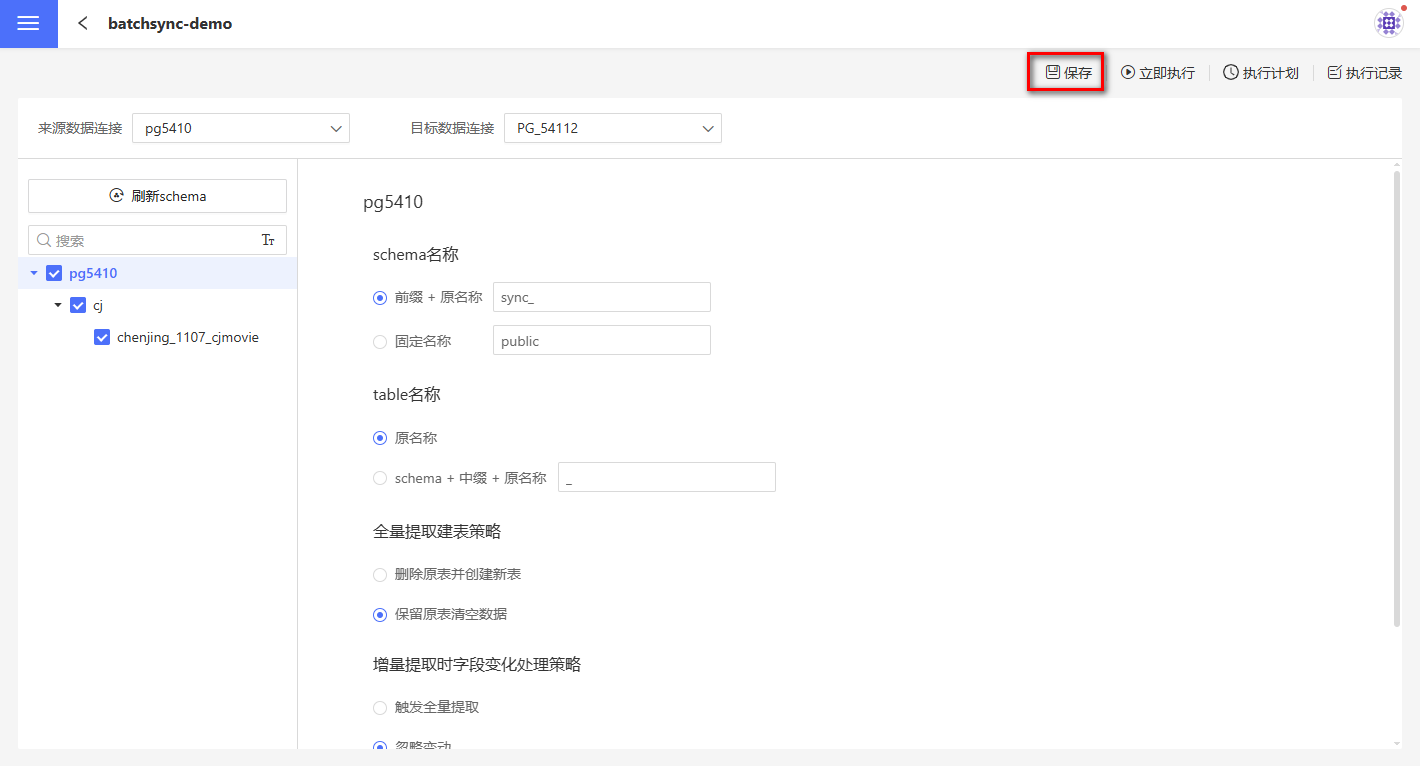
Batch Data Synchronization
When the amount of extracted data is large, the data import time may exceed the query timeout of the source database, resulting in data extraction failure. In this case, you can set the maximum limit for a single data extraction by configuring ETL_SRC_MYSQL_PAGE_SIZE (MySQL) or ENGINE_IMPORT_FROM_PG_BATCH_FETCH_SIZE (PostgreSQL). When the data exceeds this limit, it will be extracted in batches. Currently, only MySQL and PostgreSQL data sources support batch extraction.
Tip
Please contact technical personnel to configure ETL_SRC_MYSQL_PAGE_SIZE or ENGINE_IMPORT_FROM_PG_BATCH_FETCH_SIZE.
Execute Synchronization Operations
Data synchronization can be performed either immediately or according to a scheduled execution plan.
Immediate Execution: This refers to manually executing the data synchronization operation. Click the Execute Now button to start synchronizing data.
Execution Plan: This refers to setting up a synchronization schedule, where the system triggers the data synchronization operation. Click the execution plan button in the upper right corner to enter the execution plan settings page, where you can configure the basic information, scheduling information, and alert information for the plan.
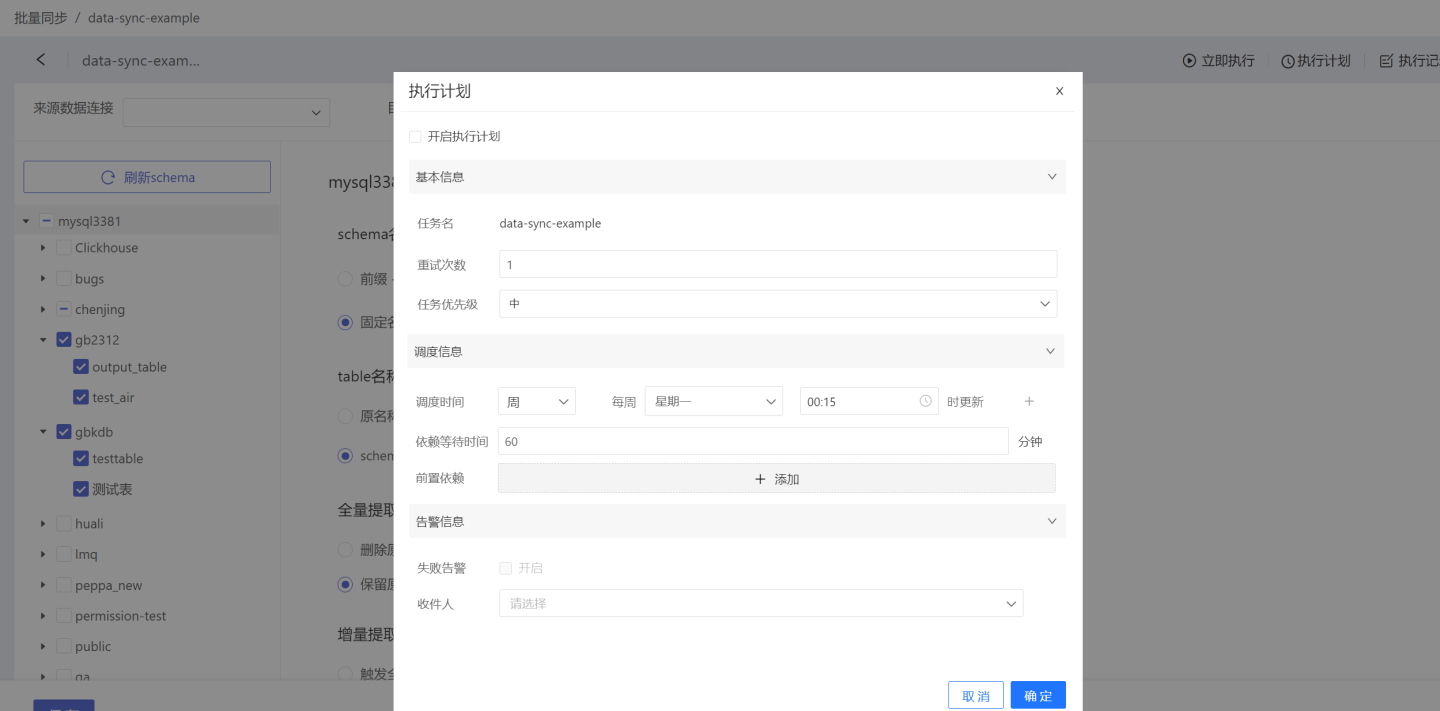
- Basic Information: Set the number of retry attempts and the priority of the task. Task priority is divided into three levels: high, medium, and low. Tasks with higher priority are processed first.
- Scheduling Information:
- Set the scheduling time for the task; multiple schedules can be configured. Execution plans can be set by hour, day, week, or month.
- Hour: You can set which minute of each hour to update.
- Day: You can set the specific time of day to update.
- Week: You can set the specific time on selected days of the week to update; multiple selections are supported.
- Month: You can set the specific day(s) of the month to update; multiple selections are supported.
- Custom: You can set custom update times.
- Set task dependencies; multiple dependencies can be configured.
- Set dependency wait time.
- Set the scheduling time for the task; multiple schedules can be configured. Execution plans can be set by hour, day, week, or month.
- Alert Information: Enable failure alerts. When a task fails to execute, an email notification will be sent to the recipient.
Tip
Each time data synchronization is executed, whether successful or failed, it will be recorded in the Execution Records.
FAQ
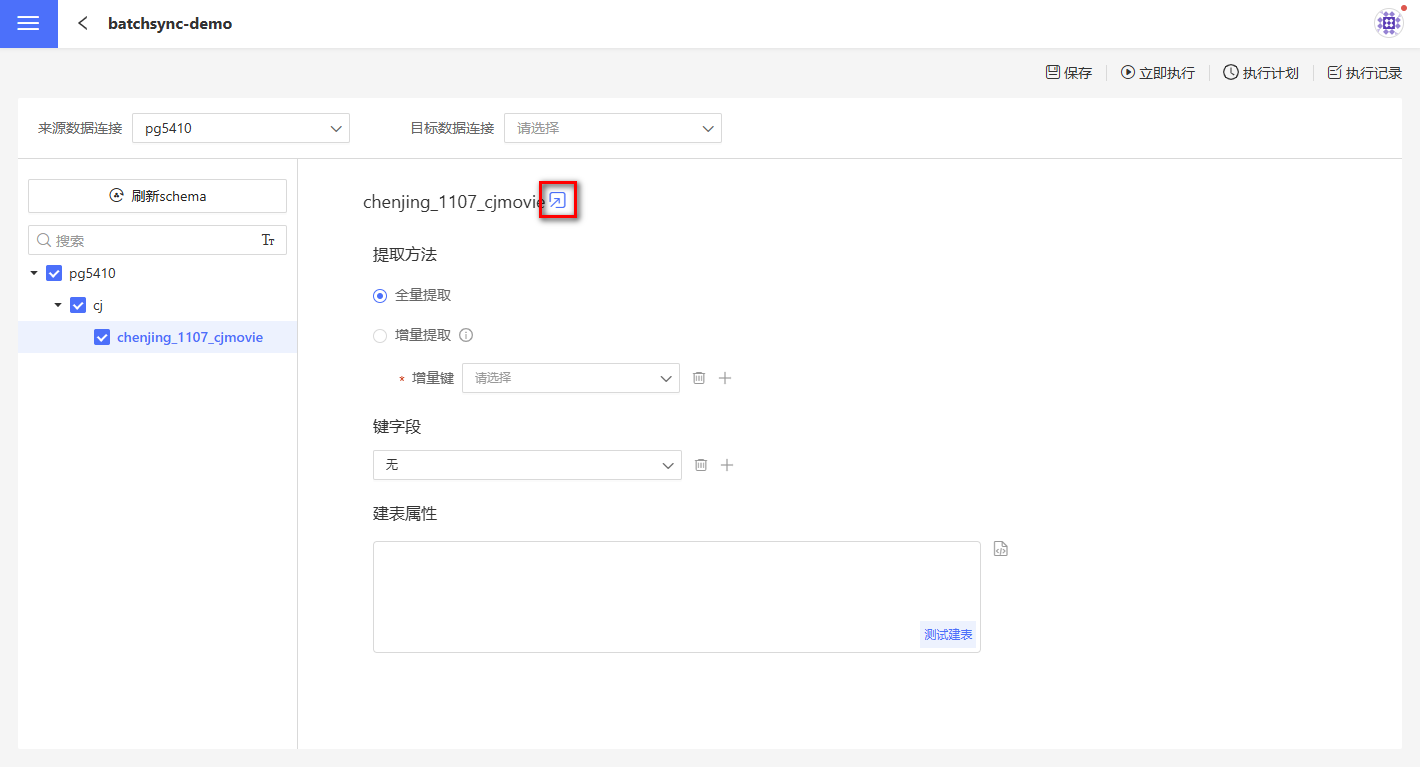
- Quick Single Table Sync
Data integration supports quick single table synchronization. When performing a full extraction of a small number of tables, after setting the target data connection, locate the corresponding table and click the icon to complete the table synchronization.