Feishu Data Q&A Bot Configuration
Prerequisites
You need to configure the Feishu authentication method in the HENGSHI system. For detailed steps, refer to the Authentication Methods section regarding Feishu. Complete this configuration first before proceeding with the following steps.
Create a Bot App in Feishu
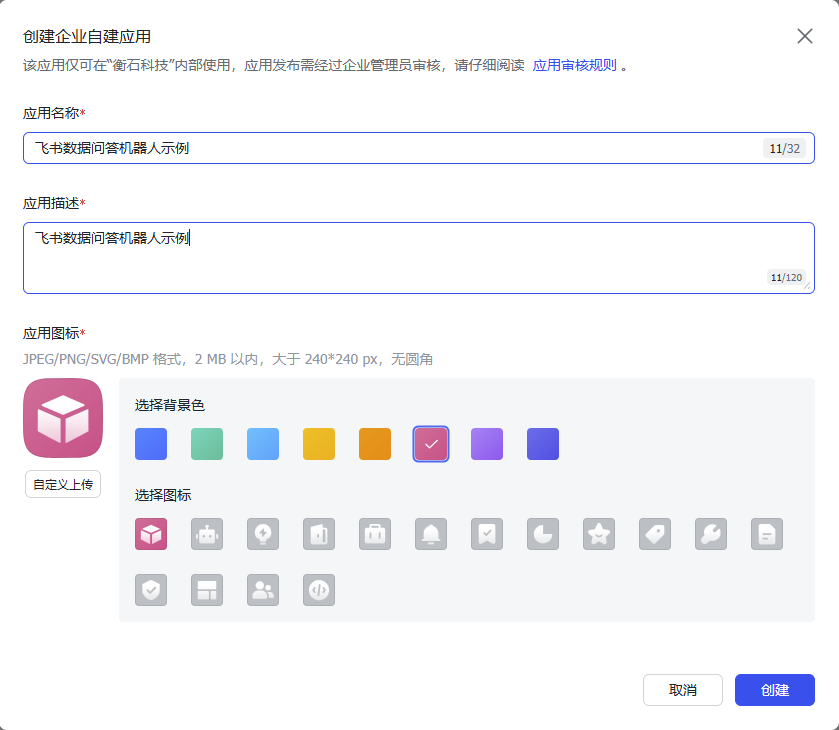
1. Create a Feishu App
Create an app in the Feishu Enterprise Self-Built App Management, set the logo, name, description, and other information, then click "Create" to complete the creation.
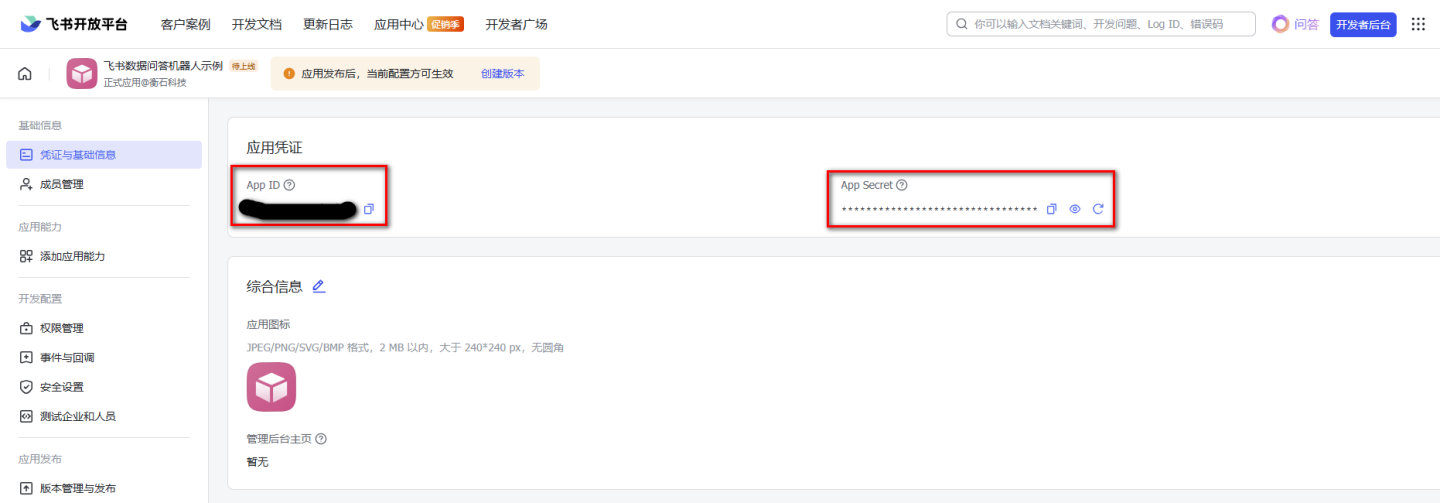
2. Obtain Feishu App ID, App Secret, and Other Information
On the settings page of the newly created Feishu application, under the "Credentials and Basic Information" section, copy the App ID and App Secret information and save them. These will be needed later when configuring the Q&A chatbot in the HENGSHI SENSE system.
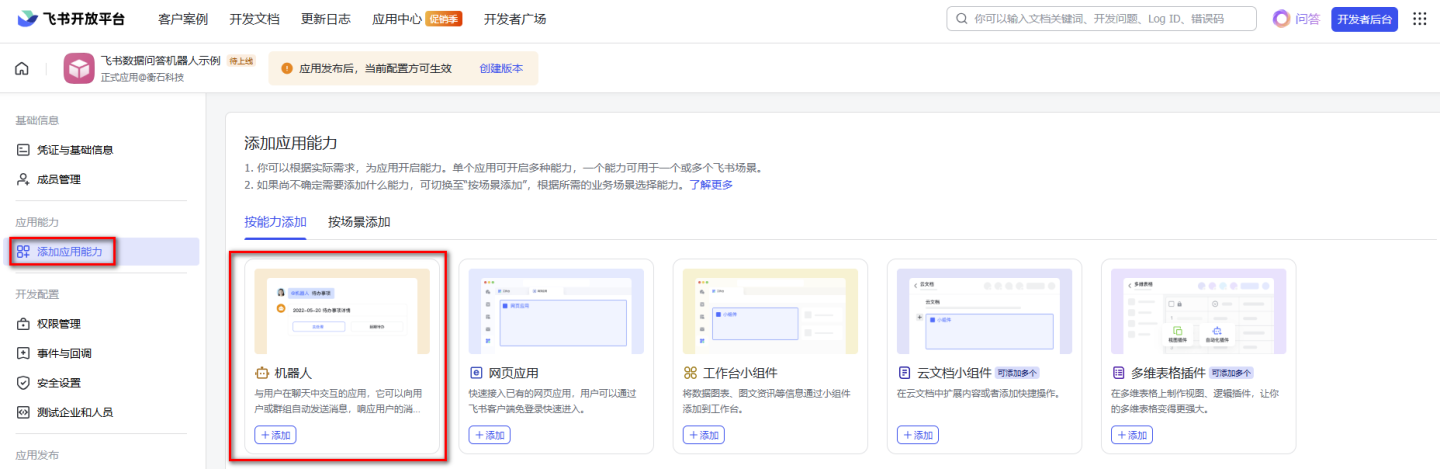
3. Add Feishu App Bot Capability
In the "Add App Capability" section of the newly created Feishu app settings page, add the "Bot" capability.
4. Add Feishu Permissions
On the newly created Feishu app settings page, under the "Permission Management" section, add the required permissions. The list of required permissions is shown in the table below.
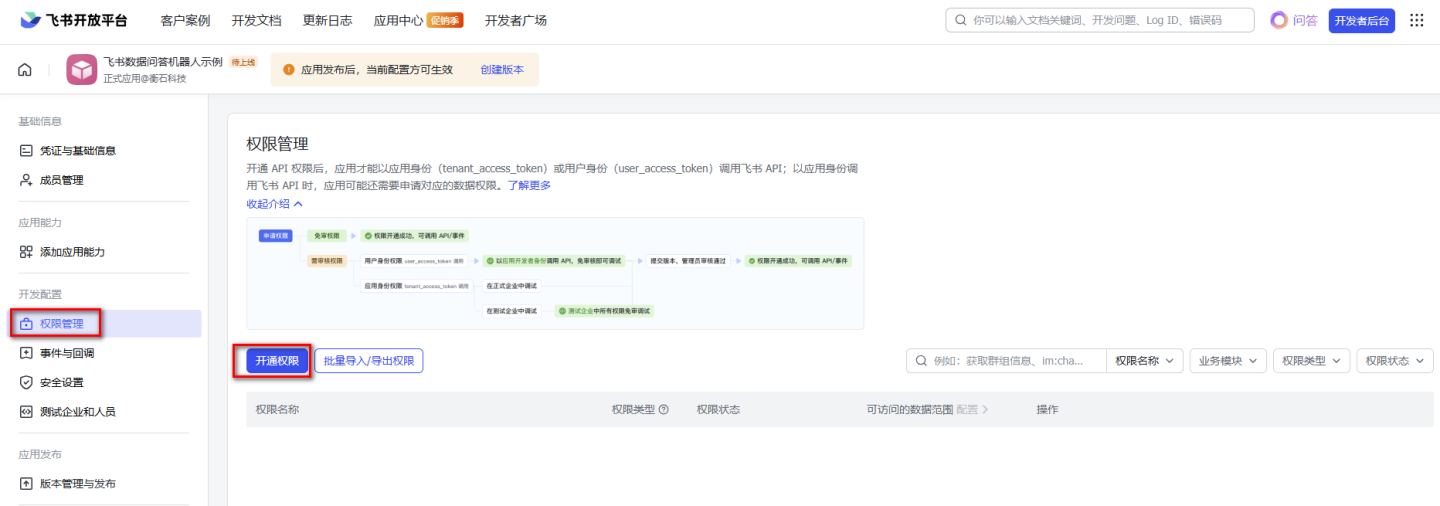
Permissions Required for Data Q&A Bot in Feishu:
| Permission Name | Code | Description |
|---|---|---|
| Get user ID | contact:user.employee_id:readonly | |
| Receive @bot messages in group chats | im:message.group_at_msg:readonly | |
| Read private messages sent to the bot | im:message.p2p_msg:readonly | |
| Send messages as the app | im:message:send_as_bot | |
| Access and upload image or file resources | im:resource |
You can quickly enable the required permissions by searching for the following codes in Feishu's permission configuration:
contact:user.employee_id:readonly,im:message.group_at_msg:readonly,im:message.p2p_msg:readonly,im:message:send_as_bot,im:resourceConfigure Robots in HENGSHI System
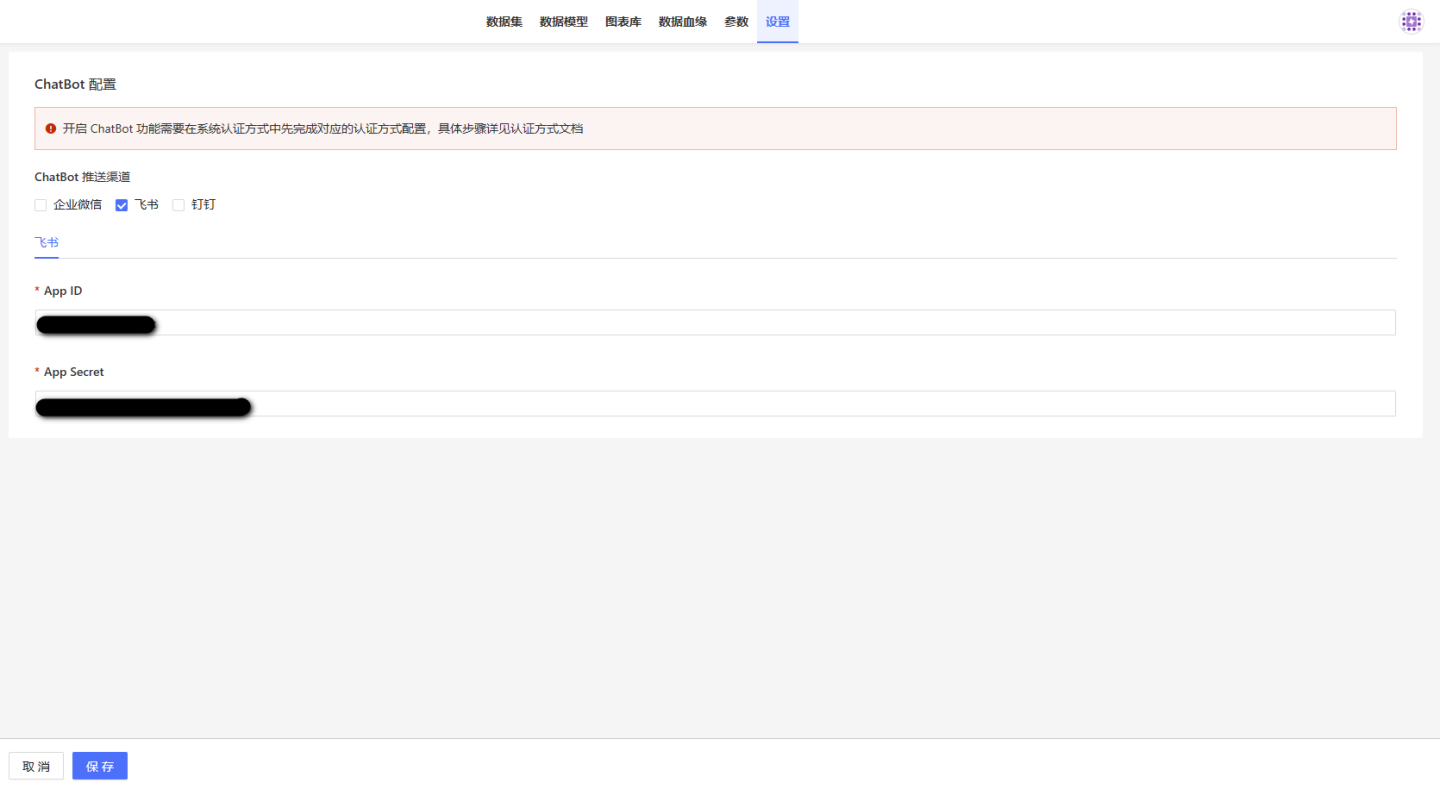
1. Configure Data Package and Bot Information
We have already obtained the App ID, App Secret, and other information above. These details need to be configured into the HENGSHI system and bound to the HENGSHI data package. In the data package settings page under bot settings, check Feishu, fill in the App ID and App Secret information into the corresponding fields, and save.

Once the data package is selected, all datasets under the package are bound, and the data required to answer user questions will be queried from these datasets. Note that the data package needs to be preprocessed according to the steps outlined in HENGSHI ChatBI regarding "Enhancing the Understanding Capability of Large Models," including "Data Vectorization," among others.
2. Configure Data Permissions
Users who log in to HENGSHI SENSE via Feishu are granted view-only permissions by default, and datasets are not readable by default. You can grant the "Viewer" permission for datasets to the ALL_USERS user group, which is a quicker method but offers a coarser level of control. Alternatively, you can set data permissions individually for each user who has logged in to HENGSHI SENSE via Feishu. Permissions can also be configured based on user attributes. For more information, please refer to the documentation related to HENGSHI SENSE data permissions.
Continue Setting Up Bot Applications in Feishu
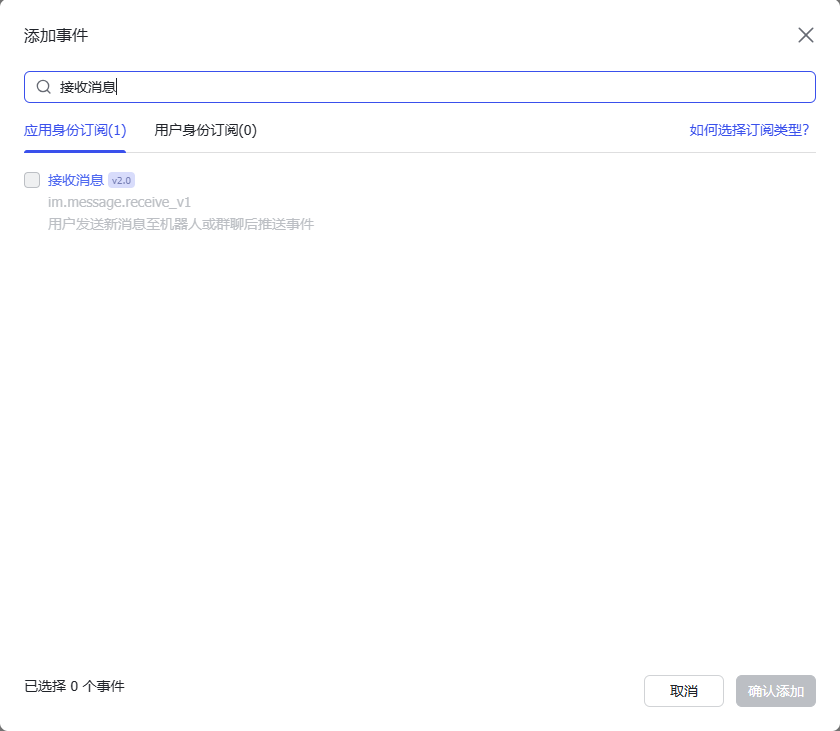
1. Configure Events and Callbacks
In the newly created Feishu app settings page, under the "Events and Callbacks" section on the "Event Configuration" tab, select the subscription method as "Use Long Connection to Receive Events" and save. Then click the "Add Event" button, search for and check the "Receive Message v2.0" (im.message.receive_v1) event to add it.

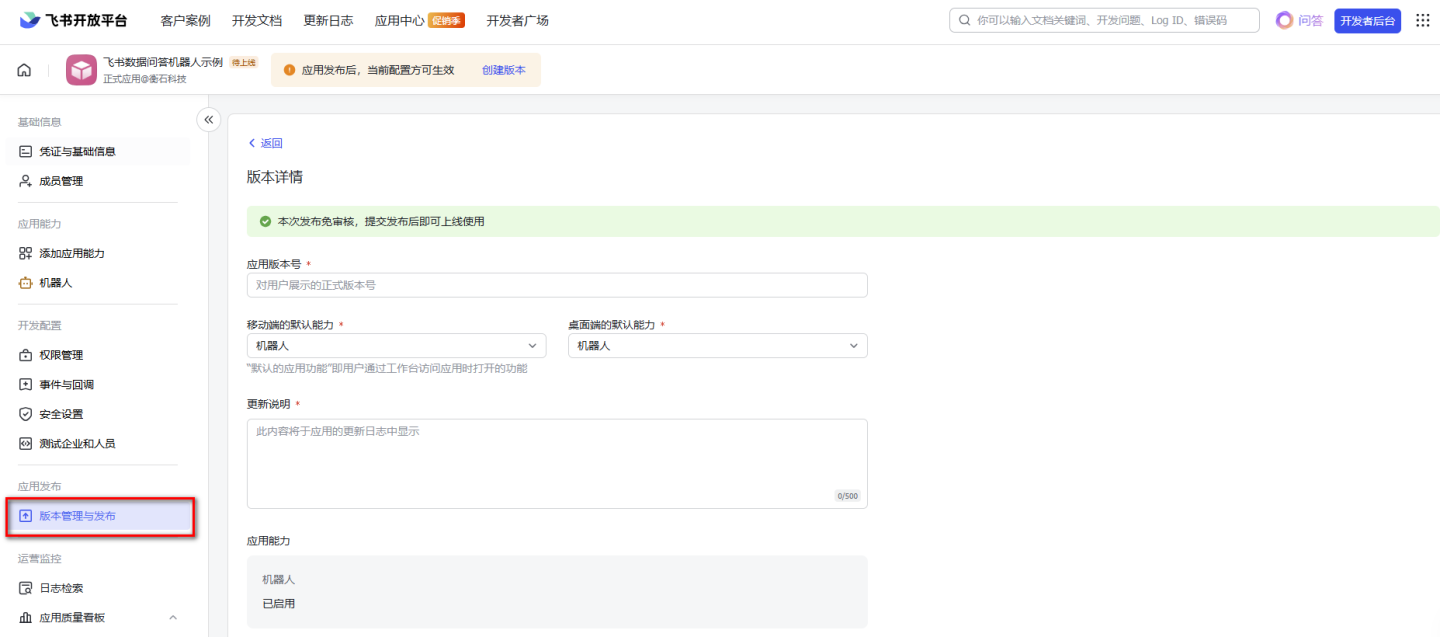
2. Create Version and Publish
Fill in the application version number, update notes, and select the available scope as required by Feishu. Apply for online publishing.
3. Application Review
Administrators in the Feishu enterprise can review and approve the application for use.
Chat with the Bot in Feishu Chat Window
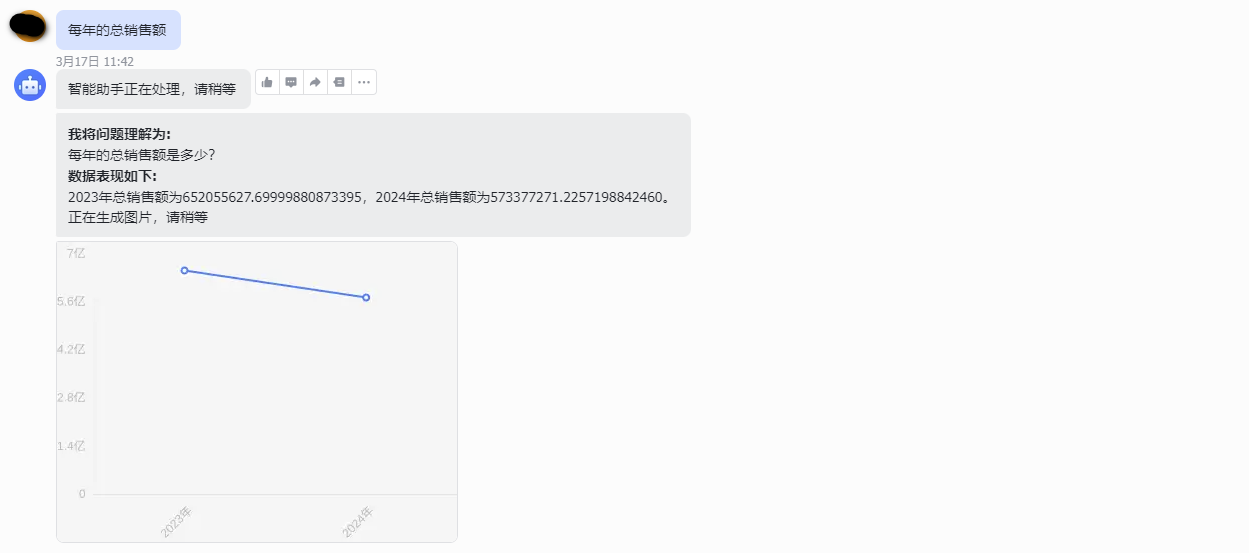
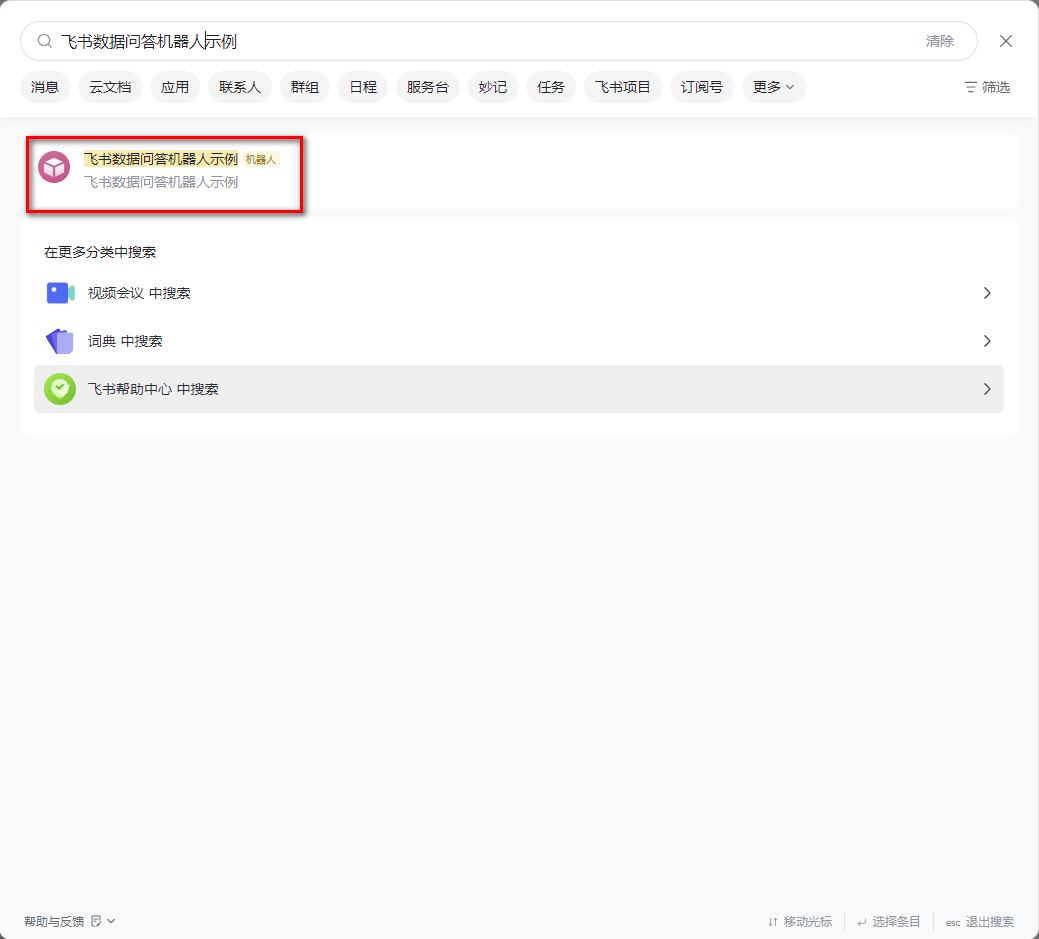
Search for the bot in Feishu using the name of the Feishu app you just created. Once found, click on the bot to start a conversation.
The conversation will look like this: