Product Overview
HENGSHI ChatBI is an intelligent data analysis tool integrated with AI technology, designed to provide business professionals with an intuitive and efficient data interaction experience. By leveraging natural language processing technology, users can directly converse with data to quickly obtain the information they need, thereby offering strong support for business decision-making. Additionally, HENGSHI ChatBI supports private deployment, ensuring the security and privacy of enterprise data.
Installation and Configuration
Prerequisites
Before starting to use HENGSHI ChatBI, please ensure the following steps are completed:
- Installation and Startup: Follow the Installation and Startup Guide to complete the installation of HENGSHI services.
- AI Assistant Deployment: Follow the AI Assistant Deployment Documentation to complete the installation and deployment of related services.
Configure Large Models
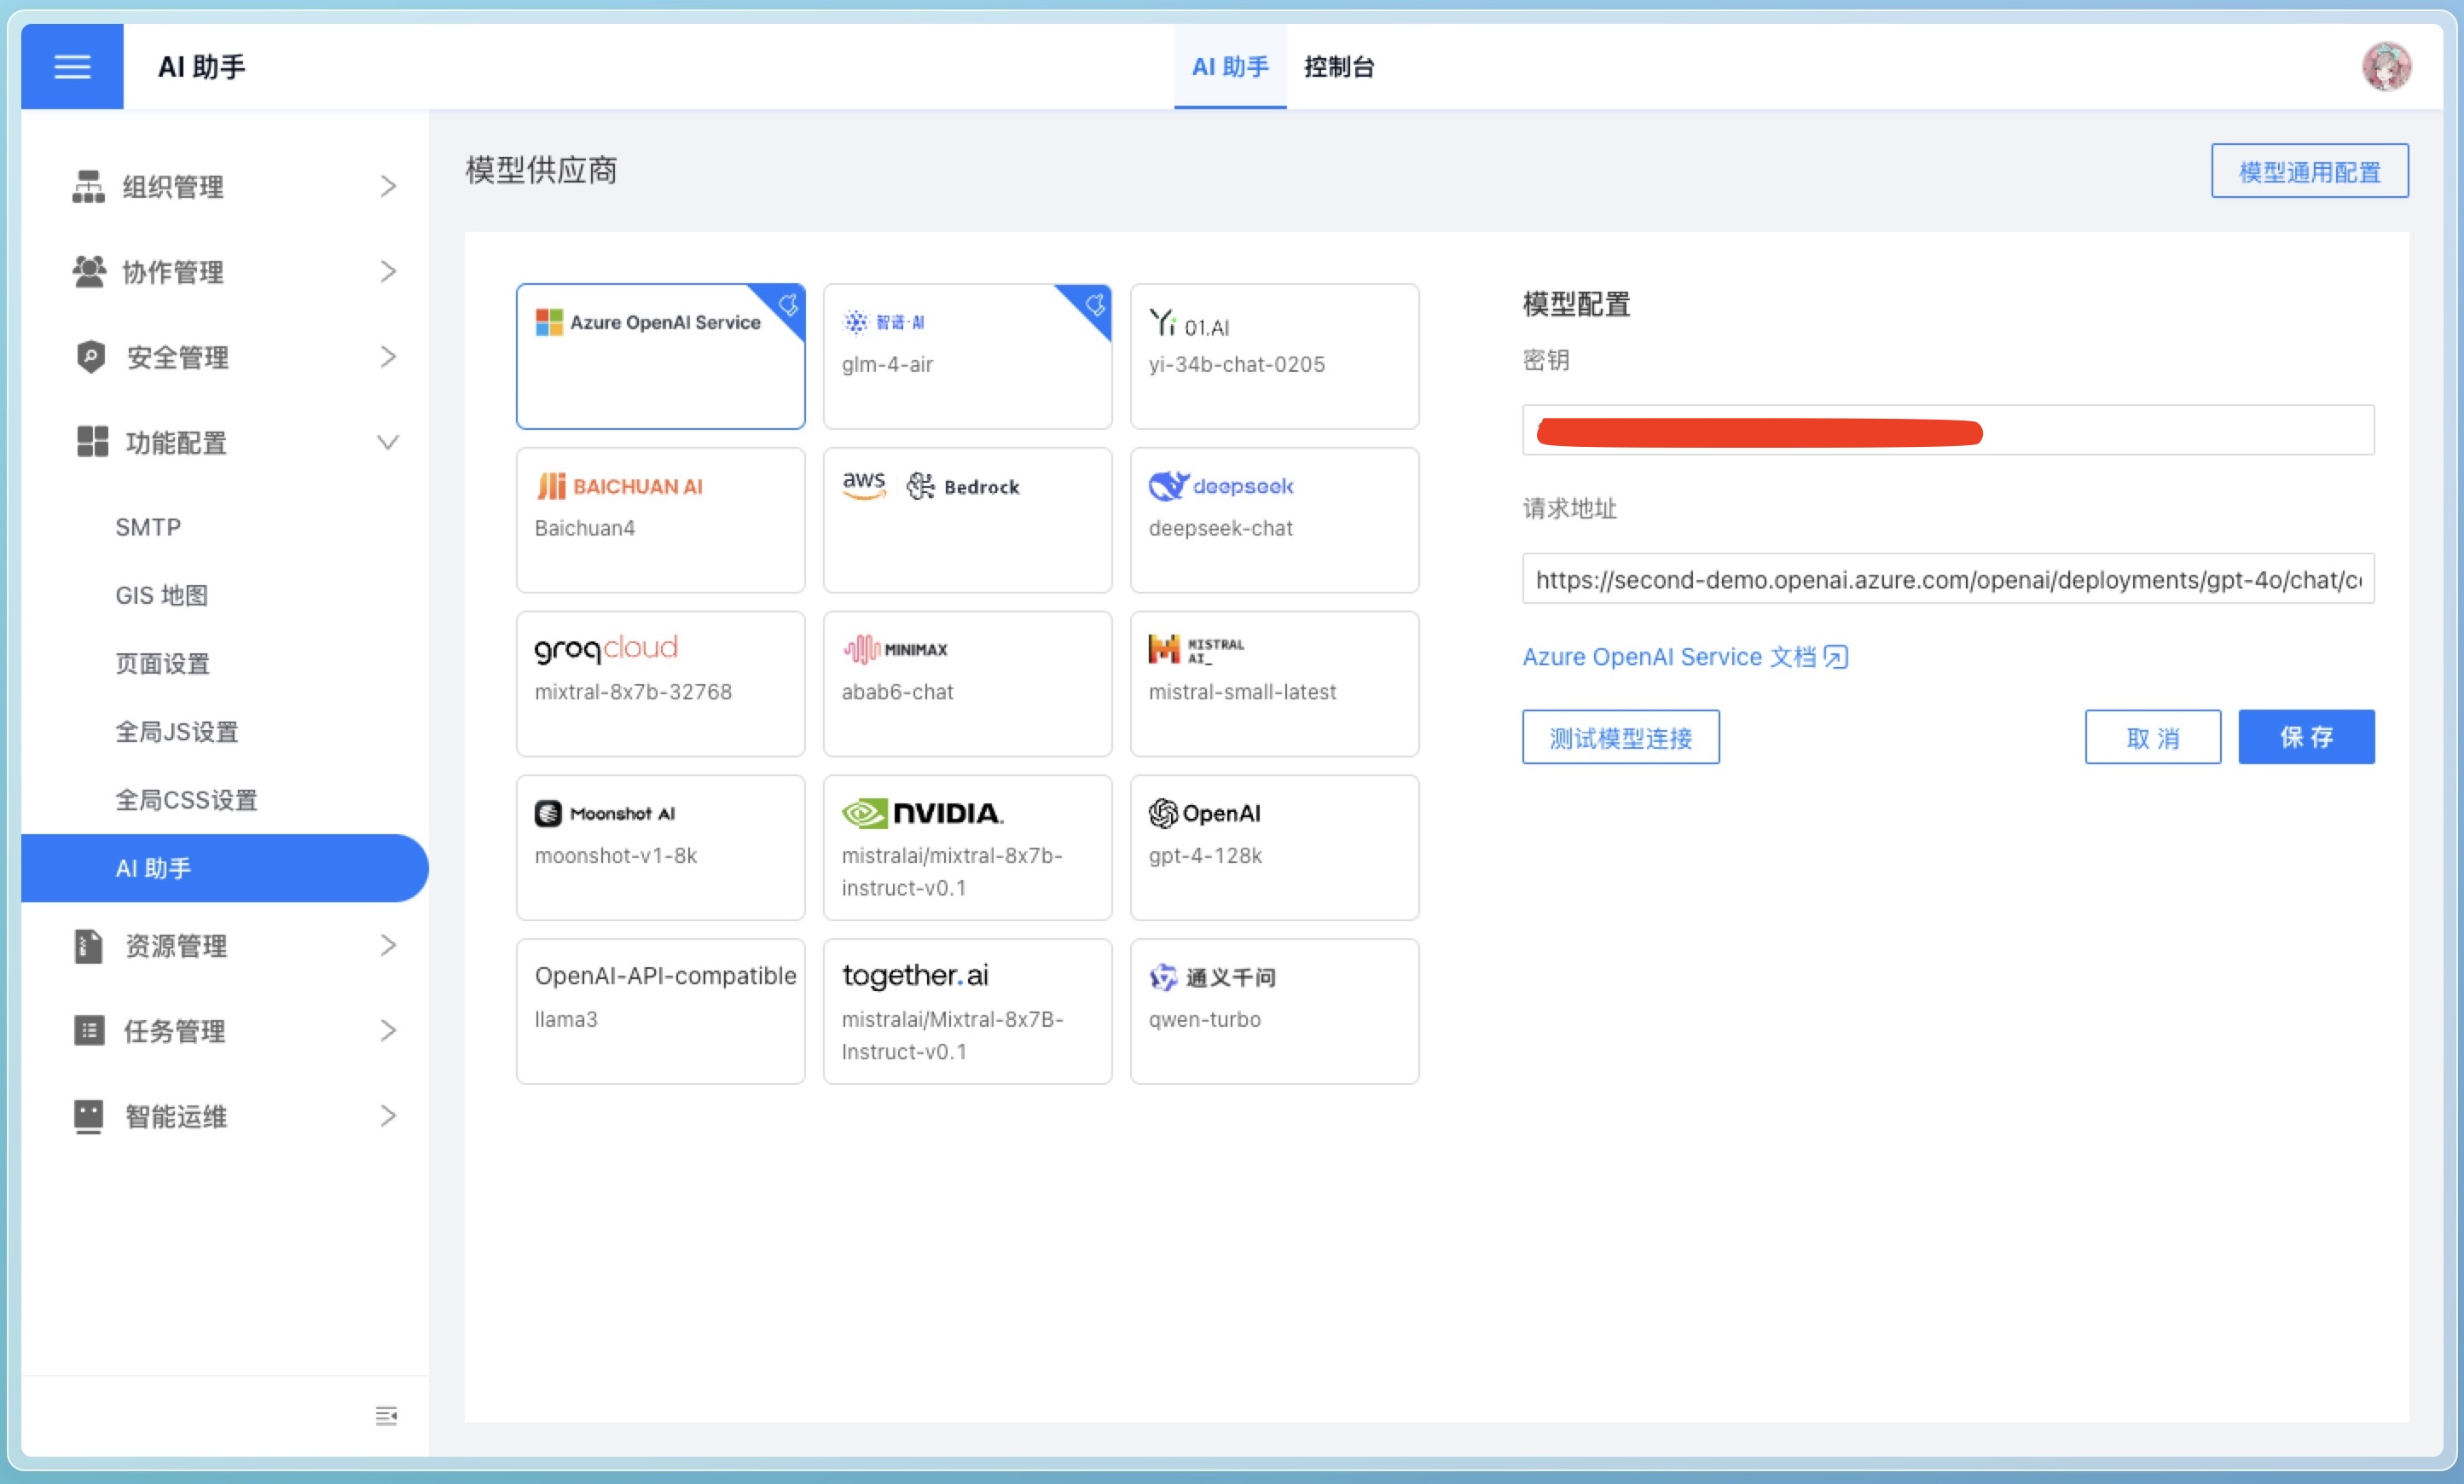
After the HENGSHI service starts, go to the "Feature Configuration" page in System Settings to configure the relevant information for the AI Copilot, including the address and key of the large model.
Not sure about the configuration options? Please refer to FAQ.
User Guide
Enhancing the Understanding Capability of Large Models
To ensure ChatBI accurately comprehends your business requirements, it is recommended to configure the following:
1. Enhance understanding of company business, industry terminology, and private domain knowledge
In the AI Assistant Console under system settings, use natural language to describe your business scenarios and terminology in the UserSystem Prompt. Ensure that the Enable Model Inference Intent in the model's general configuration is activated.
For example, if you need to prohibit answering certain types of questions, you can specify in the prompt: "Do not answer questions related to revenue."
2. Enhance Understanding of Data
- Dataset Naming: Ensure dataset names are concise and clearly reflect their purpose.
- Knowledge Management: Provide detailed descriptions of the dataset's purpose, implicit rules (e.g., filter conditions), synonyms, and business-specific terms corresponding to fields and metrics in Knowledge Management.
- Field Management: Ensure field names are concise and descriptive, avoiding special characters. Provide detailed explanations of field purposes in Field Description, such as "Default use for timeline." Additionally, field types should align with their intended use, e.g., fields requiring summation should be numeric, and date fields should be of date type.
- Metric Management: Ensure atomic metric names are concise and descriptive, avoiding special characters. Provide detailed explanations of metric purposes in Atomic Metric Description.
- Field Hiding: For fields not involved in Q&A, it is recommended to hide them to reduce the number of tokens sent to large models, improve response speed, and lower costs.
- Field and Metric Distinction: Ensure field names and metric names are not similar to avoid confusion. Fields not required for answering questions should be hidden, and unnecessary metrics should be deleted.
- Data Vectorization: Publishing an app will trigger the intelligent data vectorization task for the dataset. You can also manually trigger the "Intelligent Data Vectorization" task, which deduplicates field values and vectorizes them to improve filtering accuracy.
- Intelligent Learning: It is recommended to trigger the "Intelligent Learning" task to convert general examples into dataset-specific examples. After execution, manual review of learning results is required, along with adding, deleting, or modifying operations to enhance the assistant's capabilities.
3. Enhancing Understanding of Complex Calculations
For complex aggregate calculations, it is recommended to define them as Metrics to reduce the complexity of data retrieval in the model and avoid misunderstandings of private domain knowledge by large models.
For example, the calculation method for ROI in advertising companies differs from that in manufacturing industries, but large models cannot automatically recognize these differences. Therefore, it is recommended that you create a metric and provide a detailed description of its meaning to ensure that large models do not independently generate calculation formulas during data retrieval.
Usage Scenarios
1. Go to Analyze
Go to Analyze is an enhanced feature of HENGSHI SENSE Chart. The system integrates the Metrics Analysis Function with the published application, enabling the published chart to have secondary analysis capabilities.
Quick Start
- Log in to the system: Open your browser, visit the login page of HENGSHI ChatBI, and enter your account and password.
- Configure AI Assistant: Go to "System Settings" > AI Assistant Configuration, and input the address and key of the large model. (Requires system administrator role)
- Create an App: On the "App Creation" page, click Create New App to create a blank app.
- Create a Dataset: On the "Dataset" page, click Create New Dataset, upload your data, or connect to your data through Data Connection.
- Create a Dashboard: In the app, Create a Dashboard, add Charts, and select the dataset you just created as the data source.
- Publish the App: After completing chart creation, click Publish App to publish the app to the App Marketplace. Check the option to enable the
Go Analyzefeature during publishing. - Go Analyze: In the App Marketplace, click the published app, go to the app details page, and click the Go Analyze button at the top right of the chart to enter the secondary analysis feature page.
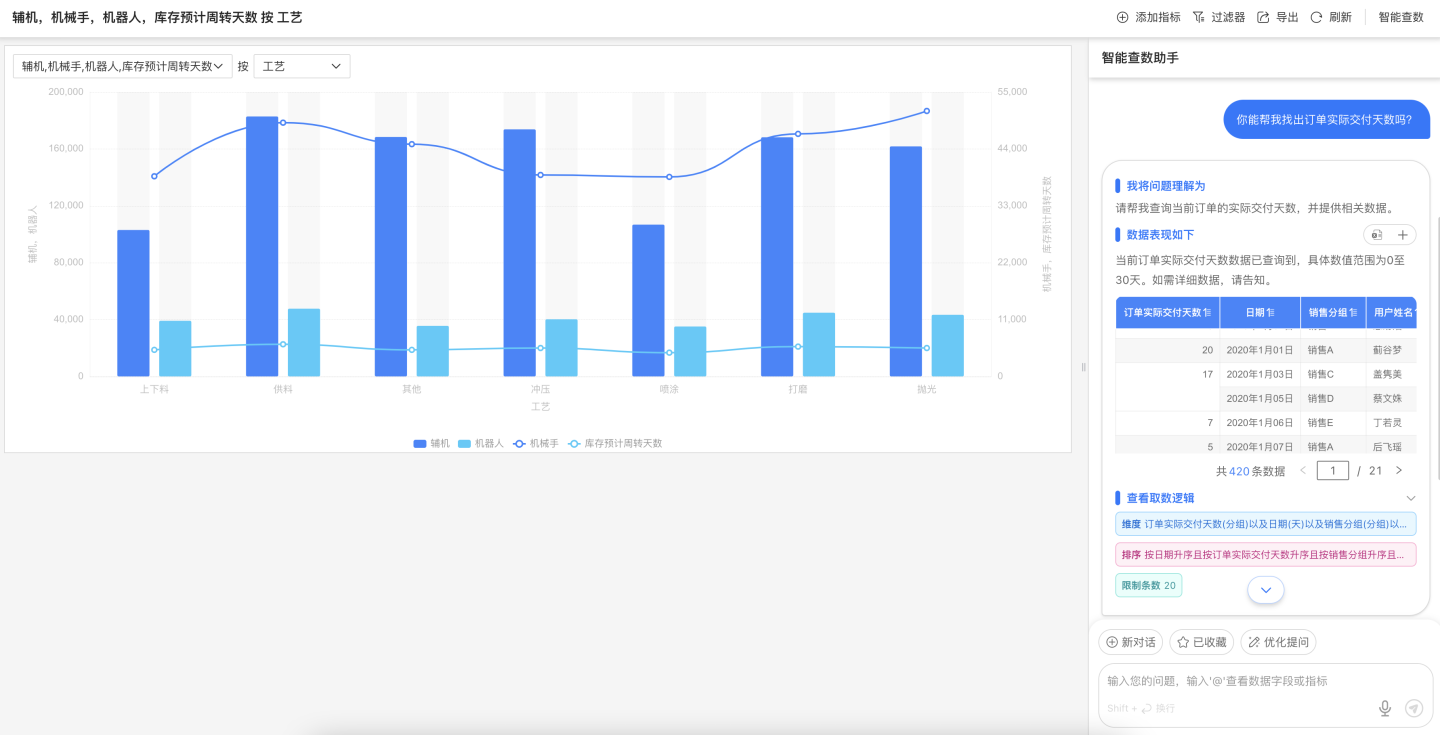
- Start a Conversation: In the ChatBI interface, input your question, such as "Show last month's sales."
- View Analysis Results: The system will generate charts or tables, allowing you to interact and perform further analysis directly on the interface.
2. Conversing in the Dashboard
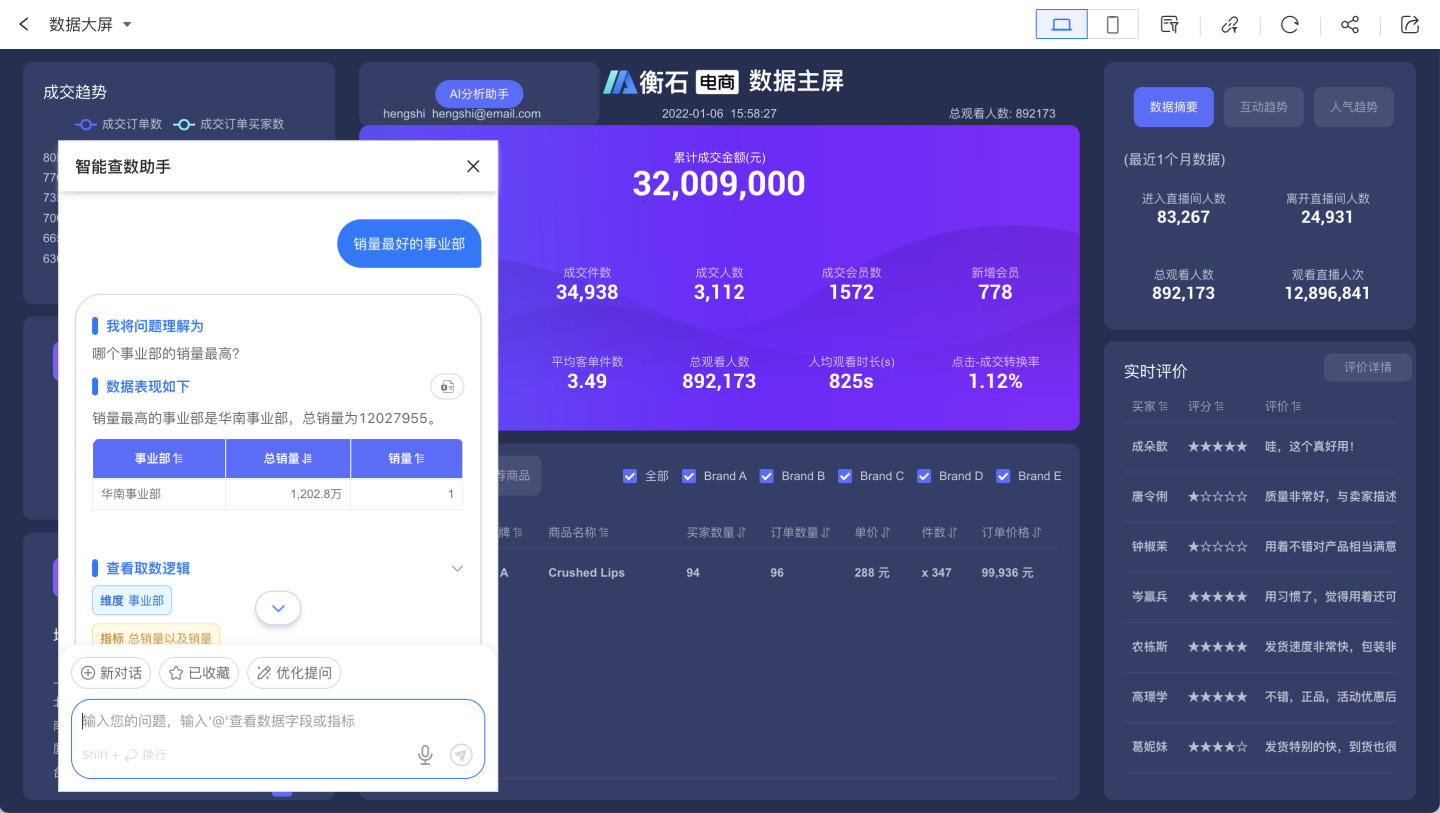
By utilizing the Global JS Functionality and dashboard Control Events, you can embed ChatBI within the dashboard, enabling users to directly interact with data, gain insights, and perform secondary analysis.
Quick Start
- Enable SDK: Log in to HENGSHI ChatBI, navigate to "System Settings" > Global JS Functionality, and refer to Integrating Copilot into Dashboards within the HENGSHI System to configure the code properly.
- Follow the same steps as Go Analyze in the quick start guide, which involves creating an app and a dashboard.
- Add a Button: Add a button to the dashboard and set the button's Control Events. Refer to Integrating Copilot into Dashboards within the HENGSHI System.
- Click the Button: Click the button on the dashboard to open the ChatBI window and perform conversational analysis.
3. Integrating ChatBI
HENGSHI SENSE offers multiple integration methods, allowing you to choose the most suitable option based on your needs:
IFRAME Integration
Use iframe to integrate ChatBI into existing systems, achieving seamless integration with the HENGSHI SENSE BI PaaS platform. The iframe is characterized by its simplicity and ease of use, directly utilizing the conversation components, styles, and functionalities of HENGSHI ChatBI without requiring additional development in your system.
SDK Integration
By integrating ChatBI into your existing system through the SDK, you can achieve more complex business logic and finer control, such as customizing the UI. The SDK offers a rich set of configuration options to meet personalized needs. Depending on your development team's tech stack, choose the appropriate SDK integration method. We provide two JS SDKs: Native JS SDK and React JS SDK.
How to choose which SDK to use?
The difference between native JS and React JS lies in their dependencies. Native JS is pure JavaScript and does not rely on any framework, whereas React JS is JavaScript based on the React framework and requires React to be installed first.
The native JS SDK provides UI and functionality similar to iframe integration, directly utilizing HENGSHI ChatBI's conversation components, styles, and features. However, through JavaScript control, SDK initialization parameters, and other configurations, it allows for custom API requests, request interception, and more.
The React JS SDK, on the other hand, only provides the Completion UI component and the useProvider hook, making it suitable for use within your own React projects.
API Integration
Integrate ChatBI capabilities into your Feishu, DingTalk, WeCom, or Dify workflow through the Backend API to achieve customized business logic.
Enterprise Instant Messaging Tool Data Q&A Bot
You can create an intelligent data Q&A bot through the Enterprise Instant Messaging Tool Data Q&A Bot, linking relevant data in HENGSHI ChatBI to enable intelligent data Q&A within instant messaging tools. Currently supported enterprise instant messaging tools include WeCom, Feishu, and DingTalk.
Frequently Asked Questions
How to Troubleshoot Model Connection Failure?
There are various reasons for connection failure. It is recommended to troubleshoot by following these steps:
Check Request Address
Ensure the model address is correct, as different vendors provide different model addresses. Please refer to the documentation provided by the vendor you purchased from.
We can provide preliminary troubleshooting guidance:
- Model addresses from various vendors typically end with
<host>/chat/completions, rather than just the domain name, such ashttps://api.openai.com/v1/chat/completions. - If your model vendor is Azure OpenAI, the model address structure is
https://<your-tenant>.openai.azure.com/openai/deployments/<your-model>/chat/completions. Here,<your-tenant>is your tenant name, and<your-model>is your model name, which you need to check by logging into the Azure OpenAI platform. For more detailed steps, please refer to Connect to Azure OpenAI. - If your model vendor is Tongyi Qianwen, there are two types of model addresses: one compatible with OpenAI format,
https://dashscope.aliyuncs.com/compatible-mode/v1/chat/completions, and another unique to Tongyi Qianwen,https://dashscope.aliyuncs.com/api/v1/services/aigc/text-generation/generation. When using the OpenAI-compatible format (indicated bycompatible-modein the URL), please selectOpenAIorOpenAI-API-compatibleas the provider in the HENGSHI Intelligent Query Assistant model configuration. - If your model is privately deployed, ensure the model address is correct, the model service is running, and the model provides an HTTP service with an interface format compatible with the OpenAI API.
Check the Key
- Large model interfaces provided by various model vendors usually require a key for access. Please ensure that the key you provide is correct and has permission to access the model.
- If your company uses a self-deployed model, a key may not be required. Please confirm with your company's developers or engineering team.
Check Model Name
- Most model providers generally offer multiple models. Please select the appropriate model based on your needs and ensure that the model name you provide is correct and that you have access to the model.
- If your company uses a self-deployed model, the model name may not be required. Please confirm with your company's developers or engineering team.
How to troubleshoot errors when querying data?
- Is the vector database installed? If not, please follow the AI Assistant Deployment Documentation to complete the installation and deployment of related services.
- Can the model connect? Follow the troubleshooting steps from the previous question to check whether the model can connect.
How to Fill in the Vector Database Address?
Follow the AI Assistant Deployment Documentation to complete the installation and deployment of related services. Manual input is not required.
Does it support other vector models?
Currently, it is not supported. If needed, please contact the after-sales engineer.